
When it comes to show-stopping desserts that require minimal effort, nothing beats the classic Oreo Dirt Cake. Moreover, this no-bake dessert combines the irresistible flavor of crushed Oreos with a rich, creamy vanilla pudding base that will have your guests asking for seconds. Furthermore, after nearly 20 years of perfecting this recipe, I can confidently say this is the ultimate version that delivers both in taste and presentation.
Not only is this dirt cake recipe incredibly delicious, but it’s also remarkably versatile. Additionally, it serves as the perfect kid-friendly dessert that can be prepared well in advance, making it ideal for potlucks, barbecues, birthday parties, and family gatherings. Consequently, you’ll find yourself returning to this recipe time and time again whenever you need a guaranteed crowd-pleaser.
Table of Content
What Makes This Recipe « The Best » – Secrets and Success Stories
The Power of Experience and Refinement

Throughout my years of recipe development, I’ve discovered that even the simplest desserts benefit from careful attention to detail. Similarly, this Oreo dirt pudding recipe has evolved through countless iterations and feedback from family and friends. As a result, every component has been optimized to create the perfect balance of flavors and textures.
The Secret Ingredient That Changes Everything
While many dirt cake recipes use standard vanilla pudding, the real game-changer is French vanilla instant pudding by Jello. Specifically, this particular brand and flavor combination creates a depth of flavor that’s simply unmatched. In fact, my husband Ritch once told me he could immediately taste the difference when I tried using a generic brand. Therefore, I always recommend sticking with the name brand for the best results.
Texture Perfection Through Strategic Preparation
Rather than pulverizing all the Oreos into fine powder, this recipe incorporates chunky Oreo pieces alongside the traditional « dirt » texture. Consequently, you get delightful surprises of soft, chewy Oreo bites throughout each serving. Furthermore, these larger pieces add visual interest and prevent the dessert from becoming monotonous.
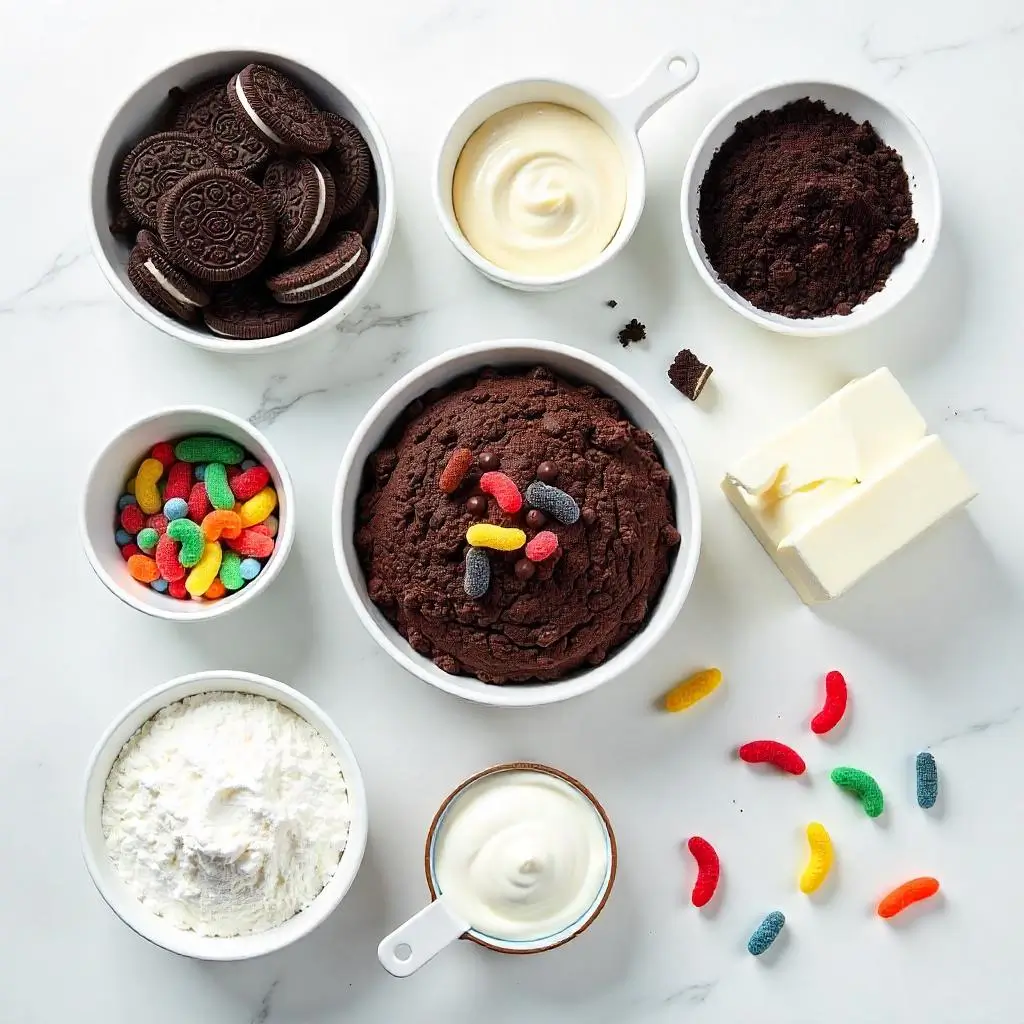
Essential Ingredients and Smart Substitutions
Choosing the Right Milk
For optimal richness and creaminess, I recommend using 2% or whole milk rather than skim varieties. Additionally, the higher fat content helps create a more luxurious mouthfeel that complements the other ingredients perfectly.
The Pudding Foundation
As mentioned earlier, French vanilla instant pudding serves as the secret weapon in this recipe. However, if you can’t find this specific variety, regular vanilla or even chocolate pudding can work as alternatives. Furthermore, homemade pudding enthusiasts can certainly substitute their favorite from-scratch version.
Oreo Selection and Preparation
While Double Stuffed Oreos are my personal preference due to their extra cream filling, any Oreo variety will work wonderfully. Moreover, those following gluten-free diets can substitute with gluten-free chocolate sandwich cookies or even JoJos. Additionally, feel free to experiment with different Oreo flavors like Birthday Cake or Mint for unique variations.
Supporting Cast of Ingredients
The recipe also calls for butter (either salted or unsalted works fine), which should be brought to room temperature for easy mixing. Similarly, any variety of Cool Whip will suffice, though the extra creamy version provides the best texture. Alternatively, homemade whipped cream can be substituted for those preferring a from-scratch approach.
Finally, powdered sugar and cream cheese round out the ingredient list, while gummy worms serve as an optional but fun garnish that kids absolutely love.
Step-by-Step Preparation Guide
Preparing Your Oreos
First and foremost, you’ll need to divide your Oreos into two groups. Subsequently, chop 8 Oreos into ¼ » to ½ » pieces to create those delightful textural elements we discussed earlier. Meanwhile, crush the remaining Oreos into fine powder using either a food processor or the old-fashioned rolling pin method.
Creating the Pudding Layer
Next, combine the French vanilla pudding mix with milk according to package directions, then refrigerate until set. Simultaneously, cream together the softened butter and room-temperature cream cheese until smooth and fluffy. Gradually, incorporate the powdered sugar until well combined.
Once the pudding has properly set, gently fold it into the butter mixture until completely smooth. Finally, carefully fold in the Cool Whip using a spatula to maintain the light, airy texture.
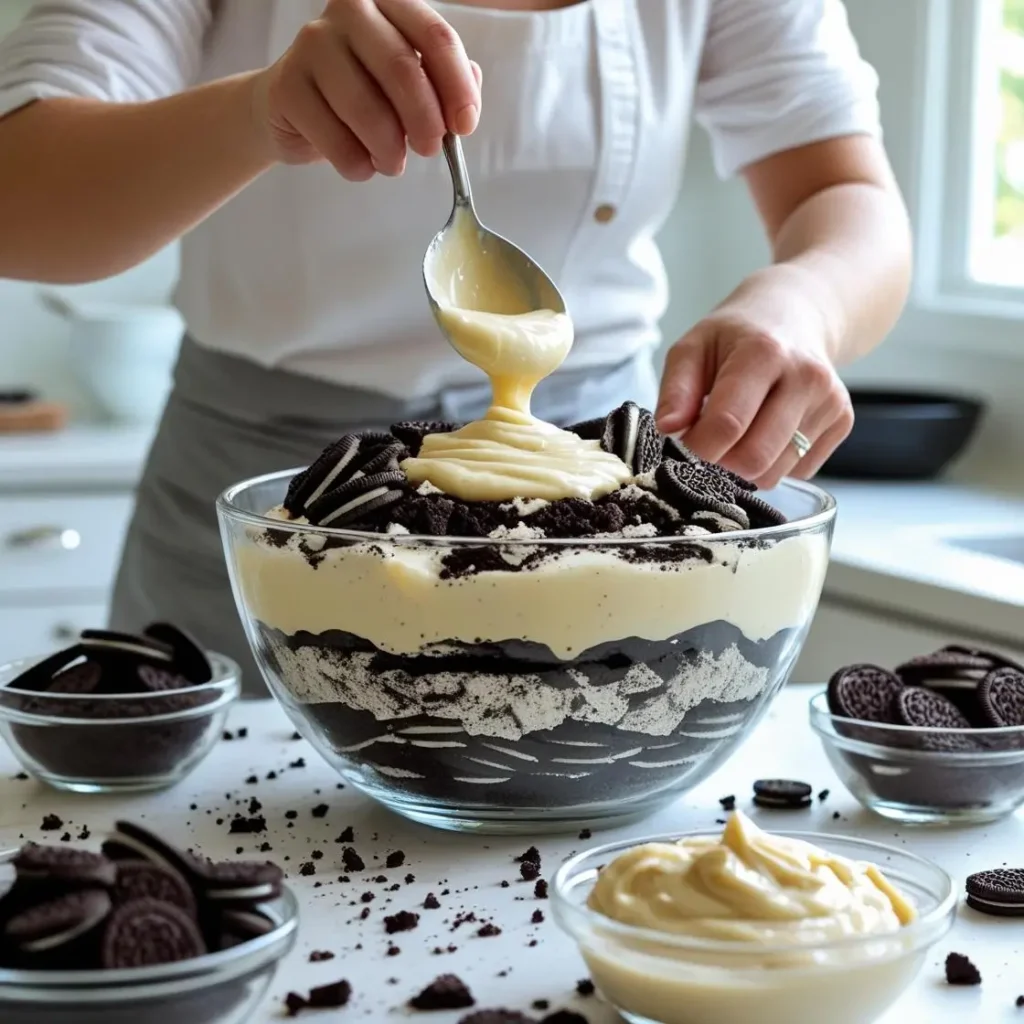
Assembly Process
Now comes the fun part – layering your dirt cake! Begin by spreading a layer of the pudding mixture in your chosen serving dish. Subsequently, sprinkle a layer of crushed Oreos, followed by some of the chunky Oreo pieces. Continue alternating these layers until all ingredients are used, ensuring you finish with a layer of crushed Oreos on top.
Optional Gummy Worm Addition
If you’re including gummy worms, now’s the time to strategically place them throughout the layers or simply on top. Particularly for children’s parties, this whimsical touch transforms an already impressive dessert into something truly magical.
The Crucial Overnight Chill
Most importantly, cover your assembled dirt cake and refrigerate overnight. This extended chilling period allows all the flavors to meld together while the Oreos reach the perfect consistency – not too soft, not too crunchy.
Serving Suggestions and Storage Tips
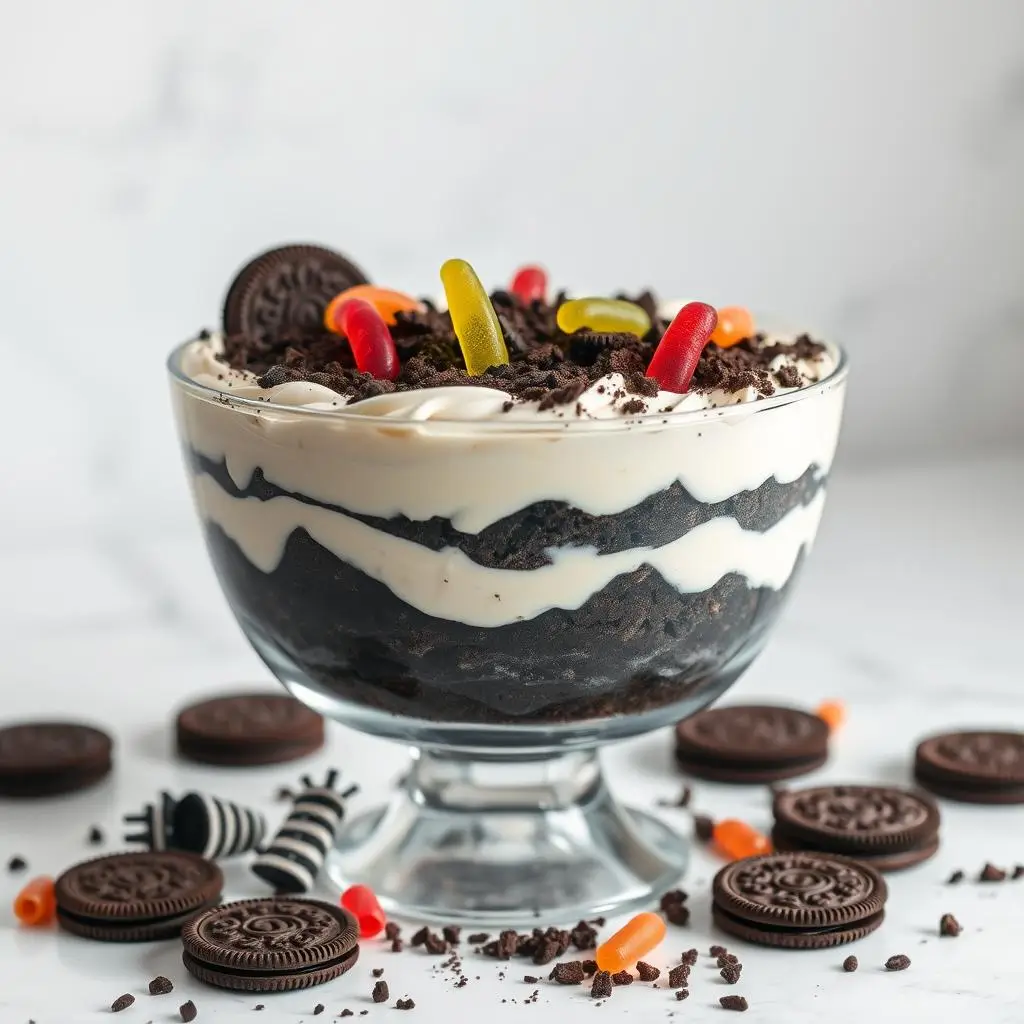
Presentation Options
Depending on your occasion, several presentation styles work beautifully with this recipe. For elegant gatherings, consider using a clear glass trifle dish to showcase the gorgeous layers. Alternatively, for casual events or children’s parties, serve in clean decorative buckets with small garden shovels for a playful touch.
Furthermore, individual dirt cake cups provide excellent portion control and easy serving at large gatherings. Similarly, a standard 9×13″ baking dish works perfectly for family-style serving.
Storage Guidelines
When properly stored in the refrigerator, this dirt cake maintains its quality for 3-5 days. Additionally, it freezes exceptionally well for up to one month when stored in airtight containers. However, be sure to thaw it slowly in the refrigerator to maintain the best texture.

Frequently Asked Questions
Why Is It Called « Dirt Cake »?
Simply put, the crushed Oreo cookies create a remarkably realistic « dirt » appearance that’s both amusing and appetizing. Additionally, the contrast between the dark cookie crumbs and creamy pudding layers enhances this visual effect.
Can This Recipe Be Made Ahead?
Absolutely! In fact, this dessert actually improves with time, making it perfect for advance preparation. Consequently, you can prepare it up to two days before serving without any loss in quality.
Are There Variations to Try?
Certainly! While this classic version remains my favorite, you can experiment with different cookie types, pudding flavors, or even add layers of fresh fruit. Moreover, some people enjoy incorporating crushed nuts or coconut for additional texture and flavor.
Nutrition Information
Nutritional Facts per Serving (based on 12 servings)
- Calories: 485
- Total Fat: 24g
- Saturated Fat: 15g
- Trans Fat: 0g
- Cholesterol: 45mg
- Sodium: 420mg
- Total Carbohydrates: 62g
- Dietary Fiber: 2g
- Total Sugars: 48g
- Added Sugars: 40g
- Protein: 6g
Other Cake Recipes
- Blackberry Cheesecake
- Texas Sheet Cake
- Fresh Apple Cake
- Pumpkin Dump Cake
- Triple Chocolate Cake
- Lemon Blueberry Layer Cake

This Oreo Dirt Cake recipe represents the perfect combination of simplicity and sophistication. Not only does it satisfy both children and adults alike, but it also provides that impressive wow factor that makes any gathering memorable. Furthermore, the make-ahead convenience means you can focus on other aspects of your event while still serving an absolutely delicious dessert.
Whether you’re planning a backyard barbecue, birthday celebration, or potluck contribution, this recipe consistently delivers outstanding results. Therefore, I encourage you to try this perfected version and experience firsthand why it’s earned the title of « The Best Oreo Dirt Cake Recipe. »
Have you tried this recipe? I’d love to hear about your experience and any creative variations you’ve discovered. Additionally, if you enjoyed this dirt cake, you might also love our No-Bake Oreo Cheesecake or individual Dirt Cups recipes!
The Best Oreo Dirt Cake Recipe – A No-Bake Crowd Pleaser
Description
« Make the best Oreo Dirt Cake recipe! This easy no-bake dessert with French vanilla pudding and crushed Oreos is perfect for parties and potlucks. »
Ingredients
For the Pudding Mixture:
For the « Dirt » Layers:
Instructions
- Set aside 8 Oreo cookies and chop them into 1/4 to 1/2 inch chunks. Set aside.
- Using a food processor, crush the remaining Oreos into fine crumbs resembling dirt. Alternatively, place cookies in a sealed plastic bag and crush with a rolling pin.
- Reserve about 1/4 cup of the finest crumbs for final topping.
- In a medium bowl, whisk together cold milk and French vanilla pudding mix for 2 minutes.
- Refrigerate for 5 minutes to allow pudding to set and thicken.
- In a large mixing bowl, use an electric mixer to cream together softened butter and cream cheese until light and fluffy (about 3-4 minutes).
- Gradually add powdered sugar and mix until smooth and well combined.
- Add the thickened pudding mixture and beat until fully incorporated and smooth.
- Using a rubber spatula, gently fold in the Cool Whip until mixture is light and evenly combined. Do not overmix.
- Spread 1/3 of the creamy pudding mixture in the bottom of your chosen serving dish.
- Sprinkle with 1/3 of the crushed Oreo « dirt » and a handful of chunky Oreo pieces.
- Repeat layers twice more, ending with a final layer of crushed Oreos on top.
- If using gummy worms, insert them partially into the top layer for a fun presentation.
- Cover tightly with plastic wrap or lid.
- Refrigerate overnight (minimum 8 hours) to allow flavors to meld and achieve optimal texture.
- Serve chilled using a large spoon or fun garden shovel if serving from a bucket.
Step 1: Prepare the Oreos
Step 2: Make the Pudding Base
Step 3: Create the Creamy Layer
Step 4: Assembly
Step 5: Chill and Serve
Notes
- Pudding Brand Matters: Jello French Vanilla provides the best flavor. Regular vanilla or chocolate can substitute if needed.
Texture Tip: Don’t pulverize all Oreos to powder – the chunky pieces add delightful texture contrast.
Make-Ahead Friendly: Actually improves after overnight chilling. Can be made 2 days in advance.
Serving Variations: Use clear glass trifle bowl to show layers, individual cups for parties, or clean garden bucket with shovel for fun presentation.
Storage: Keeps 3-5 days refrigerated, or freeze up to 1 month in airtight container.