
Introduction
Sous vide cooking has taken the culinary world by storm, revolutionizing the way we prepare meals. This method, which involves cooking food in a vacuum-sealed bag submerged in a precisely heated water bath, ensures consistent results every time. Whether you’re cooking steak, chicken, fish, or vegetables, sous vide allows you to achieve the perfect texture, tenderness, and flavor with ease.
One of the key reasons why sous vide is considered a game-changer is its level of precision. With an immersion circulator, you can control the exact temperature, ensuring that your food is cooked to perfection without any guesswork. This means you can achieve a juicy, tender steak, a perfectly cooked chicken breast, or delicately tender vegetables—all with minimal effort.
The benefits of using a sous vide machine are immense. Not only does it enhance the flavor by infusing seasonings and marinades deeply into the food, but it also frees up your time. Once your meal is set up in the water bath, you can go about your day and let the sous vide machine do the work. Whether you’re a beginner or an experienced cook, this method opens up a world of culinary possibilities.
1) What Is Sous Vide Cooking?
Fore more information: https://anovaculinary.com/fr-tw/pages/what-is-sous-vide?srsltid=AfmBOopaFgnET0hChp3-awbjKPe4bgMupNmVkhunvUycsy6erVh7Kg9-
What Is Sous Vide Cooking?
Definition and Basics of Sous Vide
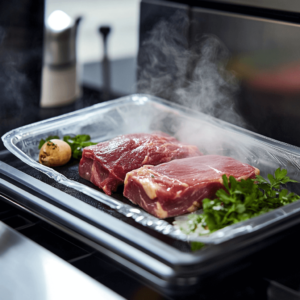
Sous vide, which means « under vacuum » in French, is a cooking method that involves sealing food in an airtight plastic bag and cooking it in a water bath at a precise, consistent temperature. Unlike traditional cooking methods that rely on high heat, sous vide uses low, controlled heat over an extended period of time to achieve perfectly cooked food. This method locks in flavors, moisture, and nutrients, resulting in tender, juicy, and flavorful dishes every time. Whether you’re preparing meats, vegetables, or even desserts, sous vide ensures that your food is cooked evenly and to your desired level of doneness.
How Does Sous Vide Work?
Sous vide works by using an immersion circulator, a device that heats water to a precise temperature and circulates it to maintain that temperature consistently. When food is placed in a vacuum-sealed bag and submerged in the water bath, it cooks slowly at the exact temperature set by the immersion circulator. For example, when cooking steak sous vide, the water bath is set to the desired internal temperature (e.g., 130°F for medium-rare), and the steak is cooked evenly throughout without the risk of overcooking or drying out.
Because the water bath is maintained at such a precise temperature, the food cannot exceed that temperature, which is why sous vide cooking is often considered foolproof. The process allows for perfect results every time, whether you’re cooking tender chicken breasts, delicate fish, or perfectly caramelized vegetables.
Popular Sous Vide Machines
For beginners, choosing the right sous vide machine can be overwhelming, but there are several popular models that make the process easy and accessible:
- Anova Culinary: One of the most popular and highly recommended immersion circulators, Anova’s sous vide machines are known for their reliability, ease of use, and affordable price. With a user-friendly app, Anova allows you to control the cooking process directly from your phone, making it a great option for beginners.
- Joule by ChefSteps: Known for its compact size and powerful heating capabilities, Joule is a favorite among food enthusiasts. Its sleek design and app integration make it a top choice for precision cooking. The app offers step-by-step guides for a variety of recipes, making it an excellent choice for both beginners and seasoned sous vide cooks.
- Instant Pot: While primarily known for its multi-functional pressure cookers, Instant Pot also offers a sous vide model. Its versatility and affordable price make it a great option for those who want a multi-purpose kitchen tool. Instant Pot’s sous vide feature is easy to use and perfect for home cooks who want to experiment with different cooking methods.
These popular sous vide machines make it easier than ever for home chefs to dive into the world of precision cooking. No matter which machine you choose, all of them provide the control and consistency necessary for achieving perfect results.
2) Why Sous Vide Is the Best Way to Cook Meat
Sous Vide for Steak and Other Meats: How Sous Vide Gives Precise Control Over Meat Temperature for a Perfect Steak
One of the most popular and rewarding uses of sous vide is cooking steak to perfection. Unlike traditional methods like grilling or pan-searing, where the outside of the steak cooks much faster than the inside, sous vide allows for uniform cooking throughout the entire cut of meat. This results in a steak that’s cooked precisely to your desired level of doneness, from edge to edge.
Precise Control Over Temperature The key to sous vide’s success in cooking steak lies in its ability to maintain a precise and consistent temperature. When you cook steak using traditional methods, it’s easy to overcook the outside while trying to achieve your perfect level of doneness on the inside. With sous vide, however, you can set your immersion circulator to the exact temperature you want your steak to reach.
For example, if you want a medium-rare steak, you would set the sous vide water bath to 130°F (54°C). The steak will cook evenly from edge to edge at that temperature, ensuring that the entire piece of meat is tender, juicy, and perfectly cooked. This precision allows you to avoid the common pitfalls of traditional cooking methods, such as overcooked edges or undercooked centers.
Benefits of Sous Vide for Meat
- Even Cooking: Because the steak cooks at a consistent temperature, you’re guaranteed even cooking throughout. No more worrying about having a well-done outer crust with a rare center! Whether you’re cooking a thin filet or a thick ribeye, the sous vide method ensures that every bite is just right.
- Juicy and Tender Texture: The slow cooking process used in sous vide helps break down the connective tissues in tougher cuts of meat, like flank steak or brisket, while keeping the meat moist. This results in a steak that’s not only evenly cooked but also incredibly tender and juicy.
- Enhanced Flavor: Sous vide allows you to infuse your steak with flavor by marinating it in the vacuum-seal bag before cooking. Whether you’re using garlic, herbs, or your favorite spices, the vacuum-sealed environment helps lock in those flavors, resulting in a steak that’s bursting with taste.
- No Risk of Overcooking: One of the most challenging aspects of cooking steak traditionally is avoiding overcooking. With sous vide, you don’t have to worry about this because the steak will never exceed the temperature you’ve set. Once the steak reaches the desired temperature, it’s essentially done, and you can leave it in the water bath until you’re ready to sear or serve.
How to Sous Vide Steak Here’s a simple outline of how to sous vide your steak for perfect results every time:
- Preheat your sous vide water bath to the desired temperature. For a medium-rare steak, set your circulator to 130°F (54°C).
- Season the steak with salt, pepper, and any other herbs or spices you prefer. For extra flavor, you can also add butter or garlic to the vacuum-seal bag.
- Vacuum seal the steak. If you don’t have a vacuum sealer, you can use the water displacement method with a Ziploc bag. Make sure the bag is tightly sealed to prevent water from entering.
- Submerge the steak in the water bath and cook for the desired time. Generally, 1 to 2 hours is sufficient for steaks that are 1 to 2 inches thick, but thicker cuts may need more time (up to 4 hours).
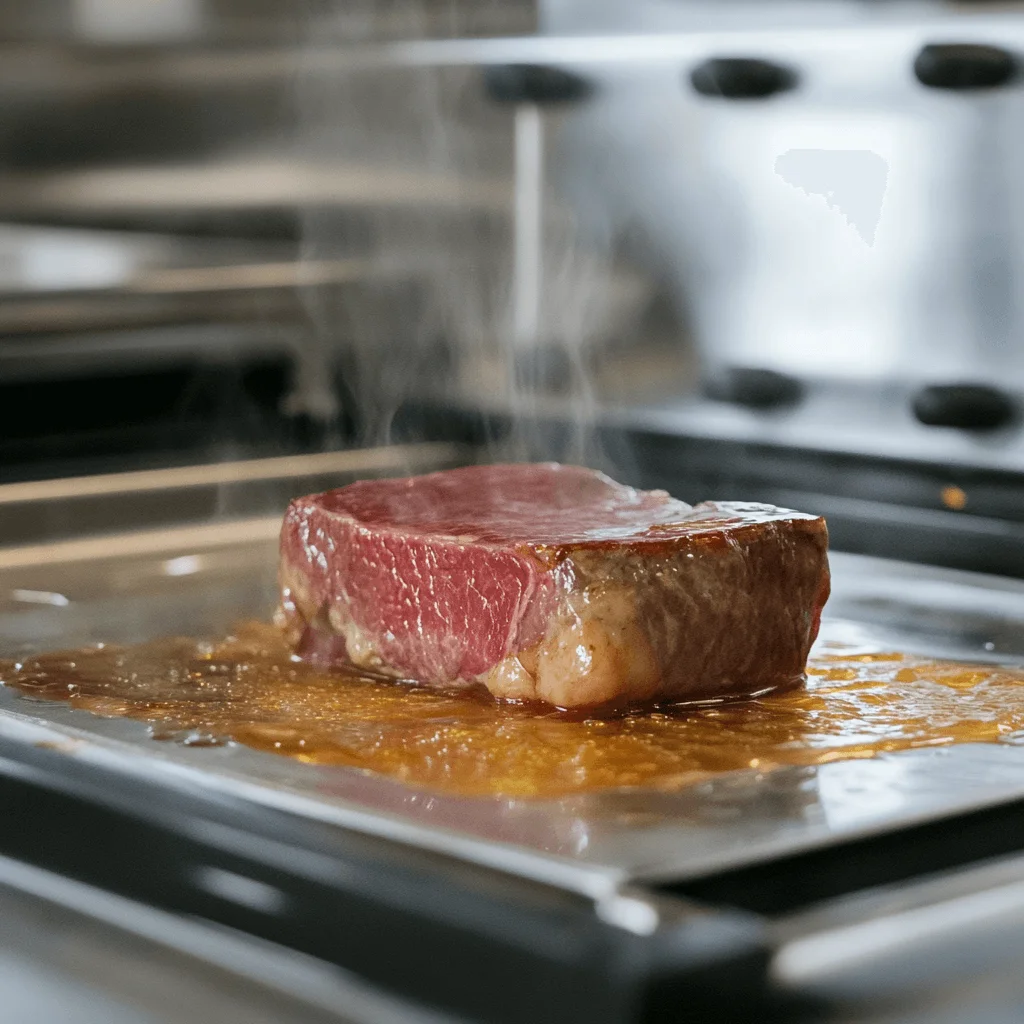
- Finish with a quick sear. After the steak is done cooking, remove it from the bag and pat it dry with paper towels. Heat a pan with oil over high heat and sear the steak for 1 to 2 minutes on each side until it forms a golden-brown crust.
By cooking steak with sous vide, you get a level of precision and control that traditional methods simply can’t match. Whether you prefer a rare, medium-rare, or well-done steak, sous vide guarantees perfect results every time. Plus, the technique works for a wide range of other meats, from pork chops to lamb chops, ensuring that you can create restaurant-quality dishes at home.
Sous Vide Chicken Recipes: Benefits of Using Sous Vide for Tender, Juicy Chicken
Chicken is one of the most versatile and popular proteins in the kitchen, but achieving perfectly cooked chicken—whether it’s a chicken breast, thigh, or even a whole chicken—can be tricky. One of the most common challenges with chicken is preventing it from becoming dry and overcooked. Sous vide cooking solves this problem by offering precise temperature control, resulting in incredibly tender and juicy chicken every time.
Why Sous Vide is Perfect for Chicken The beauty of sous vide cooking lies in its ability to cook meat evenly, without risk of overcooking. When it comes to chicken, the precise temperature control allows you to cook the chicken to exactly the level of doneness you prefer, ensuring a moist and tender result.
- Juicy and Moist Chicken: Unlike traditional methods like roasting or pan-frying, which often result in dry chicken, sous vide locks in moisture. Because the chicken is sealed in a vacuum bag and cooked in a water bath, it retains its natural juices. This makes the meat incredibly moist, even for lean cuts like chicken breasts, which can easily dry out when cooked using other methods.
- Perfectly Cooked Throughout: One of the common struggles when cooking chicken is achieving even cooking. Traditional methods can result in overcooked edges and undercooked centers. With sous vide, the chicken cooks at the exact temperature set by the immersion circulator, ensuring uniform doneness throughout the meat. Whether you’re cooking a thin chicken breast or a thicker chicken thigh, every bite will be perfectly tender and juicy.
- Tenderness and Texture: The slow and steady nature of sous vide cooking helps break down connective tissues in tougher cuts of chicken, like thighs or drumsticks, making them incredibly tender without the need for long, slow braising or stewing. Even traditionally tougher cuts of chicken become deliciously melt-in-your-mouth when cooked sous vide.
- Flavor Infusion: Sous vide allows you to infuse your chicken with herbs, spices, and marinades, all of which are sealed in during the cooking process. This method results in more flavorful meat because the vacuum-seal bag traps and intensifies the seasonings, which penetrate the meat thoroughly. You can even experiment with different marinades and flavor combinations to elevate your dish.
Sous Vide Chicken Breast Recipe: A Simple Guide Cooking chicken breasts sous vide is incredibly easy and yields consistently perfect results. Here’s a simple recipe to follow:
- Preheat the Sous Vide Water Bath: Set your immersion circulator to 140°F (60°C) for a perfectly juicy, tender chicken breast. If you prefer a firmer texture, you can increase the temperature to 150°F (65.5°C).
- Prepare the Chicken Breast: Season the chicken with salt, pepper, and any additional herbs or spices you like (e.g., garlic powder, thyme, or lemon zest). For added flavor, you can place a pat of butter or a sprig of rosemary in the vacuum-seal bag.
- Vacuum Seal the Chicken: Place the chicken breast in a vacuum-seal bag and seal it tightly. Alternatively, you can use the water displacement method with a Ziploc bag to remove air from the bag before sealing.
- Cook the Chicken: Submerge the bag in the water bath and cook for 1.5 to 2 hours. Since sous vide is a low-temperature, slow-cooking method, you don’t need to worry about overcooking. If you prefer your chicken on the rarer side, you can reduce the time slightly, but 1.5 hours is usually perfect for a tender, juicy chicken breast.
- Finish with a Quick Sear (Optional): After cooking, remove the chicken from the bag and pat it dry with paper towels to remove any excess moisture. Heat a pan with oil over high heat and sear the chicken for 1-2 minutes on each side to develop a golden-brown crust.
- Serve and Enjoy: Slice the chicken and serve with your favorite sides. The result will be a tender, flavorful, and perfectly cooked chicken breast.
Sous Vide Chicken Thigh Recipe: Tender and Flavorful If you prefer dark meat, sous vide chicken thighs are a fantastic option. They are naturally more flavorful and, when cooked sous vide, become incredibly tender.
- Preheat the Water Bath: For boneless, skinless chicken thighs, set the water bath to 165°F (73.8°C). For bone-in thighs, you can cook at 160°F (71°C) for a longer cook time.
- Season the Chicken Thighs: Rub the chicken thighs with olive oil, salt, pepper, and any other seasoning you desire (garlic, paprika, rosemary, or lemon).
- Vacuum Seal and Cook: Vacuum seal the thighs and cook for 1.5 to 2 hours. The result will be juicy, tender chicken thighs with a flavorful skin (if you leave the skin on).
- Sear or Crisp the Skin (Optional): After sous vide cooking, sear the thighs in a hot pan for a few minutes to crisp up the skin for added texture.
Versatility in Recipes Sous vide chicken can be used in a variety of dishes, from simple grilled chicken salads to hearty chicken stews or casseroles. It can also be stored and reheated without losing its juiciness, making it perfect for meal prepping. You can even cook multiple chicken breasts or thighs at once, ensuring perfectly cooked portions for the whole family.
Whether you’re cooking for one or preparing a meal for a crowd, sous vide cooking makes it easy to achieve restaurant-quality chicken with minimal effort.
Sous vide takes all the guesswork out of cooking chicken, allowing you to produce flavorful, juicy, and tender dishes with precision. By cooking at the exact temperature you desire, you ensure that every bite is perfect, making it an ideal method for home cooks looking to master chicken recipes.
Sous Vide Pork and Lamb: Tips for Using Sous Vide to Cook Pork Chops, Ribs, and Lamb to Perfection
Sous vide cooking is not just for beef and chicken—it’s also a fantastic way to prepare pork and lamb to achieve a tender, juicy, and flavorful result. These meats can sometimes be challenging to cook perfectly, but sous vide eliminates the guesswork and gives you precise control over texture and doneness. Whether you’re preparing succulent pork chops, fall-off-the-bone ribs, or juicy lamb chops, sous vide ensures you’ll achieve restaurant-quality results every time.
Cooking Pork with Sous Vide: Perfect Pork Chops and Ribs Pork is a versatile meat that benefits greatly from sous vide cooking, especially when it comes to cuts like pork chops, tenderloin, and ribs. Traditional methods can often result in dry or tough meat, but sous vide preserves moisture and tenderness, making the cooking process almost foolproof.
- Pork Chops: Pork chops can be tricky to cook because they dry out quickly when overcooked. Sous vide ensures that the pork is cooked to the exact level of doneness, resulting in a tender, juicy chop every time. For perfectly cooked pork chops, set your immersion circulator to 140°F (60°C) for a tender, juicy chop, or 145°F (62.7°C) for a slightly firmer texture. Cooking for 1 to 2 hours is usually sufficient for chops that are about 1 inch thick.
- Tips for Pork Chops:
- For extra flavor, season the pork with a rub or marinade before vacuum-sealing it. Ingredients like garlic, thyme, rosemary, and Dijon mustard work wonderfully with pork.
- If you prefer a crispy crust, sear the pork chops in a hot skillet for 1-2 minutes on each side after sous vide cooking.
- Tips for Pork Chops:
- Pork Ribs: Pork ribs are often slow-cooked to tender perfection, and sous vide takes this a step further by ensuring a juicy, melt-in-your-mouth texture. Set your water bath to 165°F (73.8°C) for tender ribs that fall off the bone. For a slightly firmer rib, you can cook at 145°F (62.7°C) for a longer period of time, anywhere from 6 to 12 hours, depending on the thickness of the ribs.
- Tips for Pork Ribs:
- For enhanced flavor, season the ribs with a dry rub and add a small amount of liquid smoke to the vacuum bag for that classic barbecue flavor.
- After cooking, finish the ribs on the grill or under the broiler for a few minutes to caramelize the rub and develop a flavorful crust.
- Tips for Pork Ribs:
Sous Vide Lamb: Perfect Lamb Chops and Roasts Lamb is a rich, flavorful meat that can be difficult to cook just right, as it can easily turn tough if overcooked. However, sous vide offers precise control over the cooking temperature, ensuring that the meat remains tender and juicy. Whether you’re cooking lamb chops, leg of lamb, or even lamb shanks, sous vide helps you achieve a perfect result every time.
Lamb Chops: Lamb chops are a popular choice for sous vide cooking because they cook quickly and benefit from the low and slow method. For medium-rare lamb chops, set the sous vide water bath to 130°F (54°C). For medium lamb, increase the temperature to 135°F (57°C). Lamb chops typically cook in 1.5 to 2 hours.
Tips for Lamb Chops:
Season the lamb with rosemary, garlic, and olive oil to complement its natural flavors. If you want to take it up a notch, add a sprig of fresh thyme or a drizzle of balsamic glaze just before serving.
After sous vide cooking, sear the lamb chops in a hot skillet or on the grill for 1-2 minutes per side to achieve a beautiful golden crust.
Leg of Lamb: If you’re cooking a larger cut of lamb like a leg roast, sous vide makes it easier to cook it evenly and to your preferred level of doneness. Set your immersion circulator to 140°F (60°C) for a medium-rare roast, or 145°F (62.7°C) for medium. Cook for 4 to 6 hours depending on the size of the leg.
Tips for Leg of Lamb:
Rub the lamb with a combination of olive oil, garlic, and herbs like rosemary and thyme before sealing it in the vacuum bag.
To finish, you can roast or sear the leg of lamb at a high temperature for 10-15 minutes to form a flavorful crust.
Why Sous Vide Works So Well for Pork and Lamb
- Tenderization: Pork and lamb, especially tougher cuts, benefit from the slow cooking process of sous vide. As the meat cooks at a low temperature, collagen breaks down more gradually, leading to a more tender and juicy texture. This is especially important for tougher cuts like lamb shanks or pork ribs, which would normally require hours of slow cooking to reach the same level of tenderness.
- Flavor Preservation: Because sous vide is a vacuum-sealed method, it traps the natural juices and flavors of the meat, resulting in a more intensely flavored piece of pork or lamb. You can even add herbs and spices to the bag, and they will penetrate the meat during the cooking process, infusing the flavors deeply.
- Consistent Results: The biggest benefit of sous vide cooking for pork and lamb is the consistency it provides. You no longer have to worry about undercooking or overcooking these meats. Whether you’re cooking a small lamb chop or a large pork rib roast, sous vide ensures that every piece of meat is cooked to the same level of perfection.
The Finishing Touch: Searing Your Pork and Lamb After cooking your pork or lamb sous vide, finishing the dish with a quick sear on a hot grill or skillet adds texture and enhances flavor. The searing process caramelizes the surface, creating a golden-brown crust that adds depth to the dish. For pork ribs, lamb chops, and pork chops, this is an essential step to give them that mouthwatering look and texture.
Whether you’re preparing a simple pork chop, a rich lamb roast, or juicy ribs, sous vide ensures that every cut of pork or lamb is cooked to perfection with maximum flavor and tenderness. The low and slow cooking process provides a unique opportunity to experiment with different flavors and seasonings, making sous vide a must-try technique for any home cook.
3) The Best Sous Vide Recipes You Can’t Miss
Sous Vide Steak Recipe: A Top Recipe for Perfectly Cooked Steak Every Time
One of the most popular and impressive dishes to cook with sous vide is steak. The sous vide method allows you to cook steak to your exact desired doneness, from edge to edge, while maintaining its natural juices and tenderness. Whether you prefer a rare, medium-rare, or well-done steak, sous vide takes the guesswork out of the cooking process, ensuring perfect results every time.
Ingredients:
- 1-2 bone-in or boneless steaks (Ribeye, New York strip, filet mignon, T-bone, or sirloin are great choices)
- Salt and freshly cracked black pepper (for seasoning)
- Optional: Fresh garlic, rosemary, thyme, or other herbs for flavor infusion
- Optional: 1-2 tablespoons of unsalted butter (for finishing)
- Optional: Olive oil (for searing)
Instructions:
Preheat Your Sous Vide Water Bath:
- The first step is to set your sous vide machine (immersion circulator) to your desired steak doneness temperature. Here are the recommended temperatures based on your preference:
- Rare: 120°F (49°C) – Cook for 1 to 2 hours
- Medium-rare: 130°F (54°C) – Cook for 1 to 2 hours
- Medium: 140°F (60°C) – Cook for 1 to 2 hours
- Medium-well: 150°F (65.5°C) – Cook for 1 to 2 hours
- Well-done: 160°F (71°C) – Cook for 1 to 2 hours
Season the Steak:
Generously season your steak with salt and freshly cracked black pepper on both sides. If you like, you can also add garlic, rosemary, or thyme to the bag for extra flavor. Simply place the steak in a vacuum-seal bag or a heavy-duty resealable bag.
If using a vacuum sealer, seal the bag tightly, ensuring no air is trapped inside. Alternatively, if using a Ziploc bag, you can use the water displacement method to push out as much air as possible before sealing the bag.
Submerge the Steak in the Water Bath:
Once the water bath has reached the target temperature, submerge the bagged steak into the water. Make sure the steak is fully submerged and not floating to ensure even cooking.
Let the steak cook for 1 to 2 hours, depending on its thickness. The beauty of sous vide cooking is that even if you leave the steak in the water bath a bit longer, it won’t overcook, as long as you don’t exceed the recommended cooking time by too much.
Finish the Steak with a Quick Sear:
After the steak has cooked sous vide, remove it from the bag and gently pat it dry with paper towels. The surface of the steak should be dry to ensure you get a good sear.
Heat a heavy pan (preferably cast iron) or grill over high heat. Add a small amount of oil (vegetable or canola oil works best for searing), and wait for the oil to shimmer.
Quickly sear the steak for 1 to 2 minutes per side to develop a rich, golden-brown crust. If you’re using butter, you can add it during the last 30 seconds of searing, along with any fresh herbs or garlic, for added flavor. Tilt the pan to spoon the melted butter over the steak for a few seconds for extra richness.
Serve and Enjoy:
Once the steak has developed a beautiful crust, remove it from the pan and let it rest for 5 minutes before slicing. This allows the juices to redistribute throughout the meat.
Slice the steak against the grain and serve with your favorite sides, such as roasted vegetables, mashed potatoes, or a fresh salad.
Why Sous Vide is Perfect for Steak
- Precision Cooking: Sous vide allows you to cook steak to an exact temperature, ensuring that it’s cooked evenly throughout. This method eliminates the risk of undercooking or overcooking, so your steak is cooked perfectly every time.
- Tenderness and Juiciness: Traditional methods like grilling or pan-searing often lead to dry or tough steaks, especially when the meat is overcooked. With sous vide, the steak is cooked in a vacuum-sealed bag, which locks in the juices and keeps the meat moist. The slow cooking process also allows the steak to become incredibly tender, even in cuts that might otherwise be tough.
- Customizable Doneness: Whether you like your steak rare, medium-rare, medium, or well-done, sous vide gives you complete control over the level of doneness, ensuring that your steak is cooked exactly to your liking. The water bath maintains a constant temperature, so there’s no guesswork involved.
- Enhanced Flavor: Because the steak is vacuum-sealed with seasonings or herbs, the flavors are infused into the meat during cooking. You can also experiment with different marinades and rubs to customize the flavor profile of your steak.
Tips for Perfect Sous Vide Steak:
- Choose the Right Cut: While sous vide works well for most cuts of steak, ribeye, filet mignon, New York strip, and T-bone steaks are excellent choices because of their rich marbling and flavor. However, even cheaper cuts like flank steak or sirloin can benefit from sous vide cooking.
- Use a Cast Iron Skillet for Searing: A cast iron skillet holds and distributes heat well, allowing you to get a perfectly crisp and even sear on your steak.
- Don’t Skip Drying the Steak: Before searing, it’s important to pat the steak dry to ensure the surface browns and crisps up nicely. If the steak is too wet, it will steam rather than sear, resulting in a less desirable crust.
With sous vide, cooking steak is practically foolproof. It guarantees a juicy, tender, and flavorful result every time, whether you’re cooking a thick ribeye or a delicate filet. The precision of sous vide cooking makes it the perfect method for steak lovers who want consistent, restaurant-quality results at home.
Sous Vide Chicken Breast Recipe: A Simple Sous Vide Chicken Recipe with Seasoning Tips
Chicken breast is one of the leanest and most popular cuts of poultry, but it can easily become dry and overcooked when cooked by traditional methods. Sous vide cooking, however, ensures perfectly moist, juicy, and tender chicken every time. By cooking the chicken at a precise temperature, sous vide guarantees a consistently flavorful result, without any of the guesswork that often comes with pan-searing or baking.
Here’s a simple sous vide chicken breast recipe, along with some seasoning tips to enhance the flavor.
Ingredients:
- 2 boneless, skinless chicken breasts (about 6-8 oz each)
- Salt and freshly cracked black pepper (to taste)
- Optional: 1-2 tablespoons of olive oil or butter (for added flavor)
- Optional: Fresh herbs like rosemary, thyme, or parsley
- Optional: Garlic powder, onion powder, paprika, or lemon zest (for seasoning)
- Optional: 1 lemon (sliced, for added citrus flavor)
Instructions:
Preheat the Sous Vide Water Bath:
Set your immersion circulator to 140°F (60°C) for a tender, juicy chicken breast. If you prefer a slightly firmer texture, you can increase the temperature to 150°F (65.5°C).
Allow the water bath to preheat while you prepare the chicken.
Season the Chicken Breast:
Generously season each chicken breast with salt and freshly cracked black pepper on both sides. For more flavor, you can add extra seasonings or herbs.
Herb & Garlic: Sprinkle garlic powder, onion powder, and dried thyme for a savory and aromatic flavor.
Lemon & Herb: Add a few slices of lemon to the bag, along with sprigs of fresh rosemary or thyme, for a bright, fresh flavor that complements the chicken.
Smoky Paprika: For a subtle smokiness, you can rub the chicken with paprika, cayenne pepper, and a touch of olive oil.
If desired, place a small pat of butter or drizzle a bit of olive oil on top of each chicken breast for added richness during the cooking process.
Vacuum Seal or Use the Water Displacement Method:
Place the seasoned chicken breasts in a vacuum-seal bag. If you’re using a Ziploc bag, you can use the water displacement method: submerge the bag (sealed almost entirely) into the water, which forces the air out, and then seal it shut.
If you’re adding lemon slices or herbs, make sure they’re evenly distributed around the chicken in the bag.
Cook the Chicken:
Once the water bath has reached the desired temperature, submerge the vacuum-sealed bag with the chicken breasts into the water.
Let the chicken cook for 1.5 to 2 hours. The beauty of sous vide is that even if you leave the chicken for a little longer, it will remain perfectly cooked, as long as you don’t exceed the time by too much.
Finish the Chicken with a Quick Sear (Optional):
After the chicken has finished cooking sous vide, remove it from the bag and pat it dry with paper towels. This is important because any moisture left on the chicken will interfere with getting a nice sear.
Heat a skillet over medium-high heat and add a tablespoon of oil (or butter) to the pan. Once the pan is hot, quickly sear the chicken for 1-2 minutes on each side to develop a golden-brown, flavorful crust. You can also add a little more fresh herbs or a splash of lemon juice during the searing to infuse extra flavor.
Serve and Enjoy:
Once seared, allow the chicken to rest for 5 minutes before slicing to allow the juices to redistribute.
Slice the chicken breast against the grain and serve with your favorite sides, such as roasted vegetables, quinoa, or a light salad.
Why Sous Vide is Ideal for Chicken Breast:
- Precise Temperature Control: Sous vide cooking ensures that the chicken is cooked evenly throughout, with no risk of undercooking or overcooking. The meat will stay moist and tender, which can be especially tricky for chicken breasts when using conventional methods like baking or grilling.
- Juicy and Tender Texture: By cooking at a lower temperature for a longer time, the chicken breast retains more of its natural moisture. This means you get juicy, flavorful chicken that is perfectly tender—no more dry, rubbery bites.
- Flavor Infusion: When you seal the chicken in a vacuum bag with herbs, spices, or aromatics (such as garlic or lemon), the flavors are infused directly into the meat. The sous vide method traps the flavors, allowing them to penetrate deep into the chicken, creating a more flavorful and aromatic dish.
Additional Seasoning Tips for Sous Vide Chicken:
- Classic Garlic and Herb: For a simple and classic seasoning, use garlic, thyme, rosemary, and lemon zest. These ingredients add fresh, aromatic flavors to the chicken without overpowering its natural taste.
- Spicy Cajun: For a bit of heat, rub the chicken with Cajun seasoning, paprika, garlic powder, and a pinch of cayenne pepper before sealing in the bag. This combination of spices will give the chicken a smoky, spicy kick.
- Asian-Inspired: For an Asian twist, you can season the chicken with soy sauce, ginger, garlic, sesame oil, and a little bit of honey for sweetness. This flavor profile pairs wonderfully with sautéed vegetables or a rice pilaf.
- Mediterranean: For a Mediterranean flair, try using dried oregano, garlic, lemon zest, and olive oil. These ingredients pair beautifully with chicken and offer a fresh, light flavor.
Why Sous Vide Cooking Works So Well for Chicken Breast:
- No Risk of Dryness: One of the biggest challenges with cooking chicken breast is preventing it from drying out. The sous vide method eliminates that risk, as the chicken is cooked gently at a consistent temperature, preserving its moisture and ensuring a juicy result.
- Perfectly Even Doneness: With traditional cooking methods, achieving uniform doneness can be difficult, especially with thicker cuts. With sous vide, you can be sure that your chicken will be perfectly cooked from edge to edge, whether you’re cooking a thin breast or a thicker piece.
- Make-Ahead and Meal Prep Friendly: Sous vide chicken breast is perfect for meal prepping, as it can be cooked in bulk and stored in the fridge for up to 4 days. It reheats beautifully, retaining its moisture and tenderness, making it ideal for quick meals throughout the week.
By using sous vide, you can create chicken breasts that are tender, juicy, and full of flavor with minimal effort. The ability to season the chicken beforehand and cook it to the exact level of doneness you desire makes this method a game-changer for busy home cooks or anyone who loves perfectly cooked chicken.
Sous Vide Vegetables Recipe: A Tasty Sous Vide Vegetable Recipe (e.g., Carrots or Potatoes)
Cooking vegetables using the sous vide method allows them to retain their natural flavor, color, and texture while being cooked to perfection. The precision of sous vide ensures that vegetables come out tender, flavorful, and vibrant, unlike traditional methods where overcooking can lead to mushy or bland results.
Sous Vide Carrots Recipe
Carrots, when cooked sous vide, become incredibly tender and sweet, with a slight caramelization from the natural sugars. This recipe brings out the best in this root vegetable, infusing it with fresh herbs and a touch of butter.
Ingredients:
- 4-5 medium-sized carrots, peeled and cut into sticks or rounds
- 1-2 tablespoons unsalted butter
- Salt and freshly cracked black pepper (to taste)
- Fresh thyme or rosemary sprigs (optional)
- 1 tablespoon honey or brown sugar (optional for extra sweetness)
Instructions:
Preheat the Sous Vide Water Bath:
Set your immersion circulator to 183°F (84°C) for perfectly tender carrots. This temperature allows the carrots to cook through without losing their vibrant color or texture.
Season the Carrots:
Place the peeled and cut carrots into a vacuum-seal bag. Add salt, pepper, and a few sprigs of fresh thyme or rosemary. For added sweetness, drizzle a tablespoon of honey or sprinkle some brown sugar over the carrots before sealing the bag.
If you prefer a richer flavor, add 1-2 tablespoons of butter to the bag. The butter will help to enhance the carrots’ natural sweetness and infuse a smooth, savory note.
Vacuum Seal the Bag:
Seal the bag tightly, ensuring that the carrots are evenly distributed inside. If you don’t have a vacuum sealer, use the water displacement method with a resealable bag.
Cook the Carrots:
Once the water bath has reached 183°F (84°C), submerge the sealed bag with the carrots into the water. Let them cook for 1 to 1.5 hours. The sous vide process will bring out the carrots’ natural sweetness while keeping them tender and flavorful.
Finish and Serve:
After cooking, remove the bag from the water bath. If you prefer a slightly caramelized finish, you can quickly sauté the cooked carrots in a hot pan with a little butter for 1-2 minutes.
Serve the carrots as a side dish or toss them into a salad, paired with roasted meats or your favorite grains.
Sous Vide Potatoes Recipe
Sous vide potatoes are incredibly easy to prepare, and the method preserves their natural starchy texture while making them perfectly creamy on the inside. You can cook a variety of potatoes this way—whether you’re working with baby potatoes, fingerlings, or even russets.
Ingredients:
- 4-5 medium-sized potatoes (baby potatoes, fingerlings, or regular potatoes)
- 2 tablespoons olive oil or melted butter
- Salt and freshly cracked black pepper (to taste)
- Fresh rosemary, thyme, or garlic cloves (optional for flavor)
- 1 tablespoon fresh parsley or chives (for garnish)
Instructions:
- Preheat the Sous Vide Water Bath:
- Set your immersion circulator to 194°F (90°C) for soft, creamy potatoes. If you want potatoes that are firmer or more sliceable (for salads), you can reduce the temperature to 185°F (85°C).
- Prepare the Potatoes:
- Wash and scrub the potatoes thoroughly. If using baby potatoes or fingerlings, you can leave them whole. For regular potatoes, cut them into bite-sized pieces or wedges.
- Place the potatoes into a vacuum-seal bag, drizzle with olive oil or melted butter, and season with salt and pepper. Add sprigs of rosemary, thyme, or garlic cloves to the bag if you want to infuse additional flavor.
- Vacuum Seal the Bag:
- Seal the bag tightly, ensuring the potatoes are evenly distributed inside.
- Cook the Potatoes:
- Once the water bath has reached 194°F (90°C), submerge the bag with the potatoes into the water. Cook for 1 to 1.5 hours. The sous vide method ensures that the potatoes cook evenly and come out perfectly tender without any risk of overcooking.
- Finish and Serve:
- After cooking, remove the bag from the water and transfer the potatoes to a serving dish. You can serve them as is, or for a crispy finish, sear them in a hot pan with some butter or oil for 2-3 minutes to develop a golden-brown crust.
- Garnish with fresh parsley or chives and serve as a side dish to meats, roasted vegetables, or salads.
Why Sous Vide is Ideal for Vegetables:
- Perfectly Even Cooking: Sous vide ensures that vegetables are cooked evenly from edge to edge, so you don’t have to worry about undercooked or overcooked pieces. Whether it’s delicate carrots or starchy potatoes, every piece will have the same perfect texture.
- Enhanced Flavors: By cooking vegetables in a vacuum-sealed bag, their natural flavors are concentrated and enhanced. The method also allows for better infusion of seasonings, herbs, and aromatics, resulting in vegetables that are packed with flavor. Adding butter, olive oil, or even a touch of honey can elevate the taste and make your vegetable dishes even more exciting.
- Retaining Nutrients: Cooking vegetables sous vide preserves more nutrients compared to boiling or steaming, as the food is cooked in its own juices without any leaching of vitamins or minerals into the water. The result is a healthier, more nutrient-dense dish.
- Tenderness and Texture: Unlike traditional methods, sous vide cooking keeps the vegetables tender without becoming mushy. The controlled temperature ensures that the vegetables maintain their texture and shape, making them perfect for salads, sides, or bowls.
Additional Tips for Cooking Vegetables with Sous Vide:
- Carrots: You can also experiment with different seasonings such as cumin, coriander, or a splash of balsamic vinegar for a slightly tangy and sweet flavor. For an extra boost, add a dash of freshly grated ginger or orange zest for an aromatic kick.
- Potatoes: If you’re using potatoes for mashed potatoes, sous vide is a fantastic way to get perfectly cooked, soft potatoes that don’t need to be drained, which helps retain all the flavor and nutrients. Simply cook the potatoes with a little butter and season, then mash them after sous vide cooking.
- Seasoning Variations: Try adding spices such as smoked paprika for a smoky flavor, garlic for an aromatic punch, or lemon zest to brighten the taste of your vegetables.
- Mix Vegetables: Sous vide also allows you to mix different vegetables in one bag, such as carrots, parsnips, or even turnips, for a vibrant medley. Just make sure to cut all the vegetables into similar sizes for even cooking.
Sous vide vegetables are an easy way to elevate your meals, offering full flavor and perfect texture every time. Whether you’re cooking carrots, potatoes, or other root vegetables, the sous vide method ensures they turn out tender, flavorful, and cooked to perfection without any hassle. This method is perfect for meal prep, making it easy to cook vegetables in advance and enjoy them throughout the week.
4) Tips for Perfecting Your Sous Vide Cooking
Choosing the Right Temperature and Time: Recommended Temperatures for Various Meats and Vegetables
One of the main advantages of sous vide cooking is the precise control over temperature, which allows you to achieve perfectly cooked food every time. However, to get the best results, it’s essential to know the right temperature and cooking time for different meats and vegetables. This ensures that your food is cooked to the desired doneness while preserving its flavor, texture, and nutritional value.
In this section, we’ll explore the recommended temperatures and times for various types of meat and vegetables to help you create delicious, restaurant-quality dishes at home.
1. Sous Vide Temperatures for Meats
Beef:
- Rare: 120°F (49°C) for 1-2 hours
- Ideal for cuts like filet mignon or ribeye if you like your steak with a red, cool center.
- Medium Rare: 129°F (54°C) for 1-2 hours
- The perfect temperature for a tender, juicy steak with a warm red center.
- Medium: 135°F (57°C) for 1-2 hours
- For those who prefer a slightly firmer texture but still with some pink in the center.
- Medium Well: 145°F (63°C) for 1-2 hours
- If you like your steak mostly cooked through with a small amount of pink in the center.
- Well Done: 155°F (68°C) for 1-2 hours
- For fully cooked beef, though sous vide will ensure it stays tender even at this temperature.
Pork:
- Medium (Tender and Juicy): 140°F (60°C) for 1-4 hours
- Pork loin, tenderloin, and chops are great at this temperature. The pork will be juicy and slightly pink in the middle, which is perfectly safe.
- Well Done (Pulled Pork): 190°F (88°C) for 12-24 hours
- For cuts like pork shoulder, this temperature ensures that the meat becomes very tender and easily shredded for pulled pork.
Chicken:
- Tender and Juicy: 140°F (60°C) for 1-4 hours
- Chicken breasts cooked at this temperature turn out incredibly tender and juicy, without the risk of drying out.
- Well-Done: 165°F (74°C) for 1-2 hours
- For a fully cooked and firm chicken texture. This is the recommended temperature if you’re looking to achieve fully cooked chicken.
Lamb:
- Medium Rare: 129°F (54°C) for 1-4 hours
- Lamb chops and racks are best cooked at this temperature, ensuring a pink, tender interior.
- Medium: 135°F (57°C) for 1-4 hours
- Lamb shanks or leg cuts cooked at this temperature offer a balanced level of doneness.
Beef Ribs (Short Ribs):
- Tender and Shredded: 175°F (80°C) for 24-48 hours
- Beef short ribs benefit from long cooking times at higher temperatures to break down collagen, turning them into a melt-in-your-mouth experience.
Game Meats (Venison, Duck, etc.):
- Medium Rare: 130°F (54°C) for 1-2 hours
- Game meats, such as venison, duck breasts, and bison, require lower temperatures to maintain their tenderness and rich flavor without overcooking.
2. Sous Vide Temperatures for Vegetables
Sous vide is especially great for cooking vegetables because it preserves their natural flavors, nutrients, and vibrant colors. Since vegetables vary greatly in texture, the ideal sous vide temperature will differ depending on the type of vegetable you’re cooking.
Root Vegetables (Carrots, Parsnips, Beets, etc.):
- Tender & Sweet: 183°F (84°C) for 1-2 hours
- Root vegetables, such as carrots, parsnips, and beets, thrive at this temperature, allowing them to soften while retaining their natural sweetness.
Potatoes (Baby Potatoes, Fingerlings, etc.):
- Soft and Creamy: 194°F (90°C) for 1-1.5 hours
- Potatoes, especially baby potatoes and fingerlings, can be cooked at this higher temperature for a soft, creamy texture. They can also be cooked for longer if you want to get a more rustic, sliceable texture.
Leafy Greens (Spinach, Kale, etc.):
- Lightly Wilted and Tender: 180°F (82°C) for 30 minutes to 1 hour
- Greens like spinach, kale, or Swiss chard cook quickly at a slightly lower temperature. This method softens them without making them mushy, preserving the flavors and nutritional content.
Asparagus:
- Tender and Vibrant: 185°F (85°C) for 30-45 minutes
- Asparagus comes out perfectly tender yet still has a bite when cooked at this temperature. The asparagus retains its color and flavor, making it a perfect side dish.
Brussels Sprouts:
- Tender with a Bite: 185°F (85°C) for 1 hour
- Brussels sprouts can be quite hearty and firm, but when cooked sous vide, they retain their texture while becoming tender and deeply flavorful. Adding seasonings like balsamic vinegar or bacon before cooking will enhance the taste.
Corn on the Cob:
- Sweet and Tender: 185°F (85°C) for 1-2 hours
- Corn cooks beautifully in a sous vide bath. It remains crisp and juicy while absorbing any butter or seasoning added to the bag.
Tomatoes:
- Vibrant and Juicy: 185°F (85°C) for 30-60 minutes
- Sous vide tomatoes are great for making sauces or serving whole as part of a salad. This method helps concentrate their flavors while preserving their moisture.
3. Additional Tips for Cooking with Sous Vide:
- Thickness of the Cut: The thickness of meat and vegetables can affect how long they need to cook. For example, a thick steak or pork chop may need a bit longer than a thinner piece to achieve the desired doneness, even if the temperature is the same. A general rule of thumb is that the thicker the cut, the longer it needs to cook. Always check the thickness to determine how much time you need.
- Cooking Time Variations: Sous vide is extremely forgiving with time. While it’s essential to respect recommended times for ideal textures, you can generally extend the time slightly without ruining the food. For meats, cooking for an additional hour won’t hurt, while vegetables can sometimes handle an additional 15-30 minutes.
- Resting Time: After removing your meat or vegetables from the sous vide bath, it’s a good idea to let them rest for a few minutes before serving. This helps redistribute the juices and results in a more flavorful and tender dish.
- Finish with a Sear or Roast: After cooking sous vide, some foods benefit from a quick finish with high heat—such as searing a steak, roasting vegetables, or caramelizing the surface of chicken or pork. This step adds texture and flavor while maintaining the benefits of sous vide cooking.
Conclusion: Why the Right Temperature and Time Matter
Selecting the correct temperature and cooking time for each food item is key to achieving the perfect sous vide results. It ensures that meats remain tender and juicy, vegetables are flavorful and vibrant, and everything is cooked to perfection. With a bit of practice, you’ll develop an instinct for how long to cook each ingredient based on its thickness, type, and your preferred doneness. The precision of sous vide cooking takes the guesswork out of the equation, allowing you to enjoy restaurant-quality meals every time.
Flavor Infusion Using Sous Vide: How to Use Herbs, Marinades, and Spices for Enhanced Flavors
One of the major advantages of sous vide cooking is the ability to infuse food with intense, concentrated flavors. The sous vide method’s vacuum-sealing process traps ingredients such as herbs, spices, and marinades close to the food, allowing them to penetrate deeply and evenly without losing any aroma or flavor during cooking. Because the food is cooked in its own juices or added liquids, the result is a dish that is packed with flavor and retains moisture.
In this section, we’ll explore how to effectively use herbs, marinades, and spices when cooking sous vide to enhance your dishes. Whether you’re cooking meats, vegetables, or even fruits, the sous vide method provides an incredible opportunity to infuse flavors with precision.
1. Using Herbs for Flavor Infusion
Herbs add depth and complexity to sous vide cooking, and because sous vide preserves the essential oils and aromas of herbs, you get the full benefit of their flavor. Here are some tips for incorporating fresh herbs into your sous vide meals:
Fresh vs. Dried Herbs:
- Fresh herbs like thyme, rosemary, tarragon, basil, and parsley work beautifully in sous vide cooking because the vacuum-sealing process traps their volatile oils, giving your dish an intense, fresh flavor.
- Dried herbs are more concentrated and can also be used, but they will infuse flavors more strongly and quickly than fresh herbs. Consider using them in smaller quantities.
Best Herbs for Meat:
- Thyme: A classic herb that pairs well with beef, lamb, and chicken. Its subtle, earthy flavor infuses deeply into the meat when cooked sous vide.
- Rosemary: A bold, aromatic herb perfect for steak, pork, and lamb. Rosemary’s pine-like fragrance and flavor infuse the food delicately, especially when paired with garlic.
- Sage: Ideal for pork, chicken, or turkey, sage offers a savory, slightly peppery flavor that works particularly well in hearty dishes.
Best Herbs for Vegetables:
- Basil: Perfect for infusing delicate dishes like tomatoes, carrots, or potatoes. Basil’s slightly sweet and peppery flavor is great when cooked sous vide at lower temperatures.
- Tarragon: Excellent for vegetables such as peas, asparagus, or zucchini. Tarragon’s sweet, anise-like flavor gives vegetables a refined taste when cooked sous vide.
- Oregano: Adds a savory, earthy kick to vegetables like eggplant, mushrooms, or bell peppers. It complements Mediterranean-inspired dishes well.
How to Use Herbs:
- Place herbs in the vacuum-seal bag with your protein or vegetables. You can add whole sprigs of herbs or chop them, depending on the intensity of flavor you prefer.
- For delicate herbs like basil or parsley, it’s best to add them towards the end of cooking or use them as a garnish after sous vide cooking to preserve their fresh, vibrant flavors.
- Stronger herbs like rosemary or thyme can be added at the start of the cooking process to allow their flavors to infuse slowly into the food.
2. Marinades and Sauces for Flavor Infusion
Marinating food before sous vide cooking is an excellent way to infuse bold flavors into meats, poultry, and fish. Since the vacuum-seal bag traps liquids, the marinade can penetrate deeply into the food, making it more flavorful and tender. Here are a few tips for successful marinade and sauce use in sous vide:
Types of Marinades:
- Acidic Marinades: Ingredients like vinegar, citrus juice, or wine help tenderize meats and bring out natural flavors. These work particularly well with tougher cuts of meat like pork shoulder or flank steak. However, be cautious not to marinate for too long, as the acid can begin to break down the texture of the meat if left too long.
- Oil-based Marinades: Using olive oil or avocado oil as a base can help coat the food evenly and prevent it from drying out. These types of marinades often include herbs, garlic, and spices, and are excellent for steak, chicken, and fish.
- Sweet Marinades: A touch of honey, maple syrup, or brown sugar can enhance the flavors of meats, especially in combination with acidic or savory ingredients. These work well for pork, ribs, and chicken wings.
- Soy-based Marinades: Soy sauce is a common base for marinades that pair well with meats like steak, chicken, and pork. It adds a rich umami flavor and complements garlic, ginger, and sesame oil.
How to Use Marinades:
- Marinate Ahead of Time: Marinate the food for 2-12 hours in the fridge before sealing in the sous vide bag. The longer marinating times allow the flavors to penetrate deeper into the meat, but for some delicate proteins like fish or shrimp, just 30 minutes is enough.
- Vacuum Seal with Marinade: After marinating, place the food and the marinade directly into the vacuum-seal bag, ensuring the food is fully coated. You can vacuum-seal meats and vegetables directly with the marinade, which will intensify the infusion during the sous vide process.
3. Using Spices for Enhanced Flavor
Spices add complexity and depth to sous vide cooking. Since the cooking process is slow and precise, the spices have time to meld and infuse throughout the dish, creating deep, aromatic flavors. Here are some tips on how to use spices for maximum impact:
Best Spices for Meat:
- Garlic: Whether minced, crushed, or whole, garlic is a staple that imparts its rich, savory flavor into meats and vegetables. Use it generously in marinades or place it directly in the sous vide bag with the meat.
- Cumin: With its warm, earthy, and slightly citrusy flavor, cumin works wonders in pork, chicken, and beef dishes. It’s often used in spice blends for Mediterranean, Middle Eastern, and Latin-inspired dishes.
- Paprika: Sweet, smoked, or hot paprika adds depth to meats like chicken, pork, and lamb. The smoke from smoked paprika pairs beautifully with roasted meats, and it enhances flavors without overwhelming them.
- Coriander: The citrusy, slightly floral flavor of coriander is excellent for chicken, lamb, and pork. It pairs well with cumin and chili powder to create rich, complex spice blends.
Best Spices for Vegetables:
- Smoked Paprika: Adds a smoky, slightly spicy flavor to roasted or sous vide vegetables like carrots, potatoes, and bell peppers.
- Cinnamon: A pinch of cinnamon enhances the sweetness of root vegetables like sweet potatoes, carrots, and beets. It’s especially great in fall-inspired dishes.
- Turmeric: Known for its vibrant color and earthy flavor, turmeric is perfect for infusing flavor into vegetables such as cauliflower, potatoes, and carrots. It adds an exotic touch and is known for its health benefits.
- Black Pepper: Black pepper is a versatile spice that pairs well with almost any vegetable or meat. It helps elevate the overall flavor profile, especially when combined with other spices.
How to Use Spices:
- Combine Spices and Herbs: For complex flavor profiles, combine spices with herbs. For example, use garlic and rosemary with smoked paprika on steak or combine cumin and coriander with cilantro for a Middle Eastern-inspired dish.
- Use Whole Spices for Subtle Flavor: Whole spices like cinnamon sticks, cloves, or cardamom pods can be added to the bag. They’ll release their essence slowly during the sous vide cooking process, giving a more subtle infusion.
- Use Ground Spices for Stronger Flavor: Ground spices like cumin, coriander, and paprika should be added directly to the bag for more intense flavors. Just be mindful not to overuse them, as they can dominate the dish.
4. Layering Flavors for Depth and Complexity
One of the best ways to enhance sous vide cooking is by layering multiple flavor profiles. Start with a basic marinade or spice rub and then build on it by adding complementary herbs and spices. For example, a steak could be marinated with olive oil, garlic, and rosemary and then infused with smoked paprika and black pepper during sous vide cooking.
Adding citrus zest, chili flakes, or a splash of vinegar just before serving can provide an extra burst of freshness and balance out richer flavors. Experiment with different combinations to create dishes that are as complex as they are delicious.
Conclusion: Maximizing Flavor Infusion with Sous Vide
Sous vide cooking offers a unique opportunity to infuse food with deep, rich flavors in a way that traditional methods cannot. By carefully selecting and combining herbs, marinades, and spices, you can elevate your meals and create truly exceptional dishes. Whether you’re cooking meats, vegetables, or even desserts, the sous vide method ensures that your flavors are perfectly balanced and absorbed, resulting in meals that are bursting with taste in every bite.
Vacuum Sealing Tips: The Importance of Vacuum-Sealing Your Food and Tips for Using a Vacuum Sealer
Vacuum sealing is one of the most crucial steps in sous vide cooking, as it directly affects the quality and consistency of the final dish. The process of vacuum sealing ensures that your food is properly immersed in the water bath, with minimal risk of contamination, and that the flavors and moisture are locked in during cooking. In this section, we’ll delve into the importance of vacuum-sealing your food correctly and provide essential tips for using a vacuum sealer effectively.
1. Why Vacuum Sealing Is Crucial for Sous Vide Cooking
Vacuum sealing is an integral part of sous vide cooking because it serves several essential functions:
Airtight Seal:
- The vacuum sealer removes all the air from the bag, ensuring that your food is fully enclosed and won’t float to the top of the water bath. This is important because if the bag is not properly sealed, it may affect the cooking process and the food may not cook evenly.
Even Heat Distribution:
- By sealing the food in an airtight bag, you create an efficient barrier that ensures even heat transfer. This allows the sous vide water bath to maintain a consistent temperature, which is critical for precise cooking.
Flavor and Moisture Retention:
- Vacuum sealing locks in the natural juices, marinades, and seasonings, infusing your food with concentrated flavors and preventing moisture loss. This is especially important for meats, which can dry out with traditional cooking methods. Additionally, the food remains tender and juicy as the vacuum-sealed environment prevents the escape of valuable moisture during cooking.
Longer Shelf Life:
- If you’re preparing food in advance, vacuum sealing helps extend the shelf life of your ingredients, whether you plan to store them in the fridge for a few days or freeze them for later use. This also makes meal prep more efficient and allows you to organize your cooking in advance.
2. Choosing the Right Vacuum Sealer
The first step in effective vacuum sealing is selecting the right machine for your needs. There are a few types of vacuum sealers to consider:
External Vacuum Sealers:
- These are the most common types of vacuum sealers and are typically affordable and easy to use. You place the open end of the vacuum bag inside the sealer, which then removes the air and seals the bag. They are great for general sous vide cooking, especially for smaller batches.
Chamber Vacuum Sealers:
- These are typically used in professional kitchens or for large-scale sous vide cooking. They provide a more reliable and stronger vacuum seal and are better for sealing liquids or moist foods. Chamber vacuums are pricier, but they offer superior performance for heavy-duty tasks.
Handheld Vacuum Sealers:
- A portable option that works well for small portions or if you don’t want a bulky machine. These are useful for beginners or casual sous vide enthusiasts who need a budget-friendly vacuum-sealing solution.
3. Selecting the Right Vacuum Sealer Bags
The bags you use for vacuum sealing can make a significant difference in your sous vide experience. Here are a few tips for choosing the right vacuum-seal bags:
Vacuum-Seal Bags vs. Regular Storage Bags:
- Always use vacuum-seal bags designed for sous vide cooking. These bags are specifically engineered to withstand the long cooking times and high temperatures involved in sous vide. Regular plastic storage bags may not hold up and could melt or leak during cooking.
Thickness of the Bag:
- Most vacuum-seal bags are available in different thicknesses. Thicker bags (typically around 4 mils) offer better durability, ensuring that they don’t tear easily, especially when handling sharp-edged foods or bones. Thinner bags are often sufficient for less aggressive use but may not hold up as well under intense pressure.
Pre-Cut vs. Roll Bags:
- Pre-cut vacuum-seal bags are convenient and ready to use, but you might find that vacuum-seal rolls are more versatile, allowing you to customize the size of the bag based on the portion size. Rolls can be cut to your desired length, reducing waste when cooking for smaller or larger batches.
BPA-Free Bags:
- Always ensure that your vacuum-seal bags are BPA-free to avoid harmful chemicals leaching into your food during the sous vide process. Most vacuum-seal brands now offer BPA-free options for health-conscious cooks.
4. Vacuum Sealing Techniques for Best Results
Proper vacuum sealing is key to ensuring your food cooks perfectly. Here are some techniques to keep in mind when vacuum sealing food for sous vide:
Use a Single Layer of Food:
- When vacuum-sealing, ensure that the food is in a single layer within the bag. This will help the heat circulate evenly around the food, leading to uniform cooking. Stacking multiple items can cause uneven heating, especially for larger cuts of meat.
Seal the Bag Tightly:
- Make sure to remove all the air from the bag before sealing. You don’t want any air pockets left behind, as this can affect the cooking process. Proper vacuum-sealing will ensure that the bag remains tight and close to the food, minimizing air exposure.
Leave Space for Expansion:
- If you are cooking foods that may expand during sous vide (like certain vegetables or marinated foods), leave a little extra space at the top of the bag before sealing. This will allow for proper expansion and prevent the bag from bursting during the cooking process.
Sealing Liquids and Marinades:
- When sealing foods with liquids or marinades, there’s a risk that the liquid may be sucked into the vacuum sealer’s chamber, ruining the seal. To avoid this, consider using the water displacement method: Place the food and marinade in a ziplock-style bag and submerge it in water until the bag is almost completely sealed, then close the bag. This method is especially useful for sous vide recipes that involve fish, poultry, or dishes with liquid-based marinades.
Pre-freeze for Liquids or Soft Foods:
- For foods that are particularly moist or contain a lot of liquid (such as raw fish or ground meat), it’s a good idea to pre-freeze the food for about 30 minutes before vacuum sealing. This ensures that the vacuum sealer doesn’t suck out the liquid, leading to a perfect seal every time.
5. Vacuum Sealing for Sous Vide-Specific Foods
Certain foods require special attention when vacuum sealing, especially if you’re working with delicate proteins or items like vegetables. Here are some tailored tips:
Delicate Proteins (Fish and Shellfish):
- Fish, especially delicate fillets like salmon, can easily become mushy if not vacuum sealed properly. Double-bagging fish helps ensure that the seal remains intact and prevents liquid from seeping into the bag. Additionally, consider using a gentle sealing method to avoid crushing the fish.
Vegetables:
- Vegetables should be vacuum sealed loosely, especially if you’re cooking a variety of them. This helps maintain their structure and prevents the bag from becoming too tight, which can lead to crushed vegetables. Avoid overpacking the bag to ensure proper circulation of water around the food.
Sous Vide Desserts:
- For sous vide desserts like custards or cheesecakes, vacuum sealing is essential to maintaining the texture and avoiding unwanted air bubbles. Be sure to use smooth, non-stick vacuum bags to prevent sticking to the sides of the bag.
6. Cleaning and Maintenance of Vacuum Sealers
To ensure longevity and performance, it’s important to keep your vacuum sealer clean and well-maintained. Here are some basic cleaning tips:
- Wipe Down After Use: After each use, wipe the exterior of the vacuum sealer with a damp cloth to remove any food particles or moisture.
- Clean the Vacuum Chamber: For chamber sealers, clean the vacuum chamber regularly to prevent food debris buildup. Use a soft brush or cloth to gently clean the chamber and sealing area.
- Check the Sealing Strip: Over time, the sealing strip on your vacuum sealer may wear out. Ensure that it’s clean and free of debris to maintain a perfect seal.
- Replace Bags and Rolls: If you notice any issues with sealing, it might be due to worn-out vacuum bags or rolls. Keep an extra supply of vacuum-seal bags on hand to ensure you don’t run out mid-cook.
Conclusion: Mastering Vacuum Sealing for Sous Vide Success
Vacuum sealing is an essential skill in sous vide cooking, and using the right techniques and tools can make a huge difference in the quality of your meals. By properly sealing your food, you’ll ensure even cooking, enhanced flavor, and maximum moisture retention. Whether you’re using marinades, herbs, or simply sealing a fresh cut of meat, the vacuum sealer helps you achieve consistent, high-quality results every time. With these tips, you’ll be able to elevate your sous vide cooking and enjoy restaurant-quality dishes at home.

5) Troubleshooting Common Sous Vide Mistakes
Overcooking or Undercooking Your Food: Solutions for Perfect Results Every Time
Sous vide cooking is known for its precision, but even with this controlled method, overcooking or undercooking can still happen if you’re not careful. Understanding how to avoid these issues will ensure that your meals turn out perfectly every time.
Overcooking: Why It Happens and How to Prevent It
Overcooking is one of the less common problems with sous vide cooking, as the process involves cooking at lower, controlled temperatures for long periods. However, it can still occur if the food is left in the water bath for too long or if the temperature is set too high. Overcooked food can become mushy, dry, or lose its desirable texture, particularly with delicate proteins like fish.
Common Causes of Overcooking:
- Excessive Cooking Time: Even with sous vide, food can reach a point where the texture is negatively affected after extended cooking periods. For example, beef steaks or chicken breasts can become dry if cooked for too many hours, even at a low temperature.
- Too High a Temperature: Setting your sous vide machine to a temperature too high for the food you’re cooking can cause the food to overcook. For instance, steaks cooked at temperatures higher than 140°F (60°C) for an extended period might lose their tenderness and become dry.
Solutions for Preventing Overcooking:
- Follow Recommended Time and Temperature Guidelines: Stick to the cooking times and temperatures recommended in sous vide recipes or guides. These recommendations are based on achieving optimal texture and flavor without compromising the quality of the food.
- Use a Timer: Set an alarm or timer when cooking your food. While sous vide cooking is forgiving and has a wide window for cooking time, it’s still best to monitor it to avoid cooking for too long.
- Avoid Excess Cooking Time for Delicate Ingredients: For proteins like fish, shellfish, or tender cuts of meat, avoid cooking for more than the suggested time to retain moisture and texture.
Undercooking: Why It Happens and How to Prevent It
Undercooking is rarer with sous vide, but it can still occur if the water bath isn’t properly maintained or if the food isn’t cooked long enough. Undercooked food may feel tough, cold in the center, or have an uneven texture.
Common Causes of Undercooking:
- Low Water Temperature: If the sous vide machine isn’t maintaining a consistent temperature, the food may not cook through properly. This is especially problematic for dense cuts of meat or large pieces of food.
- Inadequate Cooking Time: While sous vide cooking is forgiving with time, there are minimum cooking times that need to be respected. For instance, a thick steak might require several hours of cooking to achieve the perfect doneness, and skipping this time can result in an undercooked center.
Solutions for Preventing Undercooking:
- Ensure Proper Temperature: Double-check that the immersion circulator is set to the correct temperature for the food you’re cooking. Using a sous vide thermometer can help verify that the water bath is at the right temperature before sealing your food in the bag.
- Follow Minimum Time Guidelines: Respect the minimum cooking times for different cuts of meat or food. For instance, thicker cuts of steak require more time to cook through. Rushing the cooking process can leave the inside undercooked.
- Monitor Water Bath Consistency: Regularly check the water temperature with an external thermometer to ensure it stays within the desired range.
Water Bath and Immersion Circulator Problems: What to Do if the Water Temperature Fluctuates or if Your Circulator Isn’t Working Properly
Sous vide cooking relies heavily on maintaining a stable and consistent water temperature throughout the cooking process. If the water temperature fluctuates or the immersion circulator malfunctions, it can lead to uneven cooking, undercooked food, or even spoiled dishes. Here are some common issues and solutions:
Common Issues with Water Temperature Fluctuations:
- Water Evaporation: As the sous vide machine heats the water, evaporation can occur over long cooking sessions, especially if the water level is too low. This can cause fluctuations in temperature.
- Power Surges or Interruptions: Sometimes, electrical problems or power surges can affect the immersion circulator, causing a temperature drop or fluctuations.
- Poor Circulation: The immersion circulator relies on good water flow to maintain temperature consistency. If the water is not circulating properly, the temperature can become uneven, leading to parts of the food being overcooked while others remain undercooked.
Solutions for Water Temperature Fluctuations:
- Check Water Level Regularly: Ensure that the water level remains above the minimum requirement for your immersion circulator. If necessary, top up the water with warm water to prevent evaporation.
- Use Insulated Covers: To reduce water evaporation, use an insulated cover or lid for the water bath. This helps maintain temperature stability by keeping the heat trapped inside the container.
- Monitor Water Circulation: If you suspect poor circulation, make sure the food bags are not overcrowded or touching the sides of the container. Ensure the immersion circulator is fully submerged and positioned properly to allow even water flow.
- Check the Immersion Circulator’s Settings: Make sure your circulator is functioning properly by checking the settings. If you notice it is not holding the temperature accurately, try resetting it or, in extreme cases, replacing the unit if it’s malfunctioning.
Troubleshooting Circulator Problems:
- Error Codes: Many immersion circulators display error codes when something is wrong. Check the manufacturer’s manual for troubleshooting advice if you see any unusual readings or error messages.
- Test with a Backup: If you suspect a malfunction, test the immersion circulator with a backup unit or use a separate thermometer to ensure that the temperature is accurate and consistent.
- Clean the Circulator: Over time, mineral buildup from water can affect the performance of your circulator. Clean the immersion circulator regularly according to the manufacturer’s instructions to ensure proper functionality.
Vacuum Sealer Issues: Tips for Ensuring a Proper Seal and Preventing Leaks
Vacuum sealing plays a critical role in sous vide cooking. If your vacuum sealer isn’t sealing properly, or if there are leaks, the cooking process can be compromised. Leaks can lead to water entering the bag, which can dilute flavors, change textures, or cause contamination. Here’s how to prevent vacuum sealer issues:
Common Vacuum Sealer Problems:
- Vacuum Bag Leaks: A common problem is the formation of small leaks in the vacuum-seal bag, allowing water to seep inside. This often happens if there are sharp edges, like bones, in the food or if the bag is not sealed properly.
- Inconsistent Seals: If your vacuum sealer is failing to create a consistent or tight seal, the air may not be fully evacuated, leading to uneven cooking or floating bags.
- Overheating of the Sealer: If you use your vacuum sealer too frequently or for long periods, it can overheat, resulting in weak seals or failed attempts at sealing the bags properly.
Solutions for Preventing Vacuum Sealer Issues:
- Check the Bag for Tears: Before sealing the bag, inspect it for any potential tears or punctures, especially around bones or sharp edges. For meats with bones, consider double-bagging to prevent any leaks.
- Use the Right Bags: Make sure you’re using bags specifically designed for sous vide cooking. Standard storage bags may not be durable enough to withstand the heat or pressure involved in the sous vide process.
- Ensure a Tight Seal: Double-check that the bag is placed correctly in the vacuum sealer. For external sealers, make sure the open end of the bag is flat and straight on the sealing strip to prevent air from being trapped.
- Seal in Batches: If you’re sealing multiple bags, take breaks between each sealing to allow the vacuum sealer to cool down. This prevents overheating and ensures that each bag gets a strong, consistent seal.
- Avoid Overstuffing Bags: When sealing, avoid overfilling the bags with food, as it can create uneven pressure and result in weak seals. Leave enough room at the top to ensure a proper vacuum and seal.
- Use the Water Displacement Method for Liquid-Based Foods: If you’re cooking foods with a lot of liquids (e.g., marinated meats or fish), consider using the water displacement method. Submerge the bag in water before sealing it to push out excess air, which will help prevent leaks during cooking.
Conclusion: Troubleshooting Sous Vide Problems for Perfect Meals Every Time
When using sous vide cooking, it’s essential to stay vigilant about potential problems such as overcooking, water temperature fluctuations, and vacuum sealer issues. By knowing the common causes of these issues and applying practical solutions, you can ensure that your sous vide meals turn out perfectly every time. Whether it’s fine-tuning the temperature, properly maintaining your equipment, or taking extra care with sealing your bags, attention to detail will help you achieve exceptional results in your sous vide cooking.
Conclusion
Conclusion: Perfect Meals Every Time with Sous Vide
Sous vide cooking offers an unparalleled level of precision, allowing you to achieve perfect results with minimal effort. By maintaining a consistent temperature and carefully controlling the cooking process, sous vide allows you to elevate your cooking, bringing out the best in meats, vegetables, fish, and even desserts. The benefits are clear: enhanced flavor, tender textures, and restaurant-quality dishes prepared right at home.
Whether you’re perfecting a juicy steak, making tender chicken breasts, or experimenting with unique vegetable recipes, sous vide is a game-changer in the kitchen. It allows for maximum flavor infusion, ensures moisture retention, and helps you avoid the common pitfalls of traditional cooking methods like overcooking or undercooking.
We encourage you to dive into the sous vide experience by trying the recipes shared here. Whether you’re a novice or an experienced cook, the precision and convenience of sous vide will open up a world of culinary possibilities. Experiment with different cuts of meat, vegetables, and seasonings to unlock your full potential in the kitchen. The key to mastering sous vide cooking is practice—and with each meal, you’ll become more comfortable and confident in the process.
So, why not give it a try today? Your next perfect meal is just a water bath away!