
Introduction
Italian bread recipe is a staple in Italian cuisine, known for its crispy crust, airy texture, and rich flavor. Whether served alongside a hearty pasta dish, used to make a delicious sandwich, or simply enjoyed with olive oil and balsamic vinegar, this rustic Italian bread is a must-have in any kitchen.
With this easy recipe for crusty bread, you’ll learn how to make a classic Italian loaf right at home—no professional baking experience required! Using simple ingredients like bread flour, yeast, salt, warm water, and olive oil, you can create a golden, crusty bread with a soft, chewy interior.
Follow this step-by-step guide to bake the best Italian bread recipe, perfect for any occasion!
1) What Makes Italian Bread Special?
Traditional Ingredients and Techniques
Bread Flour: The Key to Structure and Texture
Bread flour is the foundation of a great Italian bread recipe. Unlike all-purpose flour, bread flour has a higher protein content, typically around 12-14%, which helps develop gluten—essential for creating the chewy, airy texture that defines rustic Italian bread. Using the right flour ensures a strong dough structure, preventing a dense or crumbly loaf.
For a more artisan-style crusty bread, some bakers mix bread flour with a small portion of semolina flour or whole wheat flour for added depth of flavor and texture.
Yeast: Activating the Rising Power
Yeast is the ingredient responsible for fermentation, allowing Italian bread dough to rise and develop its characteristic light and fluffy interior. There are three main types of yeast commonly used in baking:
- Active Dry Yeast – Requires activation in warm water before mixing with the flour.
- Instant Yeast – Can be mixed directly with dry ingredients for a faster rise.
- Fresh Yeast – Used by professional bakers for enhanced flavor and texture but requires refrigeration.
Proper yeast activation is crucial. Using warm water between 100–110°F (37–43°C) helps activate the yeast without killing it. Adding a small amount of sugar to the mixture can help jumpstart fermentation.
Fermentation: The Secret to Flavor Development
Fermentation is a key step in creating an authentic Italian bread recipe, as it develops complex flavors and improves the bread’s structure. A slow, cold fermentation process (letting the dough rise in the refrigerator overnight) enhances the final taste, giving the bread a slightly tangy and rich flavor.
The process involves two main rises:
- First Rise (Bulk Fermentation): The dough is left to rest and rise for 1–2 hours at room temperature, allowing the yeast to produce carbon dioxide and expand the dough.
- Second Rise (Proofing): After shaping, the dough undergoes a final rise before baking, which ensures a light, airy texture.
In traditional rustic Italian bread, bakers often use a pre-ferment like biga (an Italian-style starter) to improve the depth of flavor and enhance the bread’s chewiness.
Rustic vs. Classic Italian Bread
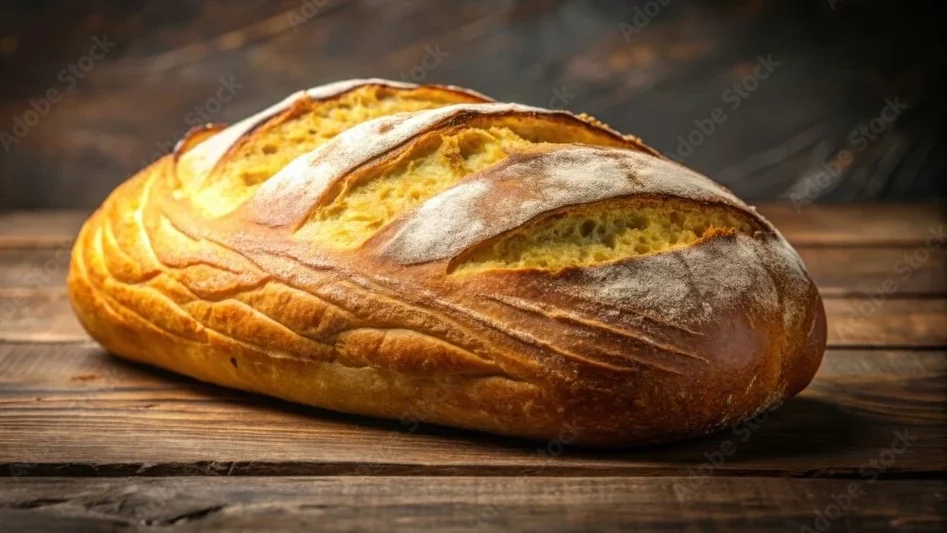
Rustic Italian Bread: A Traditional, Artisan Approach
Rustic Italian bread is known for its thick, crispy crust and open crumb structure. It is often made using minimal ingredients—bread flour, water, yeast, and salt—with little to no added fats or sugars. The dough typically undergoes a long fermentation process, which enhances flavor and creates the characteristic chewy texture with large air pockets.
This type of bread is often shaped by hand, giving it an irregular, artisan appearance. Many bakers use techniques like stretch-and-fold instead of traditional kneading, allowing the dough to develop structure naturally. Rustic Italian bread is often baked directly on a baking stone or in a Dutch oven, which helps achieve a crisp, golden-brown crust.
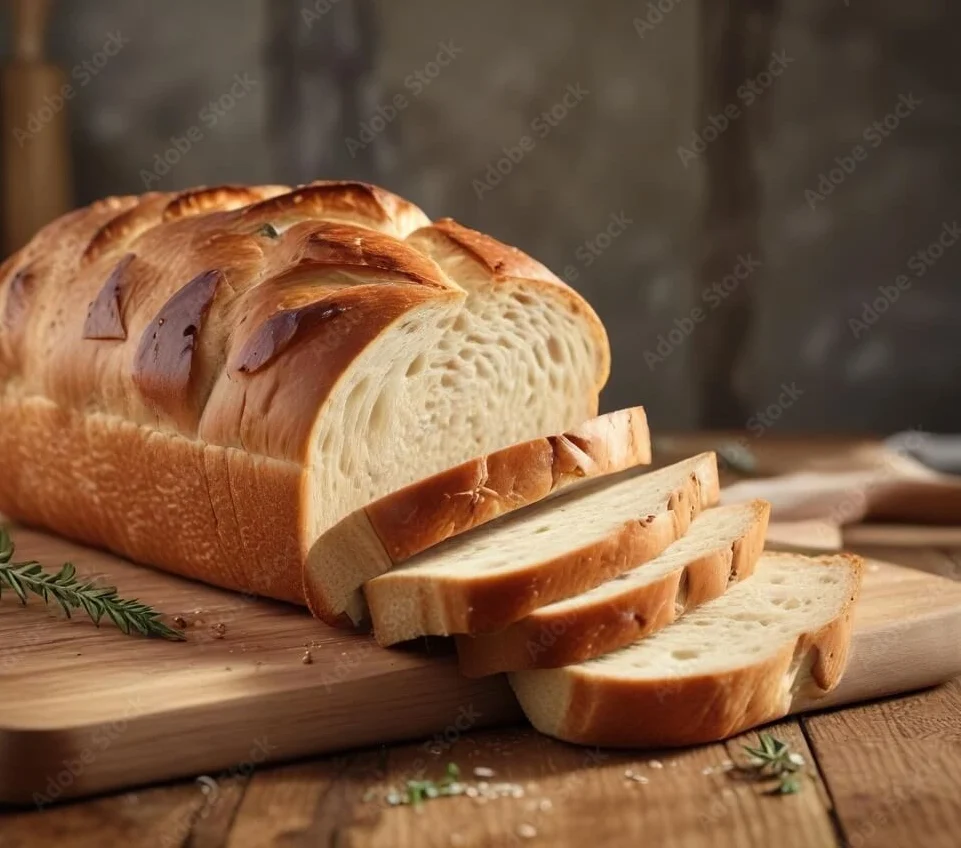
Classic Italian Loaf: Soft and Versatile
A classic Italian loaf has a softer crust and a finer crumb, making it ideal for sandwiches, garlic bread, and general daily use. Unlike rustic Italian bread, which is typically lean, a classic loaf often includes olive oil, milk, or eggs, adding richness and a slightly tender texture.
The shaping process for a classic Italian loaf is more uniform, usually done in a loaf pan to create a structured, evenly shaped bread. It has a shorter proofing time compared to rustic Italian bread, resulting in a denser crumb with fewer air pockets. Some versions may also incorporate a light egg wash or butter glaze to enhance the golden crust.
Which One Should You Choose?
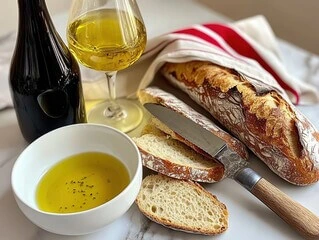
Both rustic and classic Italian bread have their unique qualities, and the choice depends on personal preference and intended use. Rustic Italian bread is perfect for dipping in olive oil and balsamic vinegar, serving with charcuterie, or pairing with soups. Classic Italian bread, with its softer texture, works well for sandwiches, paninis, and toast.
Perfect Crust and Texture
The Role of Kneading in Gluten Development
Kneading is a crucial step in achieving the ideal texture of Italian bread. It helps develop gluten, the protein responsible for the dough’s elasticity and structure. Proper kneading ensures that the bread has a chewy yet soft interior and maintains its shape during baking.
The ideal kneading process involves stretching and folding the dough repeatedly until it reaches the right consistency. A well-kneaded dough should pass the windowpane test, meaning it can be stretched thin without tearing. Over-kneading can make the bread too tough, while under-kneading results in a dense, crumbly texture.
For a more rustic Italian bread, some bakers use a no-knead method, allowing time and fermentation to naturally develop gluten instead of manual kneading. This approach results in a more open crumb structure with larger air pockets.
Proofing: The Key to a Light and Airy Crumb
Proofing, or allowing the dough to rise, is essential for achieving a light, airy interior. The yeast ferments the dough, creating carbon dioxide, which causes it to expand. Proper proofing results in a well-developed structure with an even crumb.
Italian bread typically goes through two proofing stages:
- Bulk Fermentation (First Rise): This step allows the dough to develop flavor and structure, usually lasting 1 to 2 hours at room temperature or overnight in the refrigerator for enhanced flavor.
- Final Proofing (Second Rise): After shaping, the dough is left to rise again before baking. This ensures a good oven spring and prevents the bread from being too dense.
Over-proofing can cause the dough to collapse, leading to a flat, deflated loaf, while under-proofing results in a dense, tight crumb. A well-proofed dough will be slightly puffy but still hold its shape when gently pressed.
Achieving the Perfect Crust: Steam and High Heat
The secret to a crusty exterior lies in steam and high-temperature baking. Steam in the oven keeps the dough surface moist during the initial baking phase, allowing it to expand before forming a crisp crust. Traditional methods to introduce steam include:
- Spraying water into the oven at the start of baking.
- Placing a pan of hot water on the oven’s lower rack.
- Using a Dutch oven to trap steam naturally.
Baking at a high temperature (450°F/230°C) ensures that the Maillard reaction occurs, giving the crust its deep golden-brown color and slightly nutty flavor. Cooling the bread on a wire rack after baking helps maintain its crisp texture by preventing trapped steam from softening the crust.
2) Step-by-Step Guide to Making Italian Bread at Home
Ingredients You’ll Need
Bread Flour: The Foundation of Italian Bread
Bread flour is essential for achieving the perfect texture in Italian bread. It has a higher protein content (12-14%) than all-purpose flour, allowing for better gluten development. Gluten gives the bread its characteristic chewy texture and airy crumb, making it an indispensable ingredient.
Some variations of rustic Italian bread incorporate semolina flour or a mix of whole wheat flour to enhance flavor and texture. However, using 100% bread flour results in the most traditional loaf with a light, airy interior and crisp crust.
Yeast: The Leavening Agent
Yeast is responsible for fermentation, which creates the rise and structure of the bread. There are three types of yeast commonly used in Italian bread baking:
- Active Dry Yeast – Requires activation in warm water before mixing with other ingredients.
- Instant Yeast – Can be added directly to the flour and does not need proofing.
- Fresh Yeast – Often used by professional bakers for its superior flavor and performance.
For a well-risen loaf, yeast should be activated in warm water (100–110°F or 37–43°C) to ensure it functions properly. Adding a pinch of sugar can help kickstart fermentation.
Salt: Enhancing Flavor and Controlling Fermentation
Salt is more than just a flavor enhancer—it plays a critical role in controlling yeast activity. Without salt, the yeast ferments too quickly, leading to an over-expanded, weak dough. The right amount of salt strengthens the gluten structure, allowing for better shape retention and a balanced, complex flavor.
Most traditional Italian bread recipes use fine sea salt or kosher salt for a clean, pure taste. It’s important to avoid direct contact between salt and yeast before mixing, as salt can inhibit yeast activity.
Olive Oil: Adding Depth and Moisture
Olive oil is a common ingredient in classic Italian bread, giving it a tender crumb and subtle richness. It enhances the overall mouthfeel of the bread and contributes to a slightly softer crust.
Extra virgin olive oil provides the best flavor, lending a mild fruitiness to the dough. In some variations, melted butter or vegetable oil can be used instead, but for an authentic Italian bread recipe, high-quality olive oil is preferred.
Sugar: Feeding the Yeast and Balancing Flavor
While not always included in rustic Italian bread, sugar helps to:
- Speed up fermentation by providing an additional food source for the yeast.
- Enhance browning by promoting caramelization during baking.
- Soften the texture, especially in classic Italian loaves.
Small amounts of honey or malt syrup can be used instead of sugar for a more complex sweetness.
Warm Water: Activating the Ingredients
Water is essential for hydrating the flour, activating the yeast, and forming the dough. The ideal water temperature is 100–110°F (37–43°C)—warm enough to activate the yeast but not too hot to kill it.
Some bakers use filtered or spring water to avoid chlorine, which can inhibit yeast activity. The right water-to-flour ratio determines the dough’s hydration level, which affects the final texture of the bread. Higher hydration levels lead to a softer crumb and larger air pockets, common in artisan-style rustic Italian bread.
Kneading and Proofing the Dough
The Importance of Kneading for Gluten Development
Kneading is a crucial step in making Italian bread, as it develops gluten, the protein responsible for the bread’s chewy texture and airy crumb. When flour is mixed with water, gluten strands form and create an elastic network that traps carbon dioxide, allowing the dough to rise properly.
The kneading process stretches and strengthens the gluten, ensuring that the bread has a light yet structured interior. Hand-kneading typically takes 8–10 minutes, while using a stand mixer with a dough hook requires about 5–7 minutes on low speed.
A well-kneaded dough should be smooth, elastic, and slightly tacky but not sticky. The windowpane test is a reliable way to check if the gluten is fully developed—stretch a small piece of dough between your fingers; if it forms a thin, translucent membrane without tearing, it’s ready.
For rustic Italian bread, some bakers prefer the no-knead method, which relies on a long fermentation time to naturally develop gluten. This results in an open crumb structure with large air pockets.
Bulk Fermentation: The First Rise
After kneading, the dough needs time to rise and develop flavor. This process, known as bulk fermentation, allows the yeast to feed on the flour’s natural sugars, producing carbon dioxide that makes the dough expand.
For traditional Italian bread, the dough should rise in a lightly greased bowl, covered with a clean towel or plastic wrap, for 1–2 hours at room temperature or until it doubles in size. To enhance flavor and texture, some bakers opt for a slow, overnight fermentation in the refrigerator, which deepens the bread’s taste and improves its structure.
The ideal proofing temperature is between 75–80°F (24–27°C). A colder environment slows down fermentation, while excessive heat can over-activate the yeast, leading to over-proofed dough that collapses.
Shaping and Final Proofing
Once the dough has completed its first rise, it needs to be gently deflated and shaped. The shaping process creates surface tension, which helps the dough maintain its structure during baking.
For a classic Italian loaf, the dough is typically shaped into:
- Batards (oval loaves) for a traditional look.
- Boule (round loaves) for a more rustic presentation.
- Baguette-style loaves with a crisp crust and elongated shape.
After shaping, the dough undergoes its final proofing, allowing it to rise once more before baking. This stage lasts 30–60 minutes, depending on room temperature. A well-proofed dough should spring back slowly when gently pressed with a fingertip. If it deflates immediately, it is over-proofed; if it bounces back too quickly, it needs more time.
For an artisan-style crusty Italian bread, the loaves are often proofed in a banneton (proofing basket) lined with flour, which helps maintain shape and creates a beautiful textured crust.
Baking for the Perfect Crust
Using a Baking Stone for Authentic Crusty Bread
A baking stone, also known as a pizza stone, is one of the best tools for achieving a crusty exterior in Italian bread. It retains heat evenly and distributes it across the dough, allowing the bread to bake from the bottom up, creating a crispy, golden-brown crust.
To use a baking stone:
- Preheat your oven with the stone inside for 30–45 minutes at a high temperature (usually 450°F/230°C or higher).
- Once the dough is proofed and ready for baking, carefully transfer it to the preheated stone using a baking peel or a parchment paper transfer.
- The intense, direct heat from the stone ensures that the dough expands quickly in the first few minutes of baking, promoting a nice oven spring and forming the signature crisp crust.
If you don’t have a stone, you can achieve a similar effect by using a cast iron pan or Dutch oven, which retains heat and creates a similar baking environment.
Baking with a Loaf Pan for Consistency and Shape
Using a loaf pan can be helpful for creating a more uniform shape and a slightly softer, more controlled crust. This method is especially useful for recipes that require a tighter, less rustic crumb or a bread with more volume.
When using a loaf pan:
- Shape your dough into a tight, smooth loaf and place it into a greased pan.
- For best results, let the dough rise in the pan for its final proofing before baking.
- Bake at 375°F–400°F (190°C–200°C) for a slightly lower heat to ensure the bread cooks through while maintaining a crisp outer layer.
Loaf pans create a softer, more uniform crust, but for a rustic, deeply crunchy exterior, using a baking stone or Dutch oven may be more suitable.
Steam for a Crispier, More Delicious Crust
To achieve the perfect crust in Italian bread, steam is essential during the initial stage of baking. Steam helps to keep the dough’s surface moist for the first few minutes, allowing it to expand fully before the crust forms.
There are several ways to add steam in the oven:
- Place a pan of hot water in the oven as it preheats. The steam generated will create a moist baking environment that encourages expansion and results in a glossy, crisp crust.
- Spray water into the oven with a spray bottle just after placing the dough inside, ensuring it’s done in the first 10 minutes of baking.
- Use a Dutch oven with a lid to trap steam inside, creating an even crust while allowing the bread to rise without excessive heat loss.
After the first 15–20 minutes of baking, remove the steam source and continue baking until the bread achieves a deep golden-brown color and a satisfying crunch. This helps form the signature crusty, chewy texture that is characteristic of Italian breads.
3) Tips for Perfecting Your Rustic Italian Bread
Choosing the Right Flour
Bread Flour: The Ideal Choice for Crusty Italian Bread
Bread flour is specifically designed for making breads with a chewy, structured crumb and a crispy crust. It has a higher protein content (12-14%) compared to all-purpose flour, which is essential for developing strong gluten networks during kneading. The protein in bread flour creates gluten—the stretchy, elastic substance that gives bread its desirable texture.
When making rustic Italian bread, bread flour helps the dough maintain its shape while rising and baking, resulting in a high, airy loaf with a thick, crisp crust. This type of flour allows for better oven spring, meaning the dough will expand more during the initial moments of baking, producing the ideal texture both inside and out.
All-Purpose Flour: A More Versatile Option
While all-purpose flour is more commonly used in general baking, it’s a more neutral flour with a lower protein content (typically around 9-11%). It can still be used to make bread, but the texture may not be as chewy or the crust as crisp as with bread flour. The lower protein levels in all-purpose flour result in less gluten development, which can lead to a denser, softer loaf compared to crusty Italian bread made with bread flour.
All-purpose flour is often preferred for making softer breads like sandwich loaves or pastries, but if you’re looking to make traditional Italian bread, bread flour will provide better results. However, in a pinch, a mixture of all-purpose flour and bread flour can be used to balance texture and tenderness while still achieving a satisfying result.
Can You Use All-Purpose Flour for Crusty Bread?
It’s possible to use all-purpose flour for crusty bread, but keep in mind that the resulting loaf may have a slightly different texture and crust. The bread’s crumb may be softer, and the crust might not develop the same crispness that bread flour imparts. To counteract this, some bakers add a little extra vital wheat gluten to all-purpose flour to boost protein content and help achieve a more traditional texture.
For those new to bread baking, starting with all-purpose flour is a good way to learn the process. However, if you’re aiming for a true rustic Italian bread with a perfect crust and chewy interior, bread flour is the way to go.
How to Get a Crispy Crust
The Role of Steam in the Oven
Creating a crispy crust on your Italian bread requires a steamy environment in the oven during the early stages of baking. Steam prevents the bread’s surface from drying out too quickly, allowing the dough to expand fully and develop a beautiful, crispy exterior. Without steam, the crust forms too early, restricting the rise and resulting in a thicker, less crisp crust.
To introduce steam into your oven, there are a few effective methods:
- Place a pan of water on the bottom rack of the oven while it preheats. The steam from the evaporating water will help keep the dough moist during the first 10–15 minutes of baking.
- Spray water onto the bread and oven walls with a spray bottle just as the dough is placed into the oven. This bursts the steam directly onto the surface, enhancing the oven spring and crust formation.
- Use a Dutch oven with a lid to trap steam around the dough for the initial baking period. This method creates a mini-steam environment, ensuring an evenly crisped crust without drying out the interior too quickly.
The steam helps the dough rise fully, and once the initial rise is complete, removing the steam from the oven will allow the crust to become golden and crunchy.
Brushing with Olive Oil for a Golden Finish
Brushing the surface of your dough with olive oil before baking is a classic technique used to enhance the color and texture of the crust. Olive oil adds richness and a light, glossy finish, making the bread visually appealing and extra delicious. It also helps to create a crispy, slightly chewy crust that has a pleasant mouthfeel.
To use olive oil effectively:
- Brush the top of the shaped dough with extra virgin olive oil before the final proofing and again before baking. This will give the loaf a deep golden hue and enhance its crispiness.
- For an added flavor boost, mix a pinch of salt or herbs (such as rosemary or thyme) with the olive oil for an aromatic touch.
- Olive oil also helps protect the dough from drying out during proofing, ensuring that the bread retains its moisture.
Brushing olive oil just before baking is ideal for rustic-style Italian loaves, as it forms an appetizing crust with a rich flavor and satisfying texture.
The Perfect Balance of Steam and Oil
To achieve the perfect combination of a crispy crust and tender interior, balancing steam and olive oil is key. Using steam to allow the dough to expand fully before the crust hardens, then brushing the dough with olive oil to create a beautiful, golden exterior, gives your bread the best of both worlds. The result will be a crusty Italian loaf with a perfectly chewy and airy interior, all complemented by a flavor-packed crust.
Storage and Serving Suggestions
Best Ways to Store Homemade Italian Bread
To keep your homemade Italian bread fresh, proper storage is essential. Italian bread has a wonderful crispy crust when freshly baked, but it can become soggy or stale if stored incorrectly. The key is to strike a balance between maintaining the crust and keeping the interior soft.
For short-term storage (1-2 days):
- Room Temperature: Store your bread in a paper bag or cloth bread bag to allow airflow, which helps preserve the crust’s crispiness. Avoid plastic bags, as they trap moisture, leading to a soft or soggy crust.
- If you don’t have a bread bag, you can wrap the bread loosely in a clean kitchen towel. This will help the bread retain its moisture while maintaining some crispness in the crust.
- Keep it in a cool, dry place, like a bread box or a countertop. Avoid storing it in the fridge, as this can cause the bread to dry out and lose its flavor.
For longer-term storage (3-7 days):
- Freezing: If you have more bread than you can eat in a few days, freezing is an excellent option. Slice the bread before freezing so you can easily toast individual slices. Wrap it tightly in plastic wrap or foil, and then place it in a freezer-safe bag. When you’re ready to enjoy it, simply toast or bake it directly from frozen to restore some of its original crispiness.
- Avoid refrigerating the bread unless necessary, as it can make the texture deteriorate quickly.
Serving Suggestions for Italian Bread
Italian bread is incredibly versatile, making it perfect for a variety of dishes and occasions. Its crispy crust and soft interior lend themselves well to different serving ideas, from simple snacks to hearty meals.
- With Olive Oil and Balsamic Vinegar: A classic way to serve Italian bread is by dipping it in high-quality olive oil paired with balsamic vinegar. The bread soaks up the rich oil, while the vinegar adds a tangy depth of flavor. This is a popular appetizer or side for many Italian meals.
- As a Sandwich Base: Italian bread’s chewy texture makes it an excellent base for sandwiches. Use it to make paninis, or load it up with fresh veggies, meats, and cheeses for a delicious sandwich. It pairs especially well with salami, prosciutto, or mozzarella.
- With Soups and Stews: Serve your Italian bread alongside hearty soups like minestrone or tomato basil soup. The crusty bread can be used to dip into the soup, soaking up all the flavorful broth, or even be toasted and served on top as a crunchy garnish.
- With Cheese and Charcuterie: The bread’s texture is perfect for pairing with a cheese platter. Serve it with aged cheeses like parmesan, pecorino, or creamy varieties like burrata. Add some salami, prosciutto, or marinated olives for a complete antipasto experience.
- Garlic Bread: You can turn your homemade Italian bread into garlic bread by brushing it with a mixture of butter, garlic, and parsley, then toasting it in the oven until golden and crispy. This makes a great side dish for pasta or a delicious snack on its own.
Creative Ways to Use Leftover Italian Bread
If you have any leftover bread, don’t throw it away! There are plenty of ways to repurpose it:
- Bread Crumbs: Turn your leftover Italian bread into fresh breadcrumbs by tearing it into pieces and processing it in a food processor. Use the breadcrumbs for coating meats, making meatballs, or adding texture to casseroles.
- Panzanella (Bread Salad): This Italian bread salad uses chunks of day-old bread combined with tomatoes, cucumbers, red onions, and a tangy vinaigrette. It’s a perfect summer dish that makes use of any leftover bread.
- Bread Pudding: For a sweet treat, transform your leftover bread into a bread pudding. Combine it with eggs, milk, sugar, and your choice of spices for a rich, comforting dessert.
With the right storage methods and creative serving suggestions, your homemade Italian bread can elevate any meal or be repurposed into new, exciting dishes!

4) Variations and Flavor Enhancements
Garlic and Herb Italian Bread
Enhancing Flavor with Garlic
Garlic is a classic addition to Italian bread that brings a rich, savory depth to the loaf. By incorporating garlic into your dough or brushing the finished loaf with a garlic-infused butter, you can create a fragrant, flavorful bread that pairs perfectly with pasta dishes, soups, or salads.
To add garlic to your bread:
- Roasted Garlic in the Dough: Roasting the garlic before incorporating it into the dough mellows its flavor, providing a subtle yet rich aroma that complements the bread’s natural flavors. Simply mash the roasted garlic and mix it into the dough before the final kneading.
- Garlic-Infused Olive Oil: For an extra layer of flavor, infuse olive oil with minced garlic. Brush this mixture onto the dough’s surface before baking or drizzle it over the bread after it comes out of the oven for a garlic-infused finish.
- Fresh Garlic for a Punch: If you prefer a more robust garlic flavor, finely chop fresh garlic and mix it into the dough. This will provide a more intense garlic flavor that’s especially good for savory pairings like antipasto or cheese platters.
Incorporating Fresh Rosemary
Rosemary is a quintessential herb in Italian cooking, and it works beautifully in Italian bread. The earthy, pine-like aroma of rosemary adds a sophisticated touch to the bread, making it ideal for special occasions or to complement Italian dishes like roast meats or pasta.
To incorporate rosemary into your bread:
- Fresh Chopped Rosemary in the Dough: Finely chop fresh rosemary and knead it into the dough during the mixing phase. The oil in the rosemary will infuse the bread with a pleasant herby flavor as it bakes.
- Rosemary Sprigs on Top: Place a few sprigs of fresh rosemary on top of the dough just before baking. The rosemary’s oils will release during baking, creating a fragrant, crispy top layer.
- Rosemary Oil Brush: After baking, brush the bread with rosemary-infused olive oil to intensify the flavor and add a beautiful gloss to the crust.
Adding Oregano for a Mediterranean Twist
Oregano is another popular herb in Italian cuisine, known for its bold, slightly peppery flavor. When added to Italian bread, oregano enhances the overall flavor profile, bringing a Mediterranean twist to the loaf. Oregano pairs wonderfully with garlic and olive oil, making it a natural choice for herb-infused bread.
To add oregano to your bread:
- Mix Oregano into the Dough: Add dried oregano to your dough during the initial mixing phase. It will infuse the bread with its robust flavor as it bakes.
- Oregano Olive Oil Drizzle: Combine dried oregano with olive oil and brush it over the dough just before baking. The olive oil helps the oregano to spread evenly across the crust, ensuring every bite is full of herby goodness.
- Oregano on Top: Sprinkle a bit of dried oregano over the top of your shaped dough right before baking to create a herb-crusted top with an aromatic finish.
The Perfect Blend of Herbs
Combining garlic, rosemary, and oregano can create an incredibly aromatic and flavorful loaf of Italian bread. By mixing these herbs into the dough or using them to top the bread, you’ll end up with a delicious loaf that’s perfect for serving with Mediterranean-inspired dishes, or simply enjoying on its own with a good balsamic vinegar and olive oil dip.
No-Knead Italian Bread Version
Why Choose a No-Knead Method?
The no-knead bread method offers a simplified approach for those who want to enjoy homemade crusty Italian bread without the time and effort required for traditional kneading. This method is perfect for busy bakers or those who want to skip the strenuous task of kneading while still getting that desirable crispy crust and soft interior. By relying on long fermentation, the dough develops flavor naturally, so it’s a great way to make rustic Italian bread with minimal effort.
The benefits of this approach include:
- Hands-off Preparation: After mixing the ingredients, there’s no need to knead the dough. Simply let it rest, and the dough will gradually rise over time.
- Flavor Development: The long fermentation process allows the dough to develop deep, complex flavors. The slow rise helps achieve the slightly tangy taste that is characteristic of artisan-style Italian bread.
- Crispy, Crunchy Crust: No-knead bread typically has an amazing crusty exterior because of the long, slow rise and baking at high temperatures. The dough’s surface gets beautifully crisped while maintaining a soft, airy inside.
The Simplified Process
The process of making no-knead Italian bread is incredibly straightforward, focusing on minimal steps while delivering maximum flavor and texture. Here’s how to prepare the dough without kneading:
- Mixing the Ingredients: Combine bread flour, yeast, water, and a pinch of salt in a large bowl. The dough will be shaggy and slightly sticky. Stir it together until all the flour is hydrated.
- Letting It Rest: Cover the bowl with a damp towel or plastic wrap and leave the dough to rest at room temperature for about 12-18 hours. This slow fermentation allows the yeast to work its magic and develop the flavor.
- Shaping the Dough: After the dough has risen, gently fold it over on itself a few times to form a loose ball. There’s no need to punch down or knead it!
- Second Rise: Place the dough on a well-floured surface or in a proofing basket and let it rise for another hour or two before baking.
- Baking: Preheat the oven to a high temperature, typically around 475°F (245°C). For an authentic touch, you can bake the bread in a Dutch oven to help it achieve that iconic crusty exterior. Bake for about 30 minutes, then remove the lid and bake for another 10-15 minutes to achieve a golden-brown crust.
Perfecting the No-Knead Texture
The beauty of no-knead Italian bread lies in the way the dough forms a wonderful gluten structure without any need for manual kneading. The long rise ensures the dough gets enough time to develop air bubbles, creating a light and airy interior. The crust, while slightly thicker than with a kneaded dough, becomes beautifully crisp and crunchy due to the steam and the high baking temperature.
To further enhance the texture of your no-knead bread:
- Use a Dutch Oven: Baking the bread in a preheated Dutch oven creates a steamy environment, which helps the bread rise further and results in a beautiful, crunchy crust.
- Score the Dough: Before baking, score the top of the dough with a sharp knife. This allows the bread to expand evenly while baking and helps achieve a rustic look.
Variations to Try with No-Knead Italian Bread
Once you’ve perfected the basic no-knead bread, you can experiment by adding flavor variations. Try incorporating herbs like rosemary, thyme, or oregano, or mix in garlic for extra flavor. You can also add olive oil to the dough to enrich the flavor and create a softer crumb. For a cheese-stuffed version, fold in grated parmesan or mozzarella before the second rise.
The no-knead version of Italian bread provides an easy yet satisfying way to bake at home, resulting in a loaf that rivals the best artisan breads without the complexity of traditional bread-making methods.
Whole Wheat and Multigrain Options
Substituting Bread Flour with Whole Wheat Flour
Substituting bread flour with whole wheat flour is a great way to make your Italian bread healthier while still maintaining its rustic charm. Whole wheat flour is made from the entire grain, which includes the bran, germ, and endosperm, giving it a richer flavor and higher nutritional content compared to white bread flour. When making whole wheat Italian bread, the texture will be denser, with a slightly nuttier and earthier taste.
To ensure your bread rises well with whole wheat flour, consider the following tips:
- Add Vital Wheat Gluten: Whole wheat flour can sometimes make bread denser due to its lower gluten content. Adding vital wheat gluten (about 1-2 tablespoons per cup of whole wheat flour) can help boost the bread’s structure and rise, giving it a more desirable texture.
- Adjust Hydration: Whole wheat flour absorbs more water than white flour, so you may need to increase the amount of liquid in your recipe by 1-2 tablespoons. This helps the dough stay soft and easier to work with.
- Use a Higher Ratio of Whole Wheat to White Flour: Start with a ratio of 50-70% whole wheat flour to white bread flour. This allows you to enjoy the health benefits of whole wheat while still achieving a light, airy texture. If you go with 100% whole wheat, the bread will be heavier and denser but still delicious.
Multigrain Italian Bread
For a more complex flavor and added nutrition, you can create multigrain Italian bread by mixing different types of flours and grains into the dough. Adding seeds like sunflower seeds, flaxseeds, and pumpkin seeds or incorporating grains like oats, spelt, or rye creates a hearty, flavorful loaf that’s packed with fiber, vitamins, and minerals. Multigrain bread can add a nice texture and crunch, making it perfect for serving with soups, salads, or as a sandwich bread.
Here’s how to incorporate multigrain elements into your bread:
- Add Seeds to the Dough: Incorporate seeds like sesame seeds, chia seeds, or sunflower seeds directly into your dough. You can mix them in during the kneading phase or sprinkle them on top of the dough before baking for added texture and visual appeal.
- Flour Variations: In addition to whole wheat flour, you can experiment with other flours like rye flour, spelt flour, or even oat flour to add richness to your dough. These flours can add complexity to the flavor while still contributing to the bread’s chewy texture.
- Soaked Grains for Moisture: If you’re adding grains like steel-cut oats or quinoa, soak them in water overnight to soften them before incorporating them into the dough. This helps them integrate more smoothly into the bread, ensuring a better texture and even distribution of grains.
Health Benefits of Whole Wheat and Multigrain Bread
Switching to whole wheat or multigrain bread gives your homemade Italian bread an additional boost of nutrients. Whole wheat flour is rich in fiber, which supports digestive health, helps regulate blood sugar levels, and provides a steady source of energy. The added seeds and grains in multigrain bread contribute healthy fats, protein, and antioxidants, making the bread more filling and nutritious.
Whole wheat and multigrain breads are great options for anyone looking to make healthier choices without sacrificing the delicious, rustic texture and flavor of traditional Italian bread. These variations are perfect for those following a high-fiber diet or anyone looking to incorporate more grains and seeds into their daily meals.
Conclusion
Making Italian bread at home is easier than you might think, and the results are incredibly rewarding. Whether you’re trying a traditional rustic Italian bread, experimenting with a no-knead version, or opting for a healthier whole wheat or multigrain twist, homemade bread allows you to enjoy that perfect crusty exterior and soft interior that store-bought versions can’t match. The simplicity of the ingredients—bread flour, yeast, olive oil, and a bit of patience—is all you need to create a loaf that’s as satisfying as it is delicious.
We encourage you to try this easy crusty bread recipe yourself. Feel free to experiment with different variations, and don’t forget to share your results! There’s nothing like the pride of pulling a freshly baked loaf of Italian bread out of your oven. If you’re inspired, dive deeper into Italian cuisine by exploring more bread recipes or other classic dishes, and let your baking journey continue!
1 réflexion au sujet de « How to Make the Best Italian Bread Recipe: A Step-by-Step Guide »