
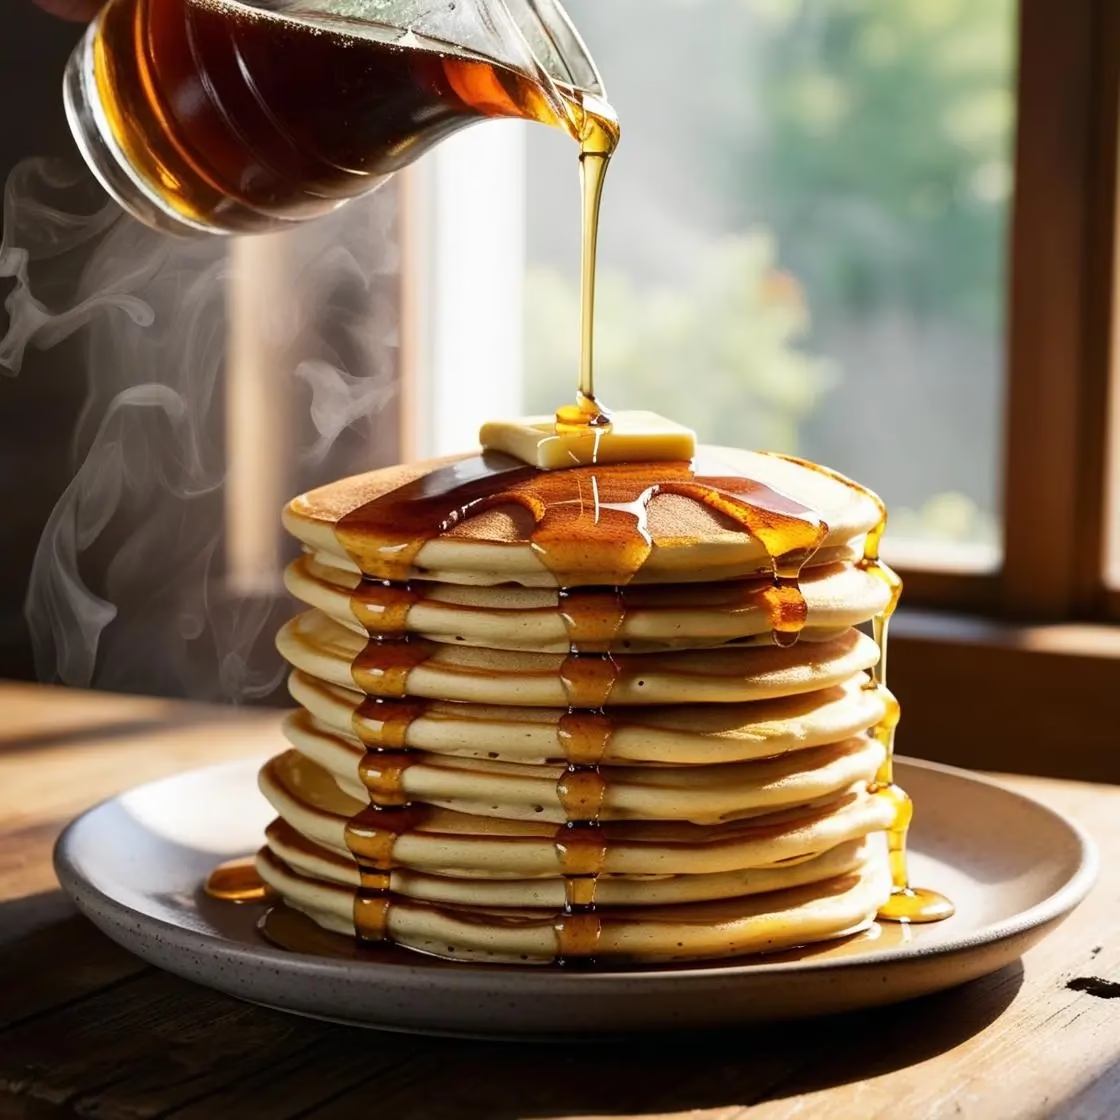
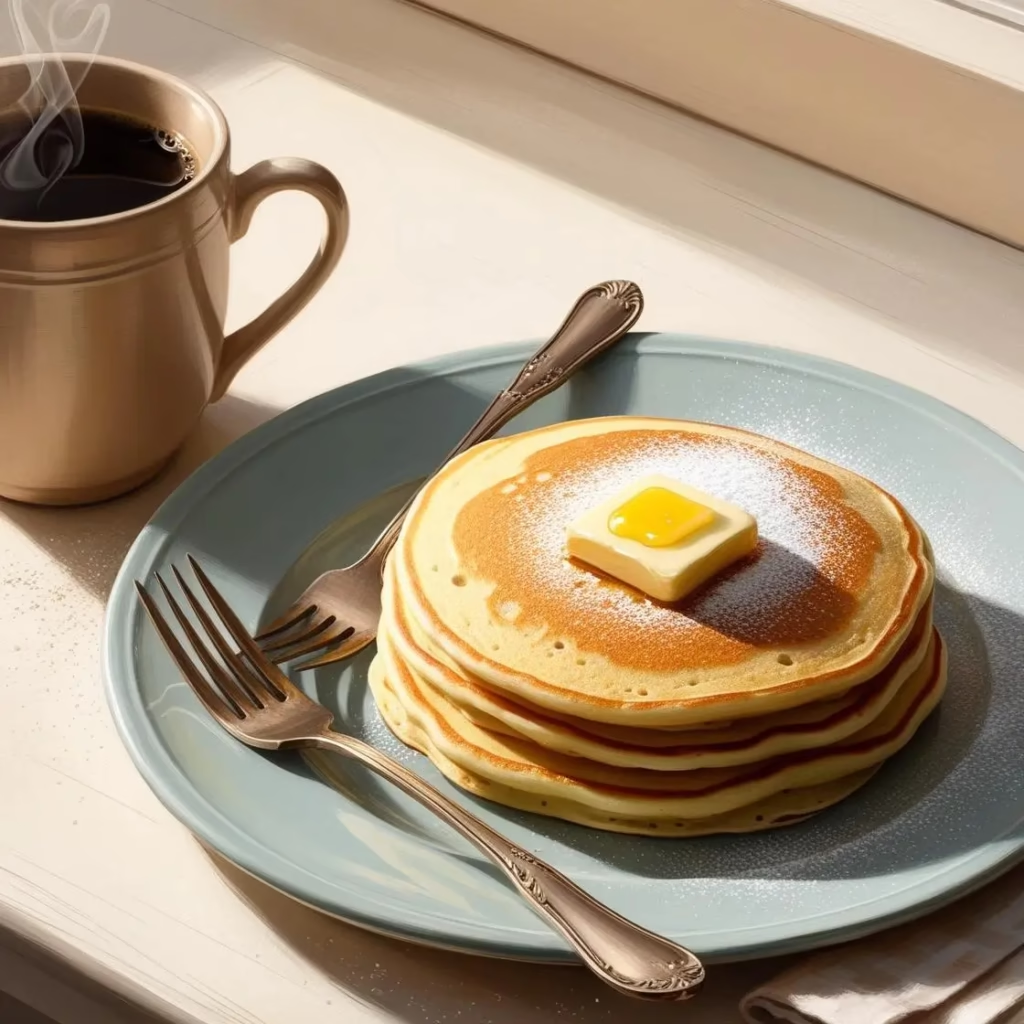
There’s something undeniably comforting about waking up to the aroma of pancake recipe sizzling on a hot griddle. As morning light filters through kitchen windows across the country, this breakfast staple brings families together around tables laden with maple syrup, fresh fruit, and stacks of golden, fluffy discs of pure joy. Pancake have earned their place in breakfast history not just for their delightful taste, but for their versatility and the memories they help create.
What makes the perfect pancake? Is it the cloudlike texture that melts in your mouth? The subtle sweetness that pairs perfectly with both savory and sweet toppings? Or perhaps it’s the ritual itself—the careful mixing, the anticipation as bubbles form on the surface, and that satisfying flip that transforms pale batter into a golden-brown masterpiece?
In this comprehensive guide, we’ll explore everything you need to know about crafting exceptional pancake. From selecting quality ingredients to mastering flipping techniques, storing leftovers (if there are any!), and nutritional considerations, you’ll discover the secrets that elevate ordinary pancakes to extraordinary culinary experiences.
Table of Content
- Why I Love This Pancake Recipe
- Ingredients: The Foundation of Perfect Pancake Recipe
- Instructions For The Best Pancake Recipe
- Storage: Extending Pancake Pleasure
- Tips: Elevating Your Pancake Recipe
- Nutrition Information: Understanding What's on Your Plate (Pancake Recipe)
Why I Love This Pancake Recipe
There’s something truly special about this pancake recipe that has earned it a permanent place in my weekend ritual. After testing countless variations over my 20 years in food writing, this particular formula strikes that perfect balance that keeps me coming back time and again.
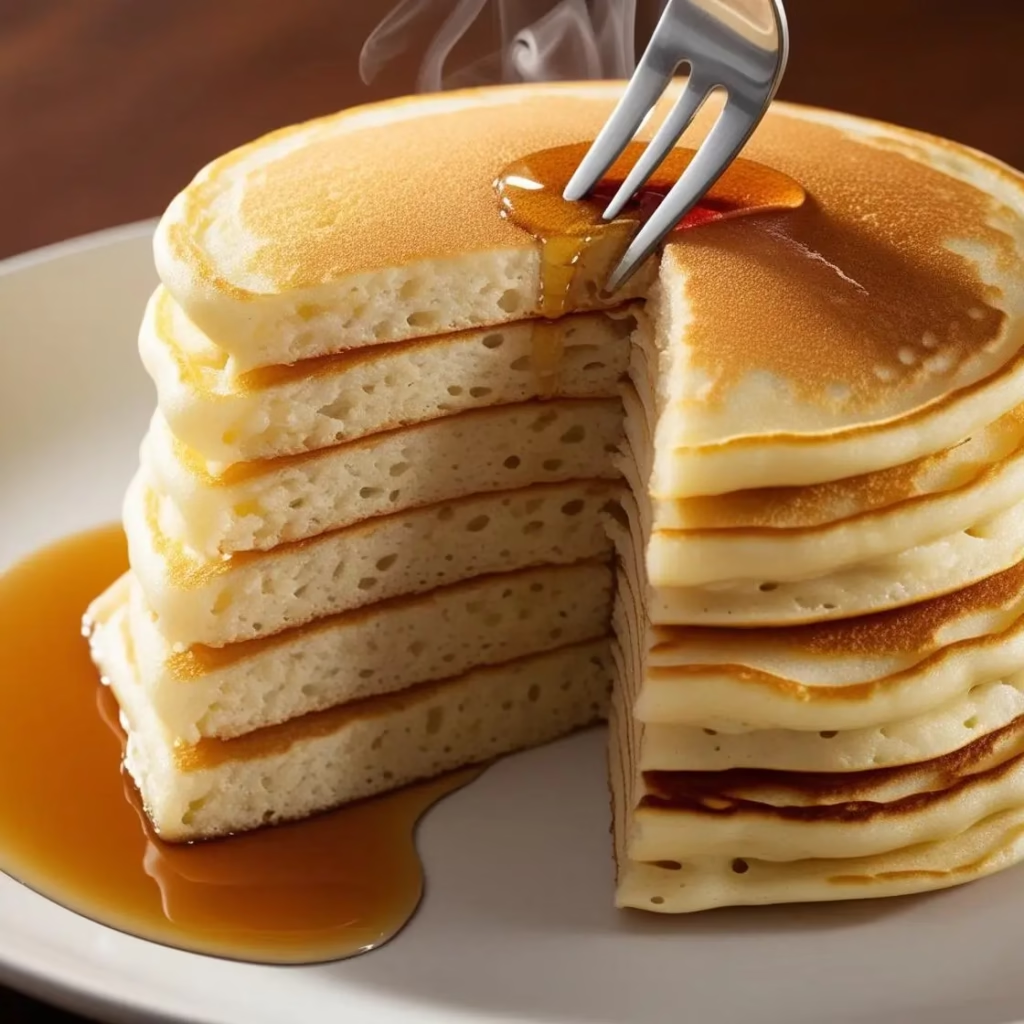
First and foremost, the texture is absolutely unrivaled. That moment when your fork sinks through the slightly crisp exterior into the pillowy interior creates a sensory experience that chain restaurant pancakes simply can’t match. The addition of melted butter directly in the batter (rather than just cooking with it) infuses every bite with rich flavor while contributing to that melt-in-your-mouth quality.
I’m also partial to how forgiving this recipe proves to be. We’ve all had hectic morning moments when measurements aren’t precise or interruptions derail our focus. Yet somehow, these pancakes consistently turn out wonderfully, accommodating those minor variations that come with real life in a busy kitchen.
In a world of complicated cooking trends and exotic ingredients, there’s profound comfort in mastering something so fundamental yet so satisfying. This recipe reminds us that often, the most beloved foods aren’t about complexity but about executing simple elements with care and attention.
Ingredients: The Foundation of Perfect Pancake Recipe
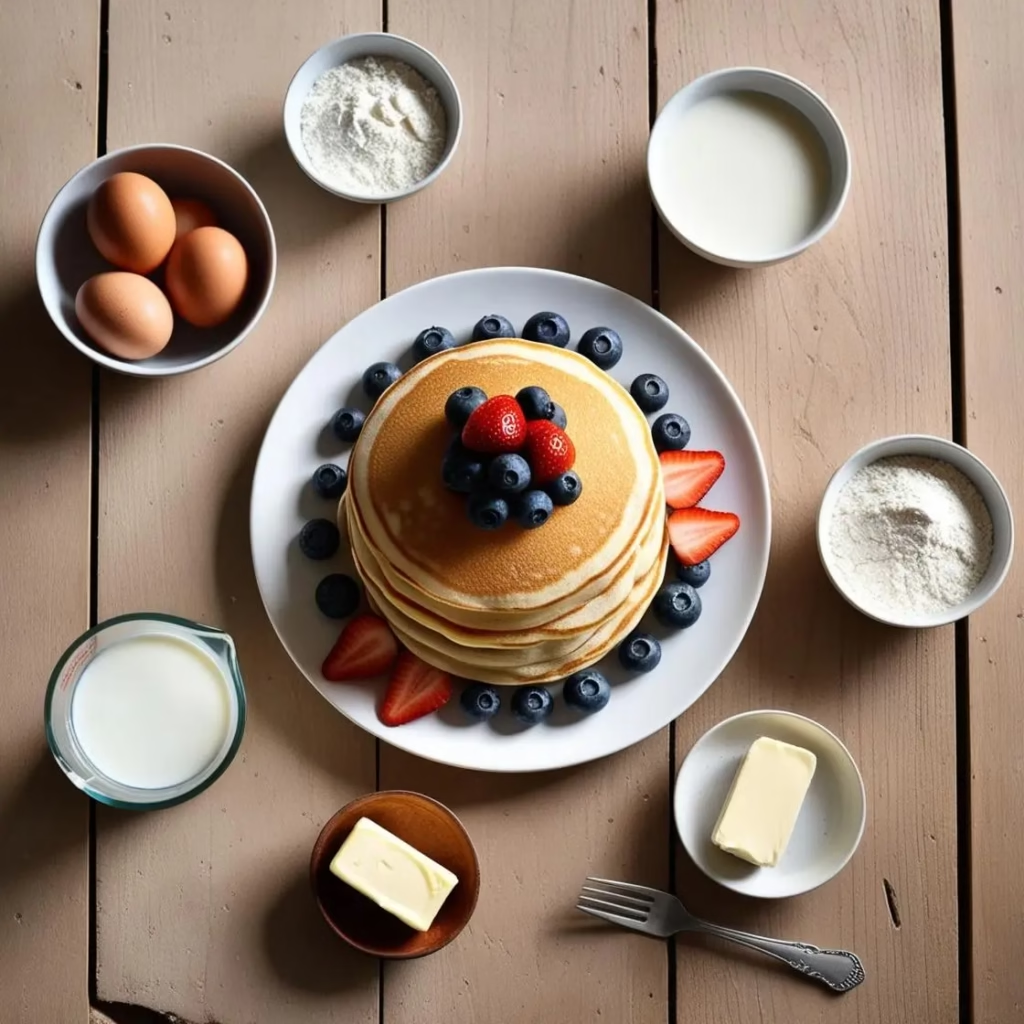
Before diving into the mixing bowl, let’s talk about what makes pancakes truly special—the ingredients. While basic pancakes recipe require only a handful of pantry staples, understanding the role each component plays will help you customize your recipe for the most delectable results.
Essential Ingredients
- All-purpose flour (2 cups) forms the structure of your pancakes
- Baking powder (2 teaspoons) provides the lift that makes them fluffy
- Salt (1/2 teaspoon) enhances flavor and balances sweetness
- Granulated sugar (3 tablespoons) adds subtle sweetness
- Whole milk (1 1/2 cups) creates moisture and richness
- Eggs (2 large) bind ingredients and add structure
- Unsalted butter (3 tablespoons, melted) contributes flavor and tenderness
- Vanilla extract (1 teaspoon) offers aromatic depth
Furthermore, quality matters significantly when it comes to pancake ingredients. Fresh baking powder makes a noticeable difference in fluffiness, while room-temperature eggs incorporate more evenly into the batter. Similarly, whole milk produces richer pancakes than reduced-fat alternatives, though plant-based milks can be successfully substituted with slight adjustments to other ingredients.
Instructions For The Best Pancake Recipe
Now that we’ve gathered our ingredients, let’s transform them into pancake perfection. The process isn’t complicated, yet small details make all the difference between average breakfast fare and memorable morning magic.
First and foremost, combine your dry ingredients in a large bowl, whisking thoroughly to distribute the leavening agents evenly. In a separate bowl, beat the eggs slightly before adding milk, melted butter (cooled slightly), and vanilla extract. This two-bowl method prevents overmixing—the sworn enemy of tender pancakes.
Subsequently, pour your wet ingredients into the dry mixture. Here’s where restraint becomes vital—mix just until combined. Those small lumps you see? They’re actually your friends, guaranteeing tender pancakes rather than tough, rubbery discs. Overmixing develops gluten, creating a chewy rather than fluffy texture.
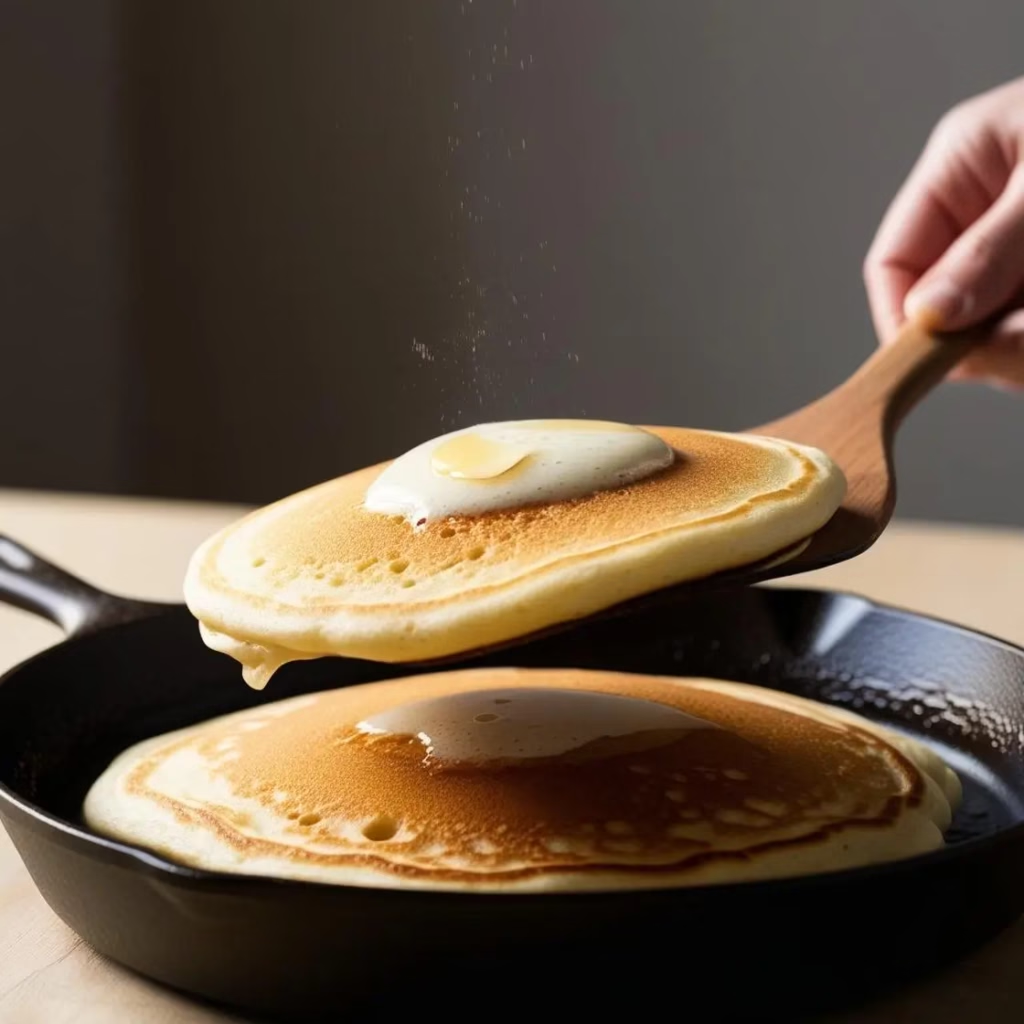
Moving on to cooking, heat your griddle or non-stick pan over medium heat. The surface is ready when water droplets dance across it. A light coating of butter or cooking spray prevents sticking without making pancakes greasy.
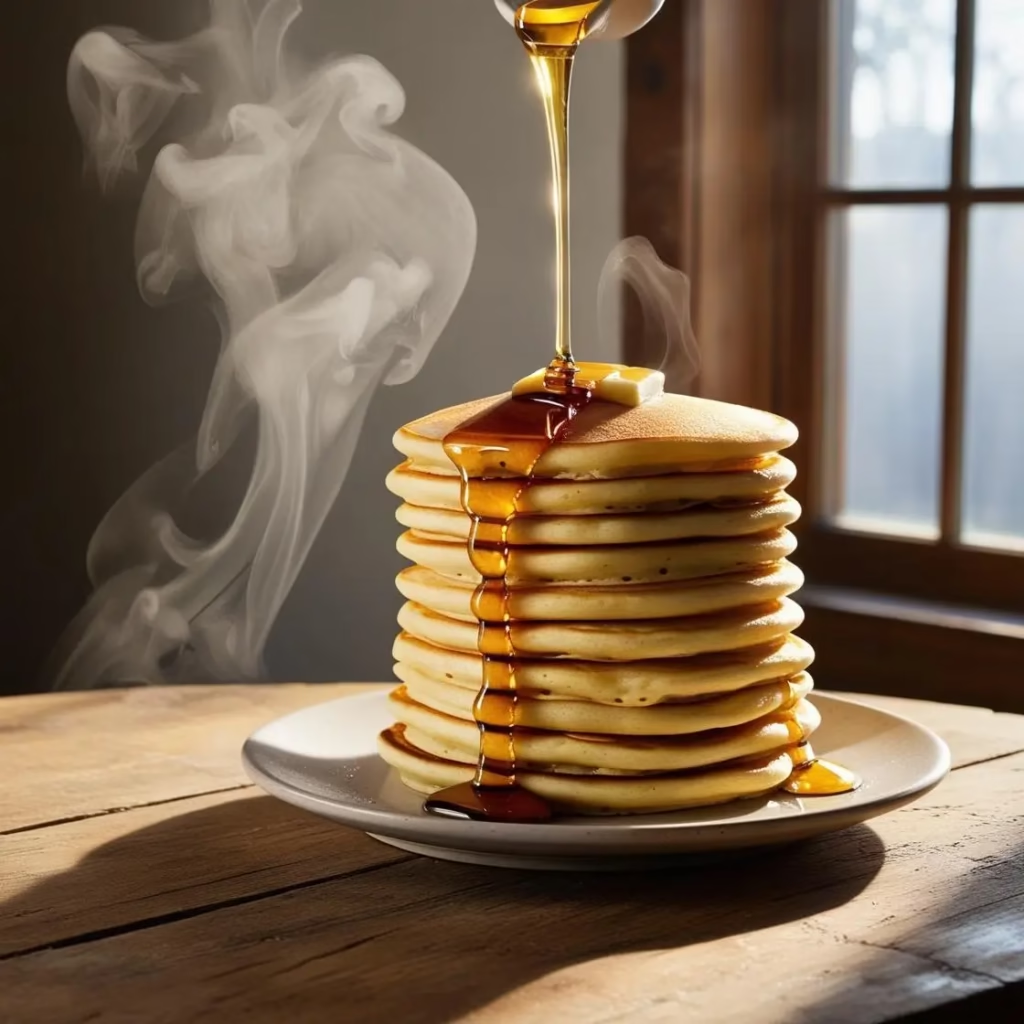
Once your pan is hot, pour approximately 1/4 cup of batter for each pancake, giving them space to expand. When bubbles form on the surface and edges appear set (about 2-3 minutes), it’s time for the all-important flip. One smooth, confident motion works best—hesitation often leads to folded or torn pancakes.
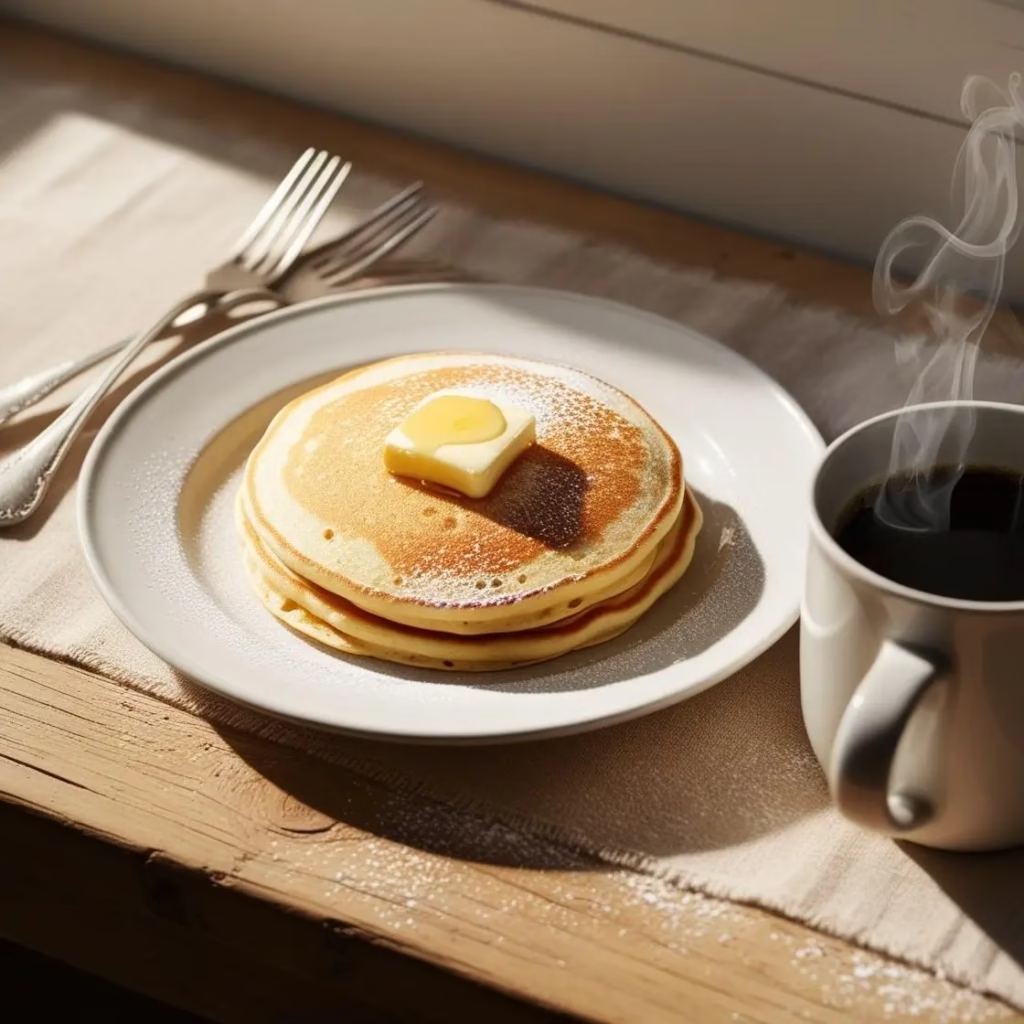
Finally, cook for another 1-2 minutes until the second side is golden brown. Transfer to a warm plate and repeat with remaining batter, adjusting heat as needed to maintain that perfect golden color.
Storage: Extending Pancake Pleasure
Sometimes our eyes are bigger than our stomachs, resulting in leftover pancake recipe. Fortunately, these breakfast treats store remarkably well when handled properly.
For short-term storage, allow pancakes to cool completely before placing them in an airtight container with parchment paper between layers to prevent sticking. They’ll keep in the refrigerator for up to three days.
Alternatively, freeze cooled pancakes in a single layer on a baking sheet, then transfer to freezer bags once solid. Properly stored, frozen pancakes remain delicious for up to two months. This approach creates your own convenient « frozen pancakes » that surpass any store-bought version.
When reheating, the toaster offers the best results for one or two pancakes, while a 350°F oven works wonderfully for larger quantities. Avoid microwaving when possible, as it often yields a soggy texture rather than restoring that delightful contrast between crisp exterior and tender interior.
Tips: Elevating Your Pancake Recipe
Beyond the basics, several professional techniques can transform good pancake recipe into great ones. Consider these insider tips for pancake perfection:
Rest your batter for 15-30 minutes before cooking. This allows flour to hydrate properly and leavening agents to activate, resulting in lighter, fluffier pancake recipe .
Test your temperature with a small sacrificial pancake. Adjust heat accordingly—too hot produces burnt exteriors with raw centers, while too cool yields pale, dense results.
Hold finished pancakes in a warm oven (200°F) arranged in a single layer rather than stacking, which creates steam and softens crisp edges.
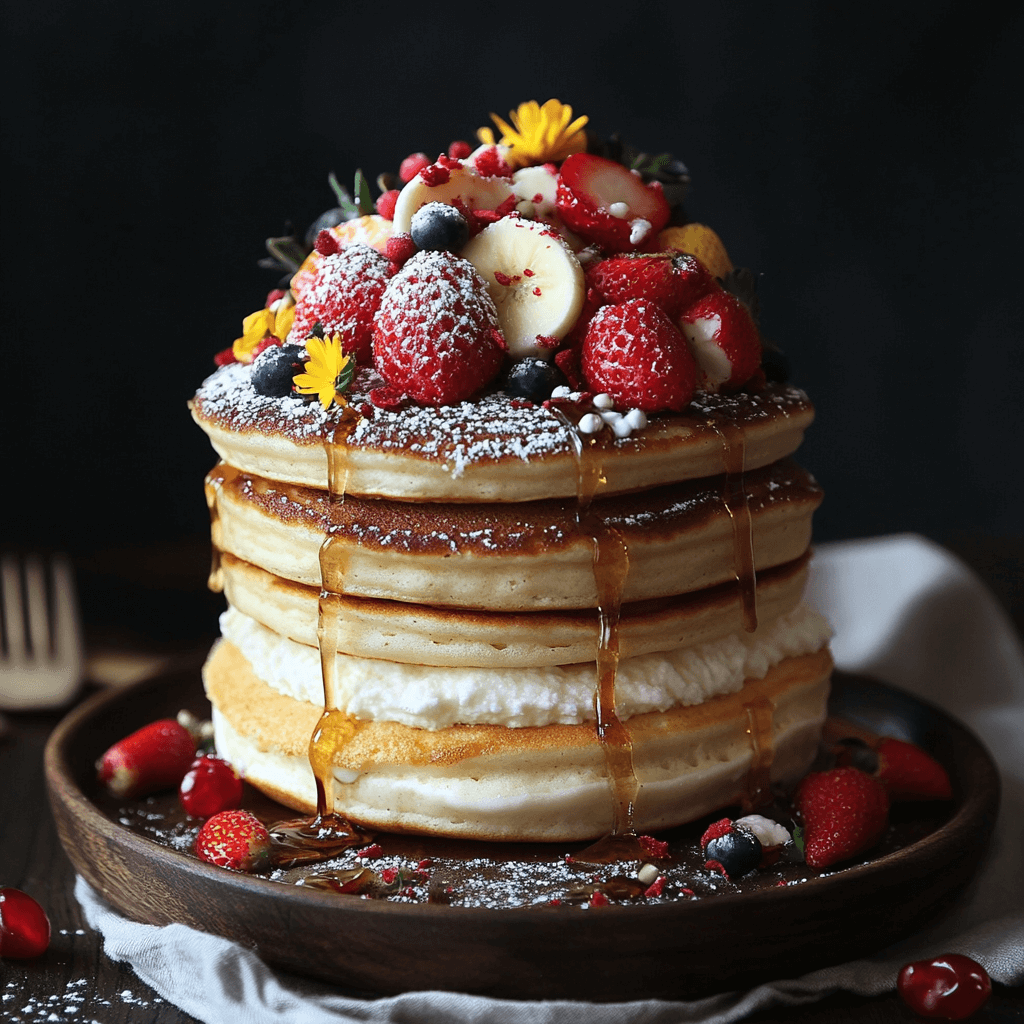
Consider add-ins like blueberries, chocolate chips, or banana slices. Sprinkle these directly onto individual pancakes after pouring batter rather than mixing into the bowl, ensuring even distribution.
Experiment with flavor infusions by adding lemon zest, cinnamon, or even cardamom to your batter for subtle complexity that elevates the entire experience.
Nutrition Information: Understanding What’s on Your Plate (Pancake Recipe)
While pancake recipe aren’t typically considered health food, understanding their nutritional profile helps make informed decisions about portion sizes and accompaniments.
A standard serving of two 6-inch pancakes (made according to our recipe) provides approximately:
- 320 calories
- 12g protein
- 45g carbohydrates
- 12g fat (5g saturated)
- 2g fiber
- 8g sugar
- 580mg sodium
However, these values change dramatically depending on toppings. Traditional maple syrup adds about 50 calories and 13g sugar per tablespoon, while fresh berries offer color, flavor, and nutrients with minimal caloric impact.
For more nutritious options, consider whole wheat flour (which increases fiber content), reducing sugar, or incorporating Greek yogurt in place of some milk for added protein. These modifications maintain pancake recipe delightful nature while improving their nutritional profile.
From lazy Sunday mornings to special celebrations, pancakes represent more than just breakfast—they embody comfort, care, and culinary tradition. The process of making them, from measuring ingredients to that satisfying sizzle on the griddle, engages our senses and connects us to generations of home cooks who have performed these same steps.
Whether you prefer your pancake recipe classic and maple-drenched or innovative with savory toppings, the fundamentals remain constant: quality ingredients, gentle mixing, proper temperature, and attentive cooking. Master these elements, and you’ll create pancakes worth waking up for—time and time again.
Remember that great pancake recipe, like most worthwhile culinary endeavors, improve with practice. Each batch teaches something new about timing, temperature, and technique. Embrace the process, adjust to your preferences, and soon you’ll develop a signature pancake recipe that becomes your own edible legacy.
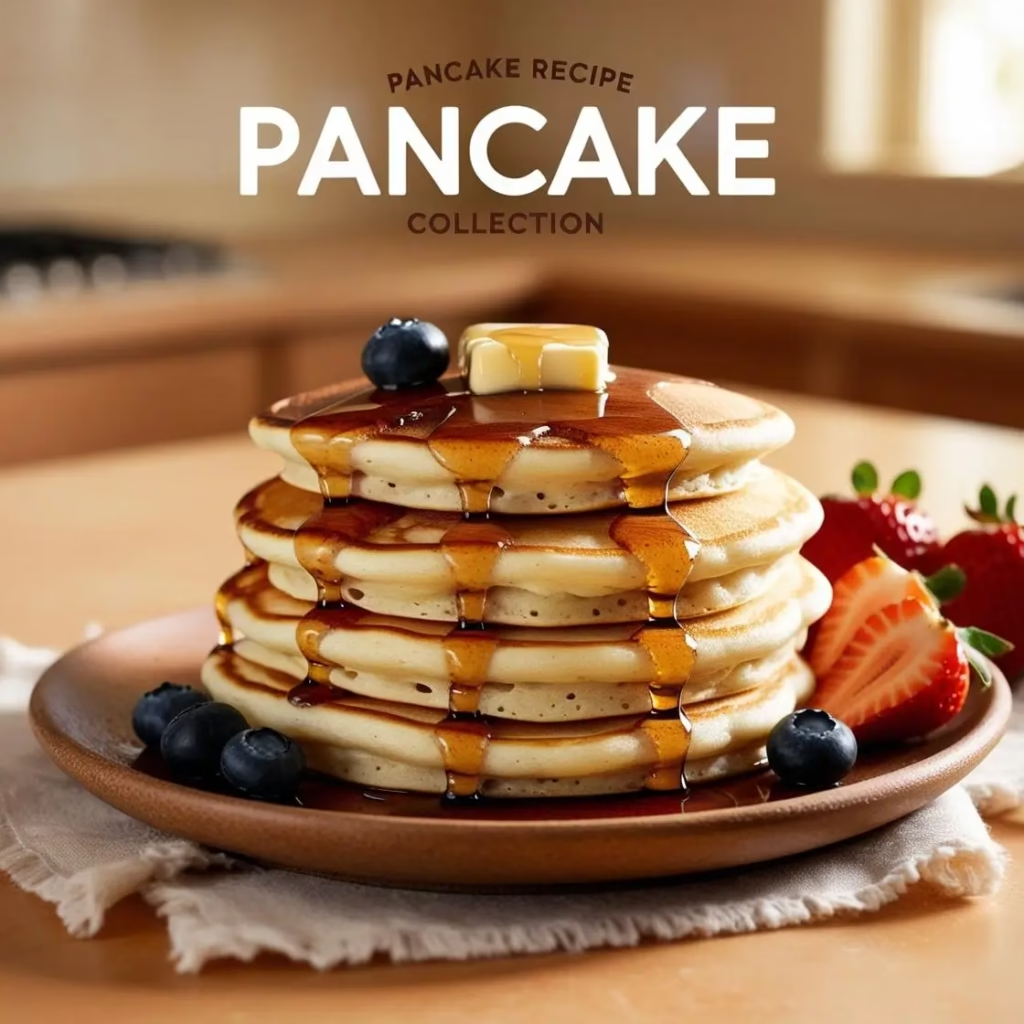
The Ultimate Fluffy Pancake Guide: From Basic to Gourmet
Description
Discover the secrets to perfect pancakes with our comprehensive guide covering ingredients, techniques, storage tips, and nutritional insights. Plus, get our tested recipe for the fluffiest pancakes ever!
Ingredients
Instructions
- In a large bowl, whisk together flour, baking powder, baking soda, salt, and sugar until well combined.
- In a separate bowl, beat eggs lightly, then add milk, melted butter, and vanilla extract. Whisk until combined.
- Pour wet ingredients into dry ingredients and stir gently with a wooden spoon or spatula just until moistened. Some small lumps should remain. Do not overmix.
- Optional but recommended: Let batter rest for 15 minutes.
- Heat a griddle or large non-stick skillet over medium heat. Add a small amount of butter or cooking spray to coat surface.
- When griddle is hot (water droplets should sizzle), pour ¼ cup portions of batter onto the surface, leaving space between pancakes.
- Cook until bubbles form on the surface and edges look set, about 2-3 minutes.
- Flip pancakes with a thin spatula and cook until golden brown on the second side, about 1-2 minutes more.
- Transfer to a warm plate or keep warm in a 200°F oven while cooking remaining pancakes.
- Serve immediately with desired toppings.
Notes
- For blueberry pancakes: Sprinkle fresh blueberries directly onto pancakes after pouring batter onto griddle.
For fluffier pancakes: Substitute buttermilk for regular milk and reduce baking powder to 1 teaspoon.
For whole wheat version: Replace half the all-purpose flour with whole wheat flour and add an additional 2 tablespoons of milk.
janvier 22, 2025 at 1:43 pm[…] Is Bisquick Mix the Same as Pancake Mix? […]