

Introduction
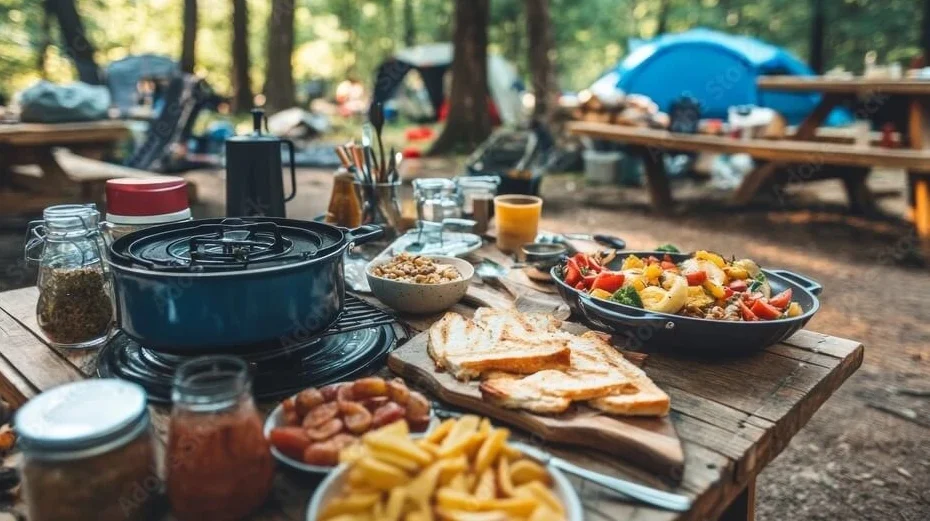
Camping is all about embracing the great outdoors, and what better way to enhance the experience than with delicious, easy-to-make meals? Cooking over a campfire, portable stove, or grill adds a rustic charm to your food while bringing everyone together for a memorable dining experience. Whether you’re a seasoned camper or heading out on your first adventure, having simple camping meals planned ahead can make your trip stress-free and enjoyable. From hearty camping breakfast ideas to quick camping dinner recipes, this guide will help you whip up tasty dishes with minimal effort. In this post, we’ll share 15+ camping recipes that cover breakfast, lunch, and dinner, so you can fuel your adventures with ease. Get ready to cook up delicious meals under the stars! 🌲🔥
1) Easy Camping Breakfast Recipes to Start Your Day
Simple Campfire Pancakes – A Quick and Delicious Way to Enjoy Pancakes with Minimal Ingredients
Why Pancakes Are Perfect for Camping
Pancakes are a classic and comforting breakfast that’s easy to make, even in the great outdoors. They require just a few simple ingredients, cook quickly, and can be customized with toppings like fresh fruit, honey, or syrup. Whether you’re cooking over a campfire, on a portable stove, or using a cast iron skillet, pancakes make for a satisfying and energy-boosting start to your day.
Ingredients Needed for Campfire Pancakes
One of the best things about camping meals is keeping things simple while still enjoying delicious food. Here’s what you need to make perfect pancakes at your campsite:
- 1 cup pancake mix (or homemade dry pancake mix)
- ¾ cup water or milk
- 1 egg (optional for fluffier pancakes)
- 1 tablespoon oil or melted butter
- ½ teaspoon vanilla extract (optional for added flavor)
- Cooking spray or additional butter for greasing
- Maple syrup, honey, or fresh fruit for serving
Step-by-Step Instructions for Making Pancakes While Camping
- Prepare the Batter – In a mixing bowl or a large zip-top bag, combine the pancake mix, water (or milk), egg (if using), and oil. Mix until smooth but avoid over-mixing. If using a bag, seal it and knead gently to combine.
- Heat the Cooking Surface – Preheat a cast iron skillet or griddle over the campfire or a portable camping stove. Add a little butter or cooking spray to prevent sticking.
- Cook the Pancakes – Pour or squeeze out small portions of batter onto the hot skillet. Cook for 2-3 minutes until bubbles form on the surface, then flip and cook for another 1-2 minutes until golden brown.
- Serve and Enjoy – Top with fresh fruit, syrup, or honey, and enjoy a warm, delicious breakfast in the fresh air.
Pro Tips for Perfect Campfire Pancakes
- Use a premade dry mix – If you don’t want to measure ingredients at camp, prepare a dry pancake mix at home and store it in a sealed container or bag. Just add water or milk at camp.
- Try foil packet pancakes – If you want to avoid flipping pancakes individually, pour the batter into a well-greased foil packet and cook over the fire for an easy pancake bake.
- Cook evenly with a griddle – A cast iron griddle allows you to cook multiple pancakes at once, making the process faster and easier for feeding a crowd.
With these simple steps, you can whip up a batch of campfire pancakes that are both easy and delicious, making them the perfect camping breakfast for your outdoor adventure! 🍽🔥
Make-Ahead Breakfast Burritos – A Filling Meal That Can Be Prepped at Home and Reheated Over the Campfire
Why Breakfast Burritos Are Great for Camping
When you’re out in nature, the last thing you want to do is spend too much time prepping meals in the morning. Make-ahead breakfast burritos are the perfect camping breakfast solution because they’re hearty, portable, and easy to reheat over a campfire or on a camping stove. Packed with protein, cheese, and veggies, they provide the energy needed for a long day of hiking, fishing, or exploring.
Another great advantage? These burritos can be made in advance at home, stored in a cooler, and simply warmed up at camp—meaning less mess, no complicated cooking, and a delicious meal in minutes!
Ingredients Needed for Make-Ahead Breakfast Burritos
The beauty of camping meals is their flexibility. You can mix and match ingredients to suit your taste. Here’s a simple but delicious burrito base:
- 6 large flour tortillas (burrito-size)
- 6 eggs, scrambled
- 1 cup cooked breakfast sausage or bacon (or plant-based alternative)
- 1 cup shredded cheese (cheddar, Monterey Jack, or your choice)
- ½ cup diced bell peppers
- ½ cup diced onions
- ½ cup cooked hash browns or roasted potatoes
- ½ teaspoon salt and pepper (to taste)
- ½ teaspoon chili powder or smoked paprika (optional for added flavor)
- Foil sheets for wrapping
How to Make and Store Breakfast Burritos for Camping
- Prepare the Filling at Home – Cook the scrambled eggs, sausage, and sautéed veggies. Let them cool slightly before assembling.
- Assemble the Burritos – Lay a tortilla flat, add a scoop of scrambled eggs, some meat, cheese, veggies, and potatoes. Avoid overfilling to keep the burrito easy to roll.
- Wrap and Store – Tightly wrap each burrito in aluminum foil. If making several different kinds, label them with a marker.
- Keep in a Cooler – Store the burritos in a cooler with ice packs to keep them fresh until you’re ready to eat.
How to Reheat Breakfast Burritos While Camping
- Over the Campfire – Place the foil-wrapped burrito near the hot embers, turning occasionally for even heating (about 10 minutes).
- On a Camp Stove – Heat a skillet over medium heat, unwrap the burrito slightly, and warm on both sides until golden and crispy.
- In a Dutch Oven – If cooking for a group, place multiple burritos inside a Dutch oven and cover. Let them warm for about 10-15 minutes.
Tasty Additions and Variations
- Spicy Kick – Add diced jalapeños or a drizzle of hot sauce.
- Veggie Lover’s Burrito – Skip the meat and add spinach, mushrooms, and black beans.
- Tex-Mex Style – Use chorizo, avocado, and salsa for bold flavors.
With these make-ahead breakfast burritos, you’ll have a warm, satisfying meal with minimal effort, leaving you more time to enjoy the great outdoors! 🌄🔥
Dutch Oven Cinnamon Rolls – A Warm and Sweet Treat Perfect for Mornings in the Wild
Why Dutch Oven Cinnamon Rolls Are a Must-Try Camping Breakfast
There’s nothing quite like waking up to the smell of freshly baked cinnamon rolls while surrounded by nature. These Dutch oven cinnamon rolls bring a warm, gooey, and comforting treat to your camping mornings, making them a perfect way to start the day.
A Dutch oven is an essential tool for campfire cooking, as it retains heat well and allows for even baking. Whether you use pre-made dough or make your own from scratch, these cinnamon rolls require minimal effort but deliver maximum flavor and satisfaction. Plus, they pair perfectly with a fresh cup of campfire coffee!
Ingredients for Dutch Oven Cinnamon Rolls
Depending on how much prep you want to do, you can go with store-bought dough or make homemade cinnamon rolls from scratch. Here’s what you need:
For the Dough (if making from scratch):
- 2 ½ cups all-purpose flour
- 2 tablespoons sugar
- 1 packet (2 ¼ teaspoons) active dry yeast
- ¾ cup warm milk
- 2 tablespoons melted butter
- 1 teaspoon salt
The Filling:
- ½ cup brown sugar
- 2 tablespoons cinnamon
- 3 tablespoons softened butter
For the Icing (Optional but Recommended!):
- 1 cup powdered sugar
- 2 tablespoons milk or cream
- ½ teaspoon vanilla extract
Step-by-Step Guide to Making Dutch Oven Cinnamon Rolls
- Prepare the Dough – If making homemade dough, mix warm milk, sugar, and yeast. Let it sit until foamy. Stir in melted butter, flour, and salt. Knead until smooth, then let it rise for about an hour. If using store-bought dough, skip to the next step.
- Roll Out and Fill – On a floured surface, roll the dough into a rectangle. Spread softened butter over the top, then sprinkle with brown sugar and cinnamon. Roll the dough tightly into a log and cut it into 1-inch slices.
- Arrange in the Dutch Oven – Line the Dutch oven with parchment paper or lightly grease it. Place the rolls inside, leaving a little space between them to allow for rising.
- Let Them Rise (If Using Fresh Dough) – Cover and let the rolls rest for about 20 minutes while you heat your campfire.
- Bake Over the Campfire – Place the Dutch oven over a bed of hot coals and put some coals on the lid for even baking. Bake for 25-30 minutes, checking occasionally to prevent burning.
- Drizzle with Icing – Mix powdered sugar, milk, and vanilla for a simple glaze. Drizzle over the warm rolls and enjoy!
Tips for Perfect Dutch Oven Cinnamon Rolls While Camping
- Use Pre-Made Dough for Convenience – Store-bought cinnamon roll dough (like Pillsbury) is a great shortcut if you don’t want to make dough from scratch.
- Manage Your Campfire Heat – If the fire is too hot, the rolls may burn on the bottom before cooking through. Use indirect heat by placing coals around—not directly under—the Dutch oven.
- Make It Extra Special – Add chopped nuts, raisins, or a drizzle of caramel for extra flavor.
These warm, gooey cinnamon rolls are an easy yet impressive camping breakfast that will make your morning in the wild feel extra special. Whether you’re serving them to a group or enjoying them solo, they’re sure to be a favorite!

2) Quick and Tasty Camping Lunch Ideas
No-Cook Wraps and Sandwiches – Easy Camping Meals That Require No Cooking, Perfect for On-the-Go Adventures
Why No-Cook Wraps and Sandwiches Are Perfect for Camping
When you’re out exploring nature, the last thing you want to do is spend a lot of time cooking. No-cook wraps and sandwiches are quick, easy, and require zero cleanup, making them perfect for busy camping mornings, quick lunches, or hassle-free dinners. They’re also lightweight, portable, and customizable, so everyone in your camping group can enjoy their favorite ingredients.
Whether you’re heading out for a long hike, a day at the lake, or a road trip between campsites, these simple camping meals are the perfect way to fuel your adventure without the need for a fire or stove.
Essential Ingredients for Easy No-Cook Wraps and Sandwiches
The beauty of these meals is their flexibility. You can mix and match ingredients to create different flavors while keeping things nutritious and delicious.
Here are some key ingredients to have on hand:
- Wraps and Bread: Tortillas, pita bread, whole wheat wraps, ciabatta, bagels, or sandwich rolls.
- Proteins: Pre-cooked deli meats (turkey, ham, roast beef), canned tuna or chicken, smoked salmon, hard-boiled eggs, or plant-based options like hummus and tofu.
- Cheeses: Cheddar, Swiss, mozzarella, pepper jack, or cream cheese.
- Veggies: Lettuce, spinach, tomatoes, cucumbers, bell peppers, avocados, or shredded carrots.
- Spreads and Condiments: Mustard, mayonnaise, pesto, hummus, guacamole, or ranch dressing.
- Extras for Flavor: Nuts, seeds, dried cranberries, pickles, olives, or fresh herbs.
Delicious No-Cook Wrap and Sandwich Ideas for Camping
Classic Turkey and Cheese Wrap
A simple yet satisfying wrap that’s perfect for lunch or dinner.
- Large tortilla or whole wheat wrap
- Sliced turkey
- Swiss cheese
- Lettuce and tomato
- Mayonnaise or mustard
How to Make It:
Lay the tortilla flat, spread mayonnaise or mustard, layer the turkey, cheese, lettuce, and tomato. Roll it up tightly, slice in half, and enjoy!
Mediterranean Veggie Pita
A flavor-packed vegetarian sandwich with Mediterranean ingredients.
- Whole wheat pita bread
- Hummus
- Cucumber slices
- Cherry tomatoes, halved
- Feta cheese
- Kalamata olives (optional)
How to Make It:
Spread hummus inside the pita pocket, then layer in cucumbers, tomatoes, feta cheese, and olives for a refreshing and satisfying meal.
Peanut Butter Banana Wrap
A sweet and energy-boosting wrap, perfect for breakfast or a midday snack.
- Flour tortilla
- Peanut butter or almond butter
- Sliced banana
- Honey or cinnamon (optional)
How to Make It:
Spread peanut butter evenly on the tortilla, add banana slices, drizzle with honey, and sprinkle with cinnamon. Roll it up and enjoy a protein-packed snack.
Tips for Packing and Storing No-Cook Wraps and Sandwiches While Camping
- Use sturdy bread and wraps – Avoid soft sandwich bread that may get soggy; opt for bagels, ciabatta, pita, or tortillas.
- Wrap them tightly – Use parchment paper, foil, or reusable beeswax wraps to keep your sandwiches fresh.
- Keep ingredients separate – If making sandwiches ahead of time, pack wet ingredients (like tomatoes and condiments) separately and assemble them fresh to avoid sogginess.
- Store properly – Use a cooler with ice packs to keep ingredients fresh, especially meats, cheeses, and dairy-based spreads.
With no cooking required, these wraps and sandwiches are the ultimate easy camping meals, giving you more time to enjoy the outdoors while still eating well!
Foil Packet Grilled Cheese – A Crispy and Cheesy Delight Made Over the Campfire
Why Foil Packet Grilled Cheese is Perfect for Camping
Grilled cheese is a classic comfort food, and making it over a campfire in a foil packet takes it to the next level. This camping-friendly version is not only crispy on the outside and gooey on the inside, but it also requires minimal cleanup—perfect for outdoor cooking.
With a few simple ingredients, you can enjoy a warm, melty sandwich at any time of the day, whether it’s for breakfast, lunch, or a late-night snack by the fire.
What You’ll Need for the Perfect Foil Packet Grilled Cheese
Making campfire grilled cheese is easy, and you don’t need a lot of ingredients. Here’s what you’ll need:
- Bread: Thick slices like sourdough, Texas toast, or French bread work best.
- Cheese: Cheddar, mozzarella, Swiss, provolone, or a mix for extra flavor.
- Butter or Mayo: To spread on the bread for a golden, crispy crust.
- Foil: Heavy-duty aluminum foil to wrap the sandwiches securely.
Optional Add-Ins for Extra Flavor:
- Proteins: Sliced ham, turkey, or cooked bacon.
- Veggies: Caramelized onions, sliced tomatoes, or spinach.
- Condiments: Mustard, pesto, or a drizzle of honey for a sweet twist.
How to Make Foil Packet Grilled Cheese Over the Campfire
1. Prepare Your Ingredients
Lay out your bread slices and spread butter or mayo on one side of each slice. This will be the outside layer, helping the sandwich get crispy.
2. Assemble the Sandwich
- Place a slice of cheese on the unbuttered side of one slice of bread.
- Add extra ingredients if desired (ham, bacon, veggies, or condiments).
- Top with another slice of cheese and the second piece of bread, buttered side facing out.
3. Wrap in Foil
- Tear off a large piece of heavy-duty aluminum foil and place the sandwich in the center.
- Wrap it securely, ensuring no cheese leaks out while cooking.
- For extra crispiness, double-wrap the sandwich.
4. Cook Over the Campfire
- Place the foil packet on a campfire grate, grill, or hot coals.
- Cook for 3-5 minutes per side, checking occasionally to prevent burning.
- Once golden brown and crispy, remove from the fire and let it cool slightly before unwrapping.
Tips for the Best Campfire Grilled Cheese
- Use thick bread to prevent it from getting too soggy inside the foil.
- Butter or mayo? Mayo creates an ultra-crispy crust, while butter gives a rich, classic flavor—try both to see which you prefer!
- Watch the heat! Cooking too close to the fire can burn the sandwich before the cheese melts. Use indirect heat for even cooking.
- Make it gourmet by adding a mix of cheeses, herbs, or meats for a next-level grilled cheese experience.
Perfect Pairings for Foil Packet Grilled Cheese
Pair your crispy, cheesy sandwich with these easy camping sides:
- Campfire Tomato Soup – A warm and cozy classic combination.
- Pickles or Coleslaw – Adds a crunchy, tangy contrast to the rich cheese.
- Fruit or Chips – A simple, no-fuss side that requires no cooking.
Whether you’re making this for breakfast, lunch, or dinner, this foil packet grilled cheese is an easy camping meal that’s packed with flavor and nostalgia. Try it on your next camping trip, and enjoy every cheesy bite!
Mason Jar Salads – Fresh, Portable, and Great for Keeping Things Simple While Camping
Why Mason Jar Salads Are Perfect for Camping
When you’re out in the wilderness, having fresh, healthy meals can be a challenge. Mason jar salads solve this problem by being portable, easy to prepare, and customizable. Whether you’re looking for a light lunch, a refreshing side, or a quick dinner option, these salads can be prepped ahead of time and stored in your cooler until you’re ready to eat.
The best part? No cooking required! Just shake, eat, and enjoy, making them a perfect addition to your list of easy camping meals.
How to Layer a Mason Jar Salad for Freshness
The secret to a perfect mason jar salad is layering. This keeps the ingredients fresh and prevents sogginess. Here’s the best way to do it:
- Dressing First – Start with your favorite dressing at the bottom to keep the other ingredients from getting soggy.
- Hearty Vegetables – Add crunchy veggies like cherry tomatoes, cucumbers, bell peppers, or carrots.
- Proteins and Grains – Layer cooked chicken, chickpeas, quinoa, or beans for added substance.
- Leafy Greens – Place spinach, arugula, or romaine at the top to keep them crisp.
- Toppings Last – Add cheese, nuts, seeds, or croutons just before eating.
Best Mason Jar Salad Recipes for Camping
1. Classic Greek Mason Jar Salad
This Mediterranean-inspired salad is refreshing, packed with flavor, and requires no heating.
- Dressing: Olive oil, lemon juice, oregano, salt, and pepper.
- Veggies: Cherry tomatoes, cucumbers, red onions, and Kalamata olives.
- Protein: Chickpeas or grilled chicken.
- Cheese: Feta crumbles.
- Greens: Romaine lettuce or mixed greens.
2. Southwest Black Bean and Corn Salad
A zesty and protein-packed salad with a Tex-Mex flair.
- Dressing: Lime juice, olive oil, cumin, and garlic.
- Veggies: Black beans, corn, diced bell peppers, and red onions.
- Protein: Shredded chicken or tofu.
- Extras: Avocado chunks (add fresh before eating) and shredded cheese.
- Greens: Chopped romaine or spinach.
3. Caprese Mason Jar Salad
A simple but delicious Italian-style salad that’s great as a side or light meal.
- Dressing: Balsamic vinegar and olive oil.
- Veggies: Cherry tomatoes and fresh basil leaves.
- Cheese: Fresh mozzarella balls.
- Greens: Arugula or spinach.
- Toppings: Pine nuts or croutons.
Tips for Packing and Storing Mason Jar Salads While Camping
- Use Wide-Mouth Mason Jars – They make it easier to layer and eat directly from the jar.
- Keep Jars Upright in Your Cooler – This prevents the dressing from mixing with the greens too soon.
- Eat Within 2-3 Days – While they can last up to 5 days, for the best taste, enjoy them sooner.
- Shake Before Eating – Just screw on the lid, give it a good shake, and your salad is perfectly mixed!
What to Serve with Mason Jar Salads While Camping
- Grilled Meat or Fish – Pair with grilled chicken, steak, or salmon for a heartier meal.
- Campfire Bread or Crackers – Adds a satisfying crunch.
- Fresh Fruit – A simple and refreshing side to balance the flavors.
Mason jar salads are a quick, nutritious, and hassle-free meal option for any camping trip. Whether you want something light and refreshing or packed with protein, these salads keep things simple, fresh, and delicious in the great outdoors!
3) Delicious Camping Dinner Ideas for a Cozy Night
Classic Campfire Chili – A Hearty and Warming Dish Cooked in a Dutch Oven or Cast Iron Skillet
Why Classic Campfire Chili Is a Must-Have for Camping
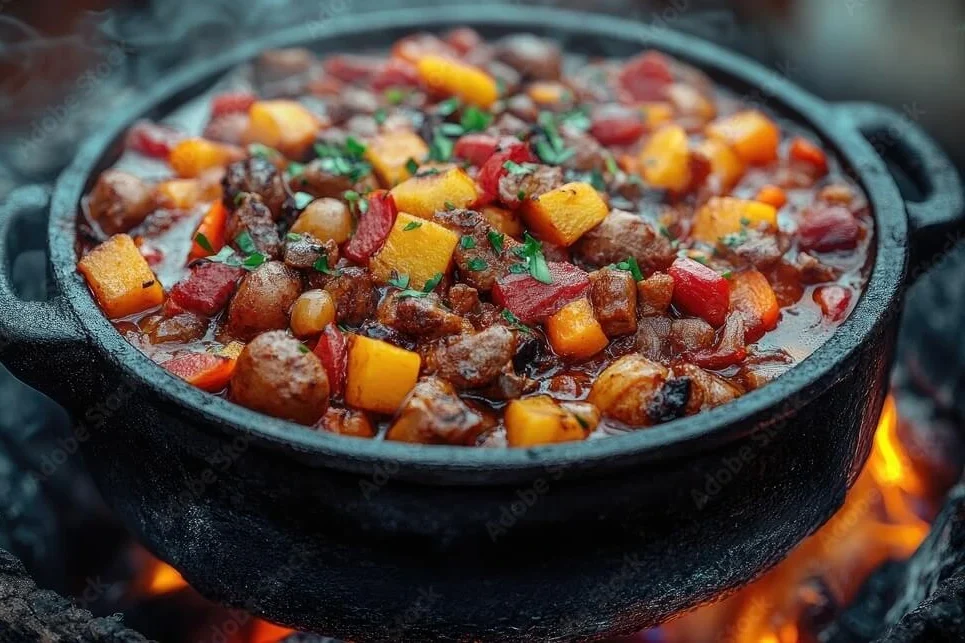
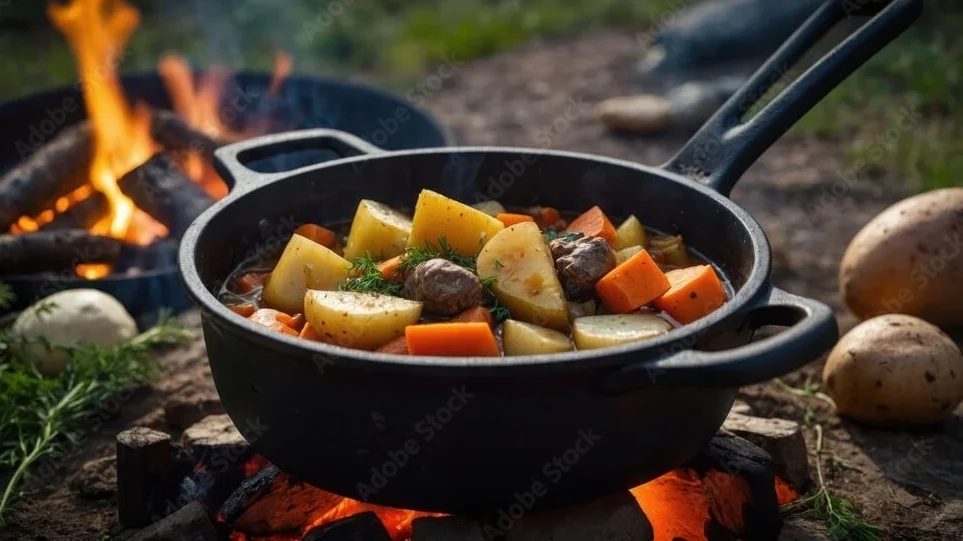
There’s nothing better than sitting around the campfire with a steaming bowl of hearty chili to warm you up after a long day of outdoor adventures. Classic campfire chili is a camping staple because it’s easy to prepare, filling, and can be customized to suit any taste. Whether you’re a vegetarian or prefer meat-based chili, this dish is versatile and perfect for cooking over an open flame.
When prepared in a Dutch oven or cast iron skillet, the chili develops a rich, smoky flavor that’s hard to beat. It’s also great for serving a group of campers, making it ideal for sharing with friends and family around the campfire.
How to Make Classic Campfire Chili
Making chili over a campfire is simple but requires a bit of planning to get the flavors just right. Here’s a step-by-step guide to preparing this hearty dish:
- Start with a Solid Base
- Meat: Brown ground beef, turkey, or sausage over the campfire in your Dutch oven or cast iron skillet. If you’re going vegetarian, opt for beans, tofu, or tempeh as your base.
- Onions and Garlic: Once the meat is browned, add diced onions and garlic to enhance the flavors. Cook until softened and fragrant.
- Add Your Beans and Tomatoes
- Beans: Kidney beans, black beans, or pinto beans work best for chili. Add them to the pot once your base is ready.
- Tomatoes: Pour in canned diced tomatoes, tomato paste, and a little tomato sauce. For extra flavor, you can add some crushed tomatoes for a thicker, chunkier chili.
- Season It Right
- Add chili powder, cumin, paprika, and a pinch of cayenne pepper for a smoky, spicy base.
- Don’t forget the salt and pepper to taste, along with a dash of hot sauce if you like your chili extra spicy.
- For extra depth of flavor, a tablespoon of brown sugar can help balance the acidity of the tomatoes.
- Let It Simmer
- Once all the ingredients are combined, cover the Dutch oven or skillet and let it simmer over low heat. Let it cook for at least 30 minutes to an hour, stirring occasionally. The longer it simmers, the richer the flavors will become.
- Serve and Enjoy
- After the chili has reached the desired consistency, it’s ready to serve. Ladle it into bowls and top with your favorite toppings like shredded cheese, sour cream, jalapeños, or fresh cilantro.
Tips for the Best Campfire Chili
- Use a heavy-bottomed pot like a Dutch oven or cast iron skillet for even heat distribution.
- Make it ahead of time: Chili is one of those dishes that tastes even better the next day, so feel free to prep it at home and reheat it over the campfire.
- Spice it up: If you love spice, add fresh chopped chili peppers (such as jalapeños or serranos) or a spoonful of your favorite hot sauce.
- Add some texture: Add diced potatoes, corn, or even some crushed tortilla chips to give the chili more body and flavor.
What to Serve with Classic Campfire Chili
Classic campfire chili pairs perfectly with a variety of side dishes that complement its hearty, savory flavors. Here are a few ideas:
- Cornbread: A warm slice of campfire cornbread is the perfect accompaniment to soak up the chili.
- Grilled Cheese Sandwiches: The creamy, cheesy goodness of a grilled cheese sandwich balances the heat of the chili.
- Crackers or Tortilla Chips: Add some crunch to your chili by serving it with a handful of crispy crackers or tortilla chips.
Variations for Classic Campfire Chili
Chili is infinitely customizable, and you can make it your own by adding different ingredients. Here are a few variations to try:
- Vegetarian Chili: Use black beans, kidney beans, and lentils as the base for a meat-free chili. Add vegetables like bell peppers, zucchini, and corn for extra flavor.
- Chili with Beer: Swap in beer for some of the liquid in your chili for an added layer of flavor. Dark beers like stout or porter work well.
- Smoky Chili: Add a little smoked paprika or chipotle peppers in adobo sauce for a smoky kick.
The Benefits of Classic Campfire Chili for Camping
- Filling and Satisfying: Chili is the ultimate comfort food after a day of hiking, fishing, or other outdoor activities.
- Easy to Prepare: You don’t need any fancy kitchen gadgets—just a Dutch oven or cast iron skillet and a campfire.
- Feeds a Crowd: Chili is perfect for sharing, making it great for group camping trips. It can be scaled up or down to feed any number of people.
Classic campfire chili is a hearty, satisfying meal that brings people together and keeps everyone full and warm. Whether you make it from scratch or adjust it to your preferences, it’s a camping recipe that’s sure to please.
Foil Packet Garlic Butter Shrimp – A Flavorful Seafood Option That’s Easy to Cook Over the Fire
Why Foil Packet Garlic Butter Shrimp is Perfect for Camping
One of the joys of cooking while camping is preparing meals that are not only delicious but also simple to make with minimal cleanup. Foil packet meals are a camping favorite, and garlic butter shrimp is a standout because of its flavorful, succulent shrimp combined with aromatic garlic butter. The beauty of this dish is in its simplicity: everything cooks in a single packet, sealed tight and cooked directly on the campfire or grill.
This dish offers the perfect balance of tender shrimp, rich garlic butter, and subtle seasoning, making it a hit for seafood lovers. Plus, foil packet cooking makes it easier to cook without worrying about intricate cooking tools or a messy cleanup. Whether you’re new to camping or a seasoned pro, garlic butter shrimp foil packets are a fantastic option to add to your camping recipe arsenal.
How to Make Foil Packet Garlic Butter Shrimp
Prepare the Shrimp and Ingredients
Start by peeling and deveining your shrimp. For this recipe, fresh shrimp is ideal, but you can also use frozen shrimp (just make sure to thaw them before cooking).
Gather your seasoning ingredients: garlic, butter, lemon juice, paprika, parsley, and a pinch of salt and pepper. For extra heat, you can add red pepper flakes or chili powder.
Create the Garlic Butter Mixture
In a small bowl, melt butter over a campfire or stove. Once melted, stir in the minced garlic, paprika, lemon juice, and any additional seasonings. Let it cook for 1-2 minutes until the garlic becomes fragrant, but be careful not to burn it.
Assemble the Foil Packets
Tear off a piece of heavy-duty aluminum foil and lay it flat.
Place the shrimp in the center of the foil, then drizzle the garlic butter mixture over the shrimp.
Fold the foil around the shrimp to create a sealed packet. Be sure to fold the edges tightly to prevent any butter from escaping during cooking. You can also add a few lemon slices or fresh herbs inside the packet for added flavor.
Cook the Foil Packet Shrimp
If you’re cooking over the campfire, place the foil packet on a grill grate or directly on the campfire coals. Cook for about 5-7 minutes, flipping halfway through for even cooking.
If you’re using a camping stove or grill, set the heat to medium and cook the foil packet for the same amount of time. You’ll know the shrimp is done when it turns a pinkish-orange color and is no longer translucent.
Serve and Enjoy
Carefully open the foil packet (beware of hot steam!) and transfer the shrimp and garlic butter sauce to a plate. Serve immediately with a side of fresh vegetables, rice, or crusty bread for dipping.
Why This Dish Is So Convenient for Camping
- Minimal Cleanup: Since everything cooks in a sealed packet, cleanup is a breeze. No pots, pans, or dishes are needed—just toss the foil after enjoying your meal.
- Quick and Easy: The recipe takes very little time to prepare and cook, making it a perfect last-minute camping dinner.
- Customizable: You can swap out the shrimp for other seafood like scallops or fish for a variety of flavors. Additionally, feel free to add veggies like asparagus, zucchini, or bell peppers to the foil packet for a complete meal.
Serving Suggestions for Foil Packet Garlic Butter Shrimp
- Over a Bed of Rice: Serve your shrimp over fluffy white rice or quinoa to soak up the flavorful garlic butter sauce.
- With Grilled Vegetables: Pair the shrimp with grilled veggies like corn, peppers, and mushrooms, which can also be cooked on the campfire.
- With a Side Salad: Add a light green salad with lemon vinaigrette for a fresh, refreshing contrast to the rich shrimp.
- As an Appetizer: If you’re camping with a group, you can serve this dish as an appetizer with crusty bread for dipping in the garlic butter sauce.
Tips for Perfect Foil Packet Garlic Butter Shrimp
- Use Fresh Shrimp for the Best Flavor: Fresh shrimp has a better texture and flavor compared to frozen, but if you’re using frozen shrimp, make sure it’s fully thawed before cooking.
- Don’t Overcook the Shrimp: Shrimp cooks quickly, so be sure to check for doneness around the 5-minute mark. Overcooking can lead to rubbery shrimp.
- Experiment with Seasonings: While garlic butter is the star, you can add other flavors like old bay seasoning, lemon zest, or fresh dill to make the recipe your own.
- Make It a Full Meal: If you’re in the mood for a more substantial meal, add some small potatoes or corn on the cob to the foil packet. Both of these ingredients cook well with shrimp and take on the wonderful garlic butter flavor.
Why Foil Packet Garlic Butter Shrimp is a Crowd-Pleaser
This simple yet flavor-packed seafood dish is a fantastic addition to any camping trip. It’s easy to make, requires minimal ingredients, and cooks quickly, making it ideal for campers of all skill levels. The garlic butter shrimp is also light enough to be served as a snack or filling enough for dinner. With its rich, savory flavor and aromatic garlic butter, this dish will surely become a camping favorite.
This recipe is perfect for those who want to enjoy fresh seafood in the wild without any of the hassle.
Grilled Sausages and Veggies – A Quick, Protein-Packed Dinner with Minimal Cleanup
Why Grilled Sausages and Veggies Are Perfect for Camping
One of the easiest and most satisfying meals you can prepare on a camping trip is grilled sausages and veggies. This dish requires minimal preparation, can be cooked on a simple grill or over a campfire, and offers a delicious balance of protein from the sausages and essential nutrients from the veggies. Whether you’re camping in the mountains or by the lake, this meal provides a quick and flavorful solution after a long day of hiking or outdoor activities.
The beauty of this meal lies in its versatility: you can customize the veggies based on your preferences or what you have available, and the sausages come in so many varieties—chicken, beef, pork, or vegetarian options—making it suitable for all campers.
How to Make Grilled Sausages and Veggies
Prepare the Ingredients
Sausages: Choose your favorite sausages. For convenience, you can pre-cook or partially cook the sausages at home, but fresh sausages will also work perfectly. Popular options include bratwurst, Italian sausages, or kielbasa. You can also experiment with different flavors, like spicy chorizo or chicken sausages for a lighter option.
Veggies: Select a variety of vegetables that grill well. Common choices include bell peppers, zucchini, onions, mushrooms, asparagus, and sweet potatoes. You can also use potatoes by wrapping them in foil and grilling them alongside the sausages. Slice or chop them into bite-sized pieces for even cooking.
Marinate or Season the Veggies (Optional)
While not required, marinating the vegetables can add extra flavor. Create a simple marinade with olive oil, garlic, salt, pepper, and fresh herbs like rosemary or thyme. If you’re short on time, just drizzle the vegetables with olive oil and season them generously with salt, pepper, and any other spices you like, such as paprika, cumin, or Italian seasoning.
Prepare the Grill or Campfire
If you’re using a grill, set it to medium-high heat. For campfire cooking, create an even bed of hot coals for consistent heat. You can also use a grill grate if you’re cooking over a direct flame.
Brush the grill grate or a grill pan with a little oil to prevent the sausages and vegetables from sticking.
Grill the Sausages and Veggies
Place the sausages directly on the grill or over the campfire, turning occasionally to ensure they cook evenly. Grill for about 15-20 minutes, depending on the thickness of the sausages. You’ll know they’re done when they’re golden brown and cooked through, with a nice char on the outside.
For the veggies, arrange them in a single layer on the grill. Use a grill basket if you’re cooking smaller veggies like mushrooms or onions that might fall through the grates. Cook the vegetables, turning occasionally, until they’re tender and slightly charred, usually 8-10 minutes. If you’re grilling sweet potatoes, you can pre-cook them by wrapping them in foil and placing them on the grill for about 25-30 minutes before finishing them off on the grill.
Serve and Enjoy
Once the sausages and veggies are cooked to your liking, remove them from the grill.
Serve the grilled sausages with the roasted vegetables on the side. This meal is perfect on its own, or you can pair it with grilled bread, a simple side salad, or potato salad for a heartier dinner.
Why This Dish Is So Convenient for Camping
- Minimal Cleanup: Grilled sausages and veggies are great because everything can be cooked on the grill or over the campfire, which reduces the number of pots and pans you need to clean. Once you’re done eating, simply toss the foil or clean the grill grate with a wire brush.
- Quick and Easy: The preparation time is minimal, and the cooking time is even shorter. After a long day of outdoor activities, the last thing you want is a complex meal. This dish cooks quickly, making it the perfect option for those who want a delicious meal without spending hours on food prep.
- Customizable: The beauty of this meal is that you can mix and match ingredients based on what you like or what you have on hand. Use different sausages or try different vegetables to keep the meal fresh each time. You can also make it vegan-friendly by using plant-based sausages or tofu and swapping traditional veggies for others like eggplant or spinach.
Serving Suggestions for Grilled Sausages and Veggies
- On a Bun: For a more filling meal, serve your grilled sausages in soft buns with your favorite toppings, like mustard, sauerkraut, or ketchup.
- With Grilled Potatoes: Grilled potatoes make the perfect side dish to complement the sausages. You can wrap them in foil with some olive oil, garlic, and rosemary, then grill them until crispy and golden.
- With a Salad: For a refreshing contrast, pair the grilled sausages and veggies with a green salad or a Mediterranean-style salad featuring tomatoes, cucumbers, and feta cheese.
Tips for Perfect Grilled Sausages and Veggies
- Pre-cook Potatoes for Faster Grilling: To save time, partially cook potatoes at home by boiling them or microwaving them before you leave for your camping trip. This will reduce the grilling time and ensure they cook through evenly.
- Use a Grill Basket for Veggies: If you’re worried about smaller vegetables falling through the grill grate, a grill basket is an essential tool. It will allow you to grill veggies evenly while keeping them from slipping through.
- Monitor the Heat: Make sure the heat isn’t too high, especially when grilling sausages, as it can cause them to burn on the outside while remaining raw on the inside. Medium heat is ideal for a nice, even cook.
Why Grilled Sausages and Veggies Are a Crowd-Pleaser
Grilled sausages and veggies are a go-to camping meal because they check all the boxes: simple, quick, delicious, and satisfying. The smoky flavors from the grill, combined with the savory sausages and tender veggies, create a meal that everyone will love. Whether you’re camping with friends, family, or on your own, this protein-packed dinner will fuel your adventures and leave you ready for the next one. It’s an easy, no-fuss meal that brings people together around the campfire.
4) Sweet Treats and Snacks for Your Camping Trip
Classic S’mores with a Twist – Creative Variations of the Traditional Campfire Dessert
Why S’mores Are the Ultimate Camping Dessert
S’mores have long been a beloved camping tradition. The combination of toasty marshmallows, melted chocolate, and crunchy graham crackers makes for a simple yet perfect dessert around the campfire. But if you’re looking to elevate the classic s’mores experience, adding your own twist is a fun and delicious way to surprise your taste buds.
From unique flavors of chocolate to alternative fillings and crusts, there are endless possibilities for creative s’mores variations. Whether you prefer a rich, gourmet version or a simplified twist, there’s a s’more out there for every camper.
Creative S’mores Variations to Try at Your Next Campfire
Peanut Butter S’mores
Add a layer of creamy peanut butter on the graham cracker before adding the roasted marshmallow. The rich and savory peanut butter combines perfectly with the sweet marshmallow and chocolate, creating an irresistible flavor.
Why It Works: Peanut butter adds a creamy texture and extra depth of flavor that complements the traditional s’mores components. It’s perfect for peanut butter lovers!
Caramel S’mores
Instead of using traditional chocolate, try drizzling warm caramel sauce on the graham cracker. Combine it with a roasted marshmallow for a sweet, gooey treat. For an extra touch, you can even use caramel-filled chocolate squares to make it even richer.
Why It Works: The richness of caramel paired with the marshmallow’s soft texture creates a perfect balance of sweetness. It’s an indulgent twist on the classic that’s sure to impress.
Mint Chocolate S’mores
Swap out regular chocolate for mint chocolate squares or mint chocolate chip cookies. This variation brings a refreshing coolness from the mint that contrasts beautifully with the warm roasted marshmallow.
Why It Works: The refreshing minty flavor adds a burst of freshness, making this a perfect s’mores variation for those who enjoy mint-flavored desserts.
Strawberry S’mores
For a fruity twist, add a few slices of fresh strawberries to your s’more. The tartness of the strawberries balances out the sweetness of the marshmallow and chocolate. You can even try using chocolate-dipped strawberries for a more decadent version.
Why It Works: The fresh fruit brings a new layer of flavor and juiciness, offering a refreshing contrast to the melty chocolate and marshmallow.
Nutty S’mores
Add a handful of your favorite nuts to the s’mores, such as almonds, hazelnuts, or pecans. Toast them lightly over the fire before adding them to your s’more for an extra crunch and a nutty flavor boost.
Why It Works: Nuts add a crunchy texture and a savory flavor that perfectly balances the sweetness of the chocolate and marshmallow.
S’mores with a Cookie Twist
Instead of using traditional graham crackers, try substituting them with chocolate chip cookies, Oreo cookies, or biscotti. These cookies will bring extra flavors and textures to your s’mores creation.
Why It Works: The cookies’ flavor elevates the s’mores experience, and depending on the cookie, you can create an entirely new taste—like a cookie and cream s’more with Oreos or a chocolate chip s’more.
Salted Caramel Pretzel S’mores
Add a salty twist to your s’mores by using salted pretzels as the crust instead of graham crackers. Combine the crunchy pretzels with caramel and marshmallows for a sweet and salty contrast.
Why It Works: The salty pretzels add an unexpected crunch and depth to the sweet elements of the s’mores, making this twist a popular choice for those who love sweet and salty combinations.
How to Make Perfect S’mores Every Time
- Choose the Right Marshmallow
- For the classic s’more, go for large marshmallows that can toast evenly. If you prefer a softer marshmallow, opt for mini marshmallows that melt faster and give a gooey effect.
- Tip: Toast marshmallows slowly over the fire to achieve that perfect golden brown exterior while maintaining a soft, gooey center.
- Use High-Quality Chocolate
- The quality of chocolate can make a huge difference in your s’mores. While milk chocolate is the traditional choice, try dark chocolate or flavored chocolate (such as salted caramel chocolate) for a more sophisticated flavor.
- Tip: Thin chocolate squares melt better and are easier to work with compared to thick bars.
- Consider Alternative Bases
- Instead of using just graham crackers, try a variety of base options such as shortbread cookies, chocolate chip cookies, or rice cakes for a lighter option. Each base offers a unique flavor and texture.
- Tip: Choose something that complements the flavor profile of the marshmallow and chocolate—crunchy bases work well with gooey fillings.
- Toast Marshmallows to Perfection
- The key to a great s’more lies in the toasted marshmallow. A perfectly roasted marshmallow is golden on the outside and soft and warm on the inside. Don’t over-roast it! Aim for that sweet spot where it’s evenly toasted but not burnt.
S’mores: A Tradition You Can Personalize
While classic s’mores will always be a campfire favorite, adding your own twist opens up a world of flavor possibilities. These creative variations allow you to take the traditional s’mores and personalize them to suit your taste, whether you prefer a sweet, salty, fruity, or nutty version.
With so many fun and easy variations to choose from, you’ll never get bored of this classic camping treat. And the best part is that you can easily experiment with different combinations of ingredients and make your own signature s’more! These creative s’mores options are not only delicious but also a great way to bond with fellow campers over a shared love of food and fire.
Campfire Banana Boats – A Fun and Easy Treat with Chocolate, Marshmallows, and Fruit
Why Campfire Banana Boats Are the Ultimate Campfire Dessert
When it comes to easy camping treats, nothing beats the simplicity and creativity of campfire banana boats. These fun, customizable treats combine the sweetness of ripe bananas, the gooeyness of melted marshmallows, and the richness of chocolate for a dessert that’s both decadent and satisfying. The best part is, you can prepare everything in one banana peel, making cleanup a breeze.
This dessert is perfect for campers of all ages, offering a unique spin on traditional campfire snacks. Whether you’re cooking with kids or fellow campers, banana boats provide a delicious way to wrap up the night around the fire. Plus, with endless flavor variations, you can adapt it to your personal taste.
How to Make Classic Campfire Banana Boats
- Ingredients You’ll Need
- Bananas: Choose ripe bananas that are firm but not overripe, as they hold up well to the heat of the campfire.
- Chocolate: Use chocolate chips or chunks. You can experiment with dark, milk, or even white chocolate depending on your preference.
- Marshmallows: These will melt perfectly inside the banana, creating a gooey texture.
- Other Add-ins: Feel free to include peanut butter, crushed graham crackers, nuts, or coconut flakes to enhance the flavor.
- Preparation
- Slice the banana down the center lengthwise, being careful not to cut all the way through. The peel will serve as the boat for the filling.
- Stuff the banana with your chosen fillings. Start with a few pieces of chocolate, then add marshmallows, and any additional toppings you desire.
- Wrap the banana in foil to keep all the ingredients secure and to prevent burning. Make sure the foil is sealed tightly.
- Cooking Your Banana Boats
- Place the wrapped banana boats directly on the campfire’s hot coals for about 10-15 minutes, turning them occasionally to ensure even cooking.
- Keep an eye on the banana boats. When the chocolate and marshmallows are fully melted, and the banana is soft, they’re ready to be enjoyed.
Creative Variations to Try with Your Banana Boats
- Nutty Banana Boats
- Add some chopped nuts, like walnuts, pecans, or almonds, to your banana boat for an extra crunch. The salty and crunchy nuts contrast nicely with the sweet banana and melty chocolate.
- Why It Works: The nuts provide a nice texture and add a savory depth to the dessert, making each bite a little different.
- Caramel Banana Boats
- Instead of just chocolate and marshmallows, drizzle caramel sauce over your banana after it’s cooked. You can use store-bought caramel sauce or make your own by melting butter, brown sugar, and a pinch of sea salt.
- Why It Works: The rich, buttery caramel adds a smooth and indulgent layer that elevates the banana’s natural sweetness.
- S’mores Banana Boats
- Mix your banana boat with the classic s’mores ingredients: crushed graham crackers, chocolate, and marshmallows. You can even toss in a few pieces of graham cracker crumbs for added texture.
- Why It Works: The s’mores twist gives you that familiar flavor profile of campfire favorites, but with the added richness of banana.
- Tropical Banana Boats
- For a refreshing twist, include tropical ingredients like coconut flakes, pineapple chunks, and macadamia nuts.
- Why It Works: The combination of tropical fruits adds a light, refreshing element that complements the sweetness of the banana and the richness of the chocolate.
- Peanut Butter Banana Boats
- Spread some peanut butter inside the banana before adding the chocolate and marshmallows. The creamy peanut butter pairs wonderfully with the banana’s sweetness and the chocolate’s richness.
- Why It Works: Peanut butter’s creaminess gives the banana boat a savory-sweet contrast, making it a more filling and satisfying treat.
Tips for the Perfect Campfire Banana Boats
- Don’t Overstuff the Bananas
- While it can be tempting to load up the banana with as many fillings as possible, it’s best to keep the ingredients balanced. Too much chocolate or marshmallow can overflow, creating a mess.
- Tip: Stick to a handful of each ingredient for a balanced texture and taste.
- Use Quality Ingredients
- Since banana boats are all about flavor, use high-quality chocolate and fresh fruit. The better your ingredients, the better your final dessert will be.
- Tip: Opt for dark chocolate for a more intense flavor or milk chocolate for a sweeter experience.
- Foil is Key
- Make sure to wrap your banana boat tightly in aluminum foil to hold in the heat and prevent the fillings from spilling. It also helps the banana cook evenly.
- Tip: Double wrap the banana boat if you’re worried about the foil tearing during cooking.
- Watch the Heat
- Too much direct heat can cause the banana peel to burn, so place the banana boats on the cooler parts of the fire. If you’re using a campfire with flames, move the boats to the coals for gentler heat.
- Tip: Rotate the banana boat occasionally to ensure even cooking and avoid hot spots.
Campfire Banana Boats – A Sweet End to a Day Outdoors
Banana boats are an excellent dessert option for camping because they’re easy to prepare, fun to customize, and offer a sweet, indulgent finish to your outdoor meals. Whether you’re enjoying a traditional version with chocolate and marshmallows or experimenting with tropical fruits and nuts, banana boats are sure to be a hit around the campfire.
Not only are they a crowd-pleasing treat, but they’re also versatile and can be tailored to suit any camping crowd, from kids to adults. So, the next time you gather around the fire, try out these delicious campfire banana boats and enjoy the ultimate sweet, gooey treat in the great outdoors!
No-Bake Energy Bites – A Healthy Snack Option to Keep You Fueled Throughout the Day
Why No-Bake Energy Bites Are Perfect for Camping
When you’re out camping, having a quick and healthy snack on hand can make all the difference between feeling sluggish or staying energized for your next adventure. No-bake energy bites are the perfect snack for any outdoor outing because they are easy to prepare, require no cooking, and provide a powerful combination of nutrients to keep you going all day. These bites are packed with protein, healthy fats, and fiber, making them an excellent fuel source when you need a boost.
These portable snacks are also highly customizable, so you can adapt them to your preferences and dietary needs, whether you’re following a gluten-free, vegan, or paleo diet. Not only are they a great way to fuel up during outdoor activities, but they’re also a fun activity to make with friends or family before heading out.
How to Make No-Bake Energy Bites
- Ingredients You’ll Need
- Oats: The base of these energy bites, providing fiber and slow-releasing carbs to keep you full.
- Nut Butter: Use almond butter, peanut butter, or any nut butter of your choice for creaminess and healthy fats.
- Honey or Maple Syrup: For sweetness and to help bind the ingredients together.
- Chia Seeds or Flax Seeds: For an extra dose of omega-3 fatty acids and fiber.
- Chocolate Chips: Add some chocolate chips for a little indulgence and extra flavor.
- Add-ins: Customize with dried fruits, shredded coconut, or even a bit of protein powder for an extra boost.
- Preparation
- In a bowl, combine the rolled oats, nut butter, honey or maple syrup, and any additional ingredients you want to include.
- Stir everything together until well mixed. If the mixture is too sticky, you can add a little more oats or nut butter to adjust the consistency.
- Roll the mixture into small balls, about the size of a walnut. If you prefer, you can also roll them in shredded coconut or chopped nuts for added texture.
- Place the energy bites on a baking sheet or plate and refrigerate them for about 30 minutes to help them firm up.
- Storing Your Energy Bites
- Store the energy bites in an airtight container for up to one week. If you’re planning a longer camping trip, you can freeze them in advance to keep them fresh.
Flavor Variations for Your No-Bake Energy Bites
- Peanut Butter and Chocolate Energy Bites
- If you’re a fan of the classic peanut butter and chocolate combo, add a generous portion of chocolate chips and peanut butter to your energy bites.
- Why It Works: The creamy peanut butter offers healthy fats, while the chocolate chips satisfy your sweet tooth without overwhelming the snack with too much sugar.
- Tropical Energy Bites
- Try a tropical twist by adding dried pineapple, coconut flakes, and chia seeds for a burst of fresh flavors and nutrients.
- Why It Works: The dried pineapple gives a chewy, fruity texture, while the coconut adds a refreshing tropical flair. Chia seeds bring extra fiber and healthy fats.
- Cinnamon Raisin Energy Bites
- Combine raisins, cinnamon, and a bit of vanilla extract for a comforting flavor combination. You can also add some chopped pecans or walnuts for a crunchy texture.
- Why It Works: The cinnamon adds warmth and depth of flavor, while raisins provide natural sweetness and raisins are rich in iron.
- Trail Mix Energy Bites
- For a more savory snack, include sunflower seeds, pumpkin seeds, and dried cranberries. A sprinkle of sea salt can also enhance the flavor.
- Why It Works: The salty seeds complement the sweet dried cranberries, giving you a balanced, snackable bite.
- Cacao and Almond Energy Bites
- If you’re craving a more decadent yet healthy option, mix in some raw cacao powder, chopped almonds, and dates for a rich flavor.
- Why It Works: Cacao provides a slight bitterness and deep chocolate flavor, while dates offer natural sweetness and a chewy texture.
Why No-Bake Energy Bites are a Must-Have for Camping Trips
Convenience
These energy bites are incredibly easy to make and require no baking, which makes them perfect for camping where access to a kitchen or oven may be limited. You can prep them ahead of time and take them along on your trip without any hassle.
Tip: They also pack well in a small container, so they won’t take up much space in your cooler or backpack.
Customizable to Your Preferences
No-bake energy bites are extremely versatile. You can adjust the flavor profile and ingredients to match your tastes, dietary restrictions, or nutritional goals.
Tip: Feel free to swap out ingredients depending on what you have available or what you prefer. Almond butter for peanut butter, raisins for dried cherries, or maple syrup for honey—the possibilities are endless!
Health Benefits
These energy bites are a great source of healthy fats, fiber, and protein, all of which are crucial for keeping your energy levels up during outdoor activities. They provide long-lasting fuel without the sugar crash of traditional snacks.
Tip: If you’re looking to boost the protein content, consider adding a scoop of your favorite plant-based protein powder or whey protein to the mix.
Kid-Friendly and Fun to Make
No-bake energy bites are perfect for kids who are camping with you. Not only are they easy to make, but they’re also fun for little hands to roll into balls. Plus, you can involve them in the kitchen and let them choose their favorite add-ins.
Tip: For a fun twist, set up a little DIY energy bite station where everyone can mix their ingredients and roll their snacks.
Versatile for All Camping Activities
Whether you’re hiking, fishing, or just lounging by the campfire, no-bake energy bites are the perfect on-the-go snack. They’re compact, easy to eat with one hand, and provide a steady energy boost to keep you active and satisfied.
Tip: Keep a batch of energy bites in your bag for a quick snack before hitting the trails or to refuel after a long hike.
Final Thoughts on No-Bake Energy Bites for Your Camping Adventure
No-bake energy bites are an ideal snack for camping, offering a perfect balance of convenience, nutrition, and flavor. With just a few simple ingredients, you can create a variety of delicious, energy-boosting bites that will keep you fueled throughout your outdoor adventures. Whether you prefer a chocolatey treat or a more tropical flavor, these bites are customizable to suit everyone’s taste and dietary needs.
By preparing them ahead of time and packing them along on your trip, you’ll have a satisfying and healthy snack that doesn’t require any cooking or preparation—just grab and go. They’re a great addition to your camping recipe arsenal, offering a guilt-free, convenient way to stay energized, happy, and ready for your next outdoor challenge.
Conclusion
Camping meals should be as enjoyable as the adventure itself, and with the variety of recipes we’ve explored, you’re sure to find something that suits every taste and skill level. From simple camping meals like no-cook wraps and energy bites to hearty campfire chili and grilled sausages, there’s no shortage of delicious options to keep you fueled throughout your outdoor experience. Whether you’re craving a quick breakfast like simple campfire pancakes or a savory dinner such as foil packet garlic butter shrimp, these easy-to-make recipes ensure you spend less time cooking and more time enjoying the great outdoors.
The beauty of these camping recipes is their versatility—perfect for beginners and seasoned campers alike, offering stress-free meal prep that doesn’t compromise on taste. So, next time you’re out camping, try out these meals to elevate your outdoor cooking game.
We’d love to hear about your favorite camping meals! Share your go-to recipes or camping meal hacks in the comments below and inspire others to enjoy stress-free cooking during their next adventure.