

Introduction:
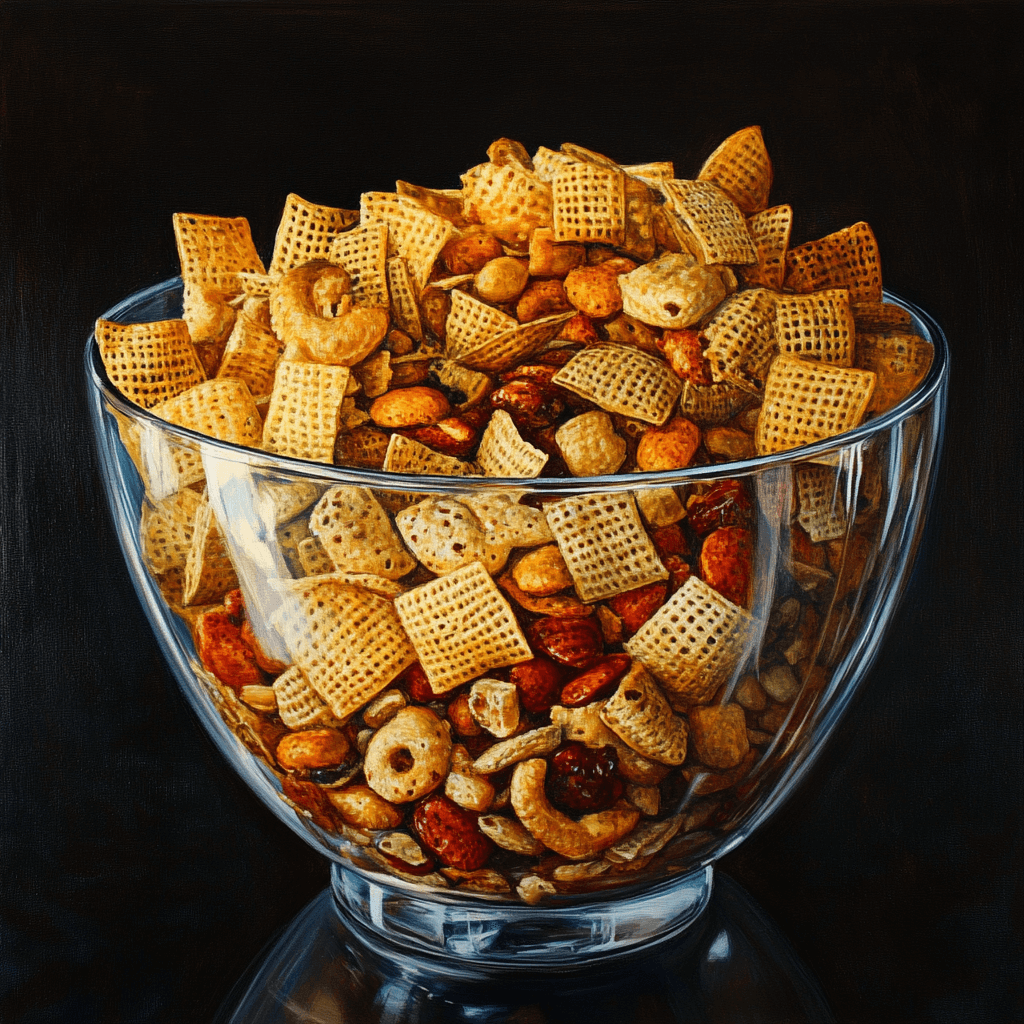
Chex Mix has been a go-to snack for decades, beloved for its perfect blend of flavors, textures, and versatility. Whether it’s for a holiday gathering, a movie night, or simply a midday craving, this classic mix never fails to hit the spot.
While there are several ways to prepare Chex Mix, baking it in the oven takes it to a whole new level. The slow, even heat ensures that each piece is perfectly crisp and thoroughly coated in its signature savory seasoning. The result? A snack that’s irresistibly crunchy, full of flavor, and far superior to its store-bought counterpart.
In this guide, we’ll show you how to make the ultimate Chex Mix Recipe Oven Edition, complete with easy steps, pro tips, and creative variations to suit any occasion. Let’s get baking!

1) Why Make Chex Mix in the Oven?
fore more information:https://www.thekitchn.com/chex-mix-recipe-23022715
Why Make Chex Mix in the Oven?
Chex Mix is delicious no matter how it’s made, but baking it in the oven brings out the best in this classic snack. Here’s why the oven is the ultimate way to prepare your Chex Mix:
Better Texture and Flavor
Oven baking ensures each ingredient becomes perfectly toasted, creating a deeper, richer flavor that stovetop or microwave methods simply can’t achieve. The gentle, consistent heat evenly crisps the Chex cereal, nuts, and pretzels, while helping the buttery seasoning cling to every piece. This method also caramelizes the seasonings slightly, enhancing the overall savory taste. The result? A snack that’s perfectly crunchy with a mouthwatering aroma that fills your kitchen.
Perfect for Celebrations
Chex Mix is a crowd-pleaser for every occasion, from casual game nights to elegant holiday gatherings. Baking it in the oven allows you to prepare larger batches than other methods, ensuring there’s plenty to go around. Plus, the homemade touch makes it even more special, giving your guests a fresh, flavorful snack that’s far superior to pre-packaged versions. Whether you’re hosting a party or giving it as a thoughtful edible gift, oven-baked Chex Mix is a surefire hit.
Customizable Ingredients
One of the best things about making Chex Mix at home is the freedom to tailor it to your taste. Prefer it gluten-free? Use only gluten-free Chex cereals and skip the bagel chips. Love spicy snacks? Add a pinch of cayenne or red pepper flakes to the seasoning mix. You can also cater to dietary preferences or allergies by adjusting the mix-ins, swapping nuts for seeds, or adding sweet elements like chocolate candies for a sweet-and-savory twist. The oven method works equally well no matter how you customize it!
Easy and Hassle-Free
Unlike stovetop methods that require constant attention or microwave recipes that can leave some pieces soggy, baking Chex Mix in the oven is straightforward and foolproof. After mixing the ingredients and seasoning, you simply spread it on a baking sheet and let the oven do the work. Stirring every 15 minutes ensures even coating and crispiness, but otherwise, it’s a hands-off process. Whether you’re a seasoned chef or a kitchen novice, the oven method is as easy as it is reliable.
2) Optional Sections:
Optional Sections: FAQ
Can I Make Chex Mix Without Nuts?
Absolutely! One of the best things about Chex Mix is its flexibility. If you or your guests have nut allergies or simply don’t enjoy nuts, you can easily leave them out without sacrificing flavor or texture. To maintain the same variety of crunch, consider replacing nuts with other mix-ins such as:
- Extra pretzels
- Bagel chips
- Cheese crackers
- Seeds (e.g., sunflower seeds or pumpkin seeds) for a nut-free but nutritious alternative
Feel free to experiment with combinations to create a mix that’s perfect for your needs. The oven method works just as well, regardless of the ingredients you choose.
How Long Does Homemade Chex Mix Last?
Homemade Chex Mix can stay fresh and crunchy for up to 2 weeks if stored properly. Here’s how to ensure it lasts as long as possible:
- Storage: Store your Chex Mix in an airtight container or resealable bag to prevent exposure to air and moisture.
- Location: Keep it in a cool, dry place, away from direct sunlight or humidity.
- Freezing Option: If you need to store it for longer, you can freeze your Chex Mix. Simply place it in a freezer-safe bag, and it will stay good for up to 3 months. When ready to enjoy, let it thaw at room temperature for a few hours.
Remember, homemade Chex Mix doesn’t contain preservatives, so freshness depends on proper storage.
What’s the Best Way to Reheat Chex Mix?
Reheating Chex Mix is easy if you want to refresh its crunch or enjoy it warm:
- Oven Method: Spread the Chex Mix on a baking sheet and place it in a preheated oven at 250°F for about 5–10 minutes, stirring occasionally. This method crisps it back up and warms it evenly without burning.
- Microwave Method: If you’re short on time, place a single serving of Chex Mix on a microwave-safe plate and heat it for 15–20 seconds. Be careful not to overheat, as this may make some pieces soggy.
- Air Fryer Option: If you have an air fryer, reheat the mix at 300°F for about 3–5 minutes for a quick, crispy refresh.
While reheating isn’t always necessary, these methods ensure your snack tastes as fresh as the day you made it!

3) Ingredients You’ll Need for the Perfect Chex Mix
Chex Cereals: The Foundation of a Perfect Mix
At the heart of every delicious Chex Mix recipe are the iconic Chex cereals, known for their light, crispy texture and ability to soak up flavorful seasonings. These cereals form the backbone of the mix, providing both crunch and versatility. Here’s a closer look at the three types of Chex cereals typically used:
Corn Chex
Corn Chex is a fan favorite for its mild flavor and airy crunch. Made primarily from whole-grain corn, this cereal has a subtle sweetness that pairs beautifully with savory seasonings. Its golden-yellow color also adds a visually appealing element to the mix. Corn Chex is naturally gluten-free, making it an excellent choice for those avoiding gluten.
Rice Chex
Rice Chex is a staple in Chex Mix for its delicate, crispy texture and neutral flavor. Made from whole-grain rice, this cereal easily absorbs the buttery seasoning mix, ensuring each bite is packed with flavor. Like Corn Chex, Rice Chex is gluten-free, making it a must-have for creating a mix that suits a variety of dietary needs.
Wheat Chex
Wheat Chex adds depth and a hearty texture to Chex Mix. Made from whole-grain wheat, this cereal is slightly denser than its corn and rice counterparts, giving the mix a satisfying chew. Its nutty, robust flavor provides a delicious contrast to the lighter, crisper cereals. However, it’s important to note that Wheat Chex is not gluten-free, so you may want to omit it or replace it with more Corn or Rice Chex if you’re catering to a gluten-sensitive crowd.
Customizing Your Chex Cereals
The beauty of Chex Mix lies in its adaptability. While the classic combination of Corn, Rice, and Wheat Chex is a tried-and-true favorite, feel free to customize the ratios to your liking. Prefer a lighter mix? Use more Rice and Corn Chex. Want a heartier texture? Add extra Wheat Chex. You can even experiment with flavored Chex cereals (like Honey Nut or Cinnamon Chex) for a unique twist!
By combining these three cereals, you’ll create a mix with a variety of textures and flavors that’s perfectly balanced and ready to be seasoned to perfection.
Mix-Ins: Adding Variety and Crunch
While Chex cereals form the foundation of this classic snack, the mix-ins are what make Chex Mix truly exciting and customizable. A perfect Chex Mix balances salty, crunchy, and savory elements, and these mix-ins play a key role in creating that harmony. Here’s a breakdown of the most popular mix-ins and how they enhance your Chex Mix:
Pretzels
Pretzels are a must-have in any Chex Mix for their salty, crunchy goodness. Their unique shape—whether twists, sticks, or minis—adds variety to the mix and ensures every handful is different. The salt on pretzels also pairs perfectly with the savory seasoning, creating bursts of flavor in every bite. You can use classic pretzels or mix it up with flavored options like garlic or cheddar pretzels for an extra layer of taste.
Mixed Nuts
Nuts bring a rich, nutty flavor and satisfying crunch to Chex Mix, making it even more addictive. Popular choices include:
- Almonds: Add a slightly sweet, earthy flavor and a firm crunch.
- Peanuts: A salty, protein-packed addition that complements the seasoning mix beautifully.
- Cashews: For a buttery, creamy crunch that’s a bit softer than other nuts.
You can stick with one type of nut or combine several for a more complex flavor profile. For a twist, try using roasted or honey-glazed nuts, but keep in mind they’ll slightly alter the overall seasoning flavor.
Nut-Free Option: If you need to omit nuts due to allergies, consider swapping them with sunflower seeds, roasted chickpeas, or more pretzels to maintain texture.
Bagel Chips
Bagel chips bring a hearty, crunchy element to the mix with their dense texture and bold, toasted flavor. They soak up the buttery seasoning beautifully, making them a flavorful standout in every handful. You can use plain bagel chips or go for flavored varieties like garlic or onion. If you don’t have bagel chips, rye chips or pita chips make excellent alternatives.
Optional Add-Ins for Extra Creativity
While the above mix-ins are staples in traditional Chex Mix recipes, feel free to get creative with additional ingredients to make the recipe your own:
- Cheese Crackers: Add a pop of cheesy flavor with crackers like Cheez-Its or Goldfish.
- Popcorn: A light and airy option that adds a different texture.
- Seasoned Snack Sticks: Garlic or sesame sticks work well for extra crunch and bold flavor.
- Spicy Elements: Add jalapeño chips or spicy corn nuts for a kick of heat.
- Sweet Additions: If you want to create a sweet-and-savory mix, consider adding chocolate candies, dried cranberries, or caramel-coated popcorn.
Balancing the Mix-Ins
The key to a perfect Chex Mix is balance. Aim to use a variety of mix-ins to keep the textures and flavors interesting. Start with equal portions of pretzels, nuts, and bagel chips, then adjust based on your preferences. If you’re creating a party mix, you can add extra pretzels or crackers to stretch the recipe without losing flavor.
With the right combination of mix-ins, your oven-baked Chex Mix will be a snack everyone loves—and it’s completely customizable to your taste and dietary needs.
Seasoning Ingredients: The Flavor Powerhouse
The seasoning is the soul of any Chex Mix, transforming simple cereals and mix-ins into a savory, addictive snack. The perfect combination of buttery richness, bold umami, and aromatic spices makes every bite burst with flavor. Let’s break down the essential ingredients that make the magic happen:
Worcestershire Sauce: The Umami Boost
Worcestershire sauce is the secret weapon behind the bold and complex flavor of Chex Mix. Made from a mix of vinegar, molasses, anchovies, tamarind, and spices, it adds a savory depth with a hint of tanginess. This umami-rich sauce helps the seasoning cling to the Chex cereal and mix-ins, ensuring every bite is packed with flavor. If you’re looking for substitutes, soy sauce or tamari (for a gluten-free option) can work, though they may alter the flavor slightly.
Garlic Powder: A Savory Essential
Garlic powder is a cornerstone of the Chex Mix seasoning, adding a robust and savory aroma that elevates the snack. Unlike fresh garlic, garlic powder evenly distributes its flavor across the mix without introducing moisture. Its warm, earthy taste balances the saltiness of the other ingredients, creating a well-rounded seasoning profile. For garlic lovers, consider increasing the amount or adding roasted garlic powder for a richer flavor.
Onion Powder: Aromatic and Mildly Sweet
Onion powder brings a subtle sweetness and depth of flavor to the seasoning mix. Its mild oniony notes enhance the overall complexity of the Chex Mix without overpowering it. Together with garlic powder, it creates the perfect base for a savory snack. If you’re feeling adventurous, you could also try granulated onion for a slightly coarser texture or a mix of onion and chive powder for a unique twist.
Melted Butter: The Flavor Carrier
Butter is the glue that holds everything together—both literally and figuratively. Its creamy richness coats the Chex cereal, pretzels, nuts, and chips, helping the seasoning stick while adding a luxurious, buttery taste. Melted butter also ensures even baking, helping the mix crisp up beautifully in the oven. For a different flavor profile, you could substitute ghee (clarified butter) for a nuttier taste or use vegan butter to make the mix dairy-free.
Optional Seasoning Enhancements
To make your Chex Mix seasoning even more flavorful, consider incorporating one or more of these optional ingredients:
- Seasoned Salt: Adds a touch of extra saltiness and boosts the overall flavor.
- Cayenne Pepper or Paprika: For a kick of spice and warmth, sprinkle in a small amount of cayenne or smoky paprika.
- Dried Herbs: A pinch of dried thyme, rosemary, or parsley can add a touch of freshness.
- Parmesan Cheese: Grated Parmesan adds a cheesy, savory twist to the seasoning.
How to Combine the Ingredients
To create the seasoning, melt the butter in a small saucepan or microwave-safe bowl. Stir in the Worcestershire sauce, garlic powder, onion powder, and any additional seasonings until fully blended. Pour the mixture evenly over the Chex cereals and mix-ins, tossing gently to ensure everything is evenly coated. The buttery seasoning not only delivers flavor but also helps the mix crisp up perfectly in the oven.
Tips for Seasoning Success
- Taste and Adjust: Before pouring the seasoning over the mix, taste it to ensure it’s perfectly balanced. Add more salt, garlic, or Worcestershire sauce if needed.
- Distribute Evenly: Pour the seasoning slowly and in stages, tossing the mix after each addition to ensure even coverage.
- Don’t Skimp on Butter: The butter is what makes the seasoning stick and helps the mix bake to a golden, crispy perfection. Use the full amount for the best results.
By combining these seasoning ingredients, you’ll create a bold, flavorful mix that’s guaranteed to disappear quickly at any gathering!
Optional Additions: Elevate Your Chex Mix with Unique Flavors
While the classic Chex Mix seasoning is already delicious, adding optional ingredients can take your snack to the next level. These additions allow you to tailor the flavor to suit your preferences or the occasion, from cheesy and savory to spicy or sweet. Here’s how you can incorporate these optional extras to make your Chex Mix truly unforgettable:
Parmesan: A Cheesy Upgrade
Grated Parmesan cheese adds a rich, savory, and slightly nutty flavor to your Chex Mix. Its umami-packed profile pairs beautifully with the traditional seasonings, giving the mix a gourmet touch. For best results:
- Add the Parmesan after baking while the mix is still warm, so it lightly melts and sticks to the ingredients.
- Use freshly grated Parmesan for a more intense flavor, or opt for pre-grated for convenience.
- Try pairing Parmesan with dried herbs like rosemary or thyme for a more Italian-inspired twist.
You could also experiment with other hard cheeses like Pecorino Romano or Asiago for similar results.
Cayenne Pepper: A Spicy Kick
For those who love a little heat, cayenne pepper is the perfect addition to your Chex Mix. Its vibrant spice adds a punch of flavor that balances the buttery and savory notes of the classic recipe. Here’s how to use it:
- Start small (about 1/4 teaspoon) and increase to taste, as cayenne can be quite potent.
- Mix the cayenne directly into the melted butter and seasoning mixture for even distribution.
- For a smoky twist, substitute cayenne with smoked paprika or chipotle powder.
If you’re serving a crowd, consider making two batches—one spicy and one mild—so everyone can enjoy their preferred level of heat.
Sweet Elements: A Sweet-and-Savory Combo
Adding a touch of sweetness to your Chex Mix creates a delightful contrast with the savory seasonings. Here are a few sweet options to consider:
- Honey: Drizzle a small amount of honey over the mix after baking for a light sweetness. For an even coat, mix honey with melted butter before tossing it into the Chex Mix.
- Maple Syrup: For a rich, caramel-like sweetness, substitute honey with pure maple syrup.
- Brown Sugar: Add a tablespoon or two of brown sugar to the butter mixture for a deeper, molasses-like flavor.
- Candied Nuts: Use honey-roasted peanuts or add a handful of candied almonds for an extra sweet crunch.
- Chocolate Candies: Once the Chex Mix has cooled, mix in some chocolate pieces, like M&M’s, for a sweet surprise in every handful.
These additions are especially great if you’re making a mix for holidays or festive occasions, where sweet-and-savory snacks are always a hit.
Combining Flavors: Endless Possibilities
What makes Chex Mix so versatile is that you don’t have to choose just one optional addition—you can combine them! For example:
- Create a Spicy Parmesan Chex Mix by combining cayenne pepper with Parmesan cheese.
- Try a Honey-Sriracha Chex Mix by mixing honey with a splash of sriracha for a sweet and spicy combo.
- Make a Savory-Sweet Blend with a touch of brown sugar, Parmesan, and smoked paprika for a flavor-packed twist.
Tips for Adding Optional Ingredients
- Timing Matters: Some ingredients, like Parmesan or chocolate candies, are best added after baking to prevent them from burning or melting.
- Balance the Flavors: If you’re adding sweet elements, slightly reduce the Worcestershire sauce or salty seasoning to keep the mix balanced.
- Test in Small Batches: If you’re experimenting with new flavors, try adding them to a small portion of your mix first to see how they work together.
By incorporating these optional additions, you can transform your Chex Mix into a snack that’s truly your own—whether you’re craving something cheesy, spicy, sweet, or a combination of all three.
4) Step-by-Step Guide to Baking Chex Mix in the Oven
Prepping the Ingredients: How to Measure and Mix the Cereals, Nuts, and Pretzels
The key to making perfect Chex Mix lies in how you prepare and combine your ingredients. Properly measuring and mixing your cereals, nuts, and pretzels ensures even seasoning and a well-balanced mix of textures. Let’s go step by step through the process of prepping your ingredients for the best results:
Measuring the Ingredients
When it comes to Chex Mix, precise measurements are important to achieve the perfect balance of flavors and textures. Here’s how to properly measure each component:
- Chex Cereals (Corn, Rice, Wheat):
- For a traditional batch, aim for 4 cups of Chex cereal in total (e.g., 1.5 cups of Corn Chex, 1.5 cups of Rice Chex, and 1 cup of Wheat Chex). You can adjust the proportions depending on your preference for certain types of cereals. For a lighter mix, use more Rice Chex; for a heartier mix, add more Wheat Chex.
- Use dry measuring cups for an accurate measure—this ensures the right cereal-to-seasoning ratio.
- Pretzels:
- Pretzel sticks or mini pretzels are commonly used in Chex Mix. Measure out around 2 cups of pretzels.
- If you’re using a different type of pretzel (like twists or pretzel chips), just aim for an equivalent volume to match the other ingredients in terms of texture and crunch.
- Nuts:
- If you’re using mixed nuts (like peanuts, cashews, or almonds), 1 to 1.5 cups should be enough for a standard batch. You can mix and match according to your preference or leave out certain nuts for allergies or taste.
- For a more balanced mix, aim for nuts that have similar sizes and textures. Whole almonds, peanuts, or cashews work best, while nuts like walnuts or pecans may break apart during mixing and baking.
Mixing the Dry Ingredients
Once you’ve measured all of your dry ingredients, it’s important to mix them well to ensure even distribution before adding the seasoning. Here’s how:
- Use a Large Bowl or Roasting Pan:
- Since you’re going to toss everything together, use a bowl or pan large enough to hold all the ingredients comfortably. A big mixing bowl or roasting pan works best to allow enough space for stirring.
- A roasting pan is especially useful if you plan on baking the Chex Mix directly in the pan, as it makes the process easier and reduces cleanup.
- Toss the Cereal, Pretzels, and Nuts Together:
- Add all your dry ingredients—Chex cereals, pretzels, and nuts—into the bowl or pan.
- Gently toss them together using a spatula or your hands. Take care not to break the Chex pieces, but make sure that everything is evenly distributed. The goal is to create a balanced mix with each ingredient having roughly the same amount of seasoning coverage later.
Preparing the Wet Seasoning Mixture
Before you mix the seasoning with the dry ingredients, it’s crucial to prepare the butter-based seasoning mixture. Here’s how to prep it:
- Melt the Butter:
- In a microwave-safe bowl or saucepan, melt 1/2 cup (1 stick) of butter. Make sure it’s fully melted but not browned, as this could affect the taste of the final product.
- If you’re making a larger batch, scale up the butter proportionally.
- Add Worcestershire Sauce and Spices:
- To the melted butter, add 2–3 tablespoons of Worcestershire sauce, 1–2 teaspoons of garlic powder, and 1 teaspoon of onion powder.
- You can also add any other spices or seasonings at this point, such as salt, cayenne pepper, or paprika, depending on your recipe. Whisk the ingredients together until fully combined.
- Optional: Adjust for Sweetness or Heat:
- If you’re making a sweet-and-savory mix, now’s the time to add honey, maple syrup, or brown sugar to the melted butter. For heat, add a pinch of cayenne pepper or paprika.
Coating the Ingredients with Seasoning
Now that your dry ingredients are mixed and the seasoning is ready, it’s time to coat everything evenly:
- Drizzle the Butter Mixture:
- Pour the melted butter mixture slowly over the dry ingredients. Do this in stages to ensure even coverage.
- As you drizzle, gently toss or stir the ingredients with a spatula, making sure each piece gets coated in the buttery seasoning. Be thorough but gentle—this helps keep the Chex cereal pieces intact and prevents breakage.
- Toss until Evenly Coated:
- After drizzling, continue to toss the ingredients until the entire mix looks evenly coated. You should see the seasoning glistening on every piece. If needed, use your hands (with gloves on for cleanliness) to mix it thoroughly.
Tips for Even Mixing and Coating:
- Don’t Overcrowd: When mixing the dry ingredients, ensure there’s enough space to move everything around. If the bowl is too small, the ingredients will be harder to mix evenly. You may want to divide the dry ingredients into batches if needed.
- Add Some Seasoning After Baking: If you find that some pieces didn’t get as much seasoning as others, you can always add a little extra seasoning after baking. Just be sure to stir gently so it doesn’t disrupt the crispness.
- Be Patient with the Tossing: When mixing the butter and seasoning, don’t rush the process. Spend a few extra minutes ensuring the seasoning is spread evenly across all the ingredients for the best flavor outcome.
By following these steps, you’ll ensure your Chex Mix ingredients are properly prepped, coated, and ready for the oven. The result will be a perfectly seasoned and balanced snack with crispy, flavorful bites throughout!
Making the Seasoning: Melt Butter and Mix with Worcestershire Sauce, Garlic Powder, and Onion Powder
The seasoning is the heart of Chex Mix, giving it that irresistible flavor that keeps everyone coming back for more. By carefully crafting your seasoning, you can ensure every piece of cereal, nut, and pretzel is perfectly coated and bursting with flavor. Here’s a step-by-step guide to making the perfect seasoning for your oven-baked Chex Mix:
Step 1: Melt the Butter
Butter is the base of your seasoning, providing a rich, creamy texture that helps the seasoning cling to the dry ingredients. Here’s how to prepare it:
- Measure the Butter:
- For a standard batch, you’ll need 1/2 cup (1 stick) of butter. If you’re making a larger batch, simply scale the amount proportionally.
- Melt the Butter:
- Melt the butter in a microwave-safe bowl or a saucepan over low heat. If you’re using a microwave, heat it in 20-30 second intervals, stirring in between, until fully melted.
- Tip: Be sure to avoid overheating the butter to prevent it from browning or burning, as this can negatively affect the flavor of your Chex Mix.
Step 2: Add Worcestershire Sauce
Worcestershire sauce is the key ingredient that gives Chex Mix its savory umami flavor. It’s rich in complex flavors from its combination of vinegar, molasses, anchovies, and spices, and it enhances the taste of the nuts, cereals, and pretzels. Here’s how to add it:
- Measure the Worcestershire Sauce:
- Add 2 to 3 tablespoons of Worcestershire sauce to the melted butter. The sauce provides depth and a slight tang, which helps balance out the richness of the butter.
- Mix Well:
- Stir the Worcestershire sauce into the melted butter until it’s fully combined. This will create the base of your seasoning mixture.
Step 3: Add Garlic Powder
Garlic powder adds a savory, aromatic kick to your seasoning, making it a key component of Chex Mix. It’s more convenient than fresh garlic since it distributes evenly throughout the mix without introducing excess moisture.
- Measure the Garlic Powder:
- Add 1 to 2 teaspoons of garlic powder, depending on how much garlic flavor you prefer. Start with 1 teaspoon for a milder garlic flavor and increase to 2 teaspoons for a more pronounced taste.
- Mix to Combine:
- Stir the garlic powder into the butter and Worcestershire sauce mixture. The garlic powder will dissolve into the melted butter, creating a flavorful base for your seasoning.
Step 4: Add Onion Powder
Onion powder complements the garlic powder by adding a mild, slightly sweet and savory flavor to the seasoning. It’s less pungent than fresh onion, giving your Chex Mix a smooth, balanced taste.
- Measure the Onion Powder:
- Add 1 teaspoon of onion powder to the mixture. You can increase this slightly if you prefer a stronger onion flavor.
- Stir Well:
- Stir the onion powder into the butter mixture until it’s fully incorporated. This ensures an even distribution of flavor across your Chex Mix.
Step 5: Optional Ingredients for Extra Flavor
At this point, you can customize your seasoning to suit your tastes. Here are some optional additions to take your Chex Mix flavor profile to the next level:
- Seasoned Salt:
- A pinch of seasoned salt (about 1/2 teaspoon) will add extra seasoning and boost the savory flavor of your mix.
- Cayenne Pepper or Paprika:
- Add 1/4 to 1/2 teaspoon of cayenne pepper for a spicy kick, or paprika for a mild smoky flavor. These spices will add depth and complexity, especially if you prefer a spicier mix.
- Sweet Elements:
- If you prefer a sweet-and-savory mix, consider adding 1-2 tablespoons of brown sugar or honey to the melted butter mixture. This will create a caramelized, sweet flavor that contrasts beautifully with the salty seasoning.
Step 6: Stir and Combine
Once all the seasoning ingredients have been added, stir everything together until well-combined. The goal is to make sure the butter is fully emulsified with the Worcestershire sauce, garlic powder, onion powder, and any additional seasonings you’ve chosen. This ensures an even coat on the dry ingredients when you toss them together.
Step 7: Taste and Adjust
Before applying the seasoning to the dry ingredients, it’s always a good idea to taste the mixture. Give it a small taste to check for balance—if it feels too salty, add a little more butter or Worcestershire sauce; if it’s not flavorful enough, add a pinch more garlic or onion powder. Adjust the seasonings to your taste preferences!
Tips for Perfecting the Seasoning
- Don’t Rush the Mixing:
Stir slowly and patiently, making sure that all the seasonings are fully incorporated into the butter. This will help ensure that every bite of your Chex Mix is evenly flavored. - Avoid Overheating the Butter:
Overheating the butter can cause it to separate, affecting the final texture and consistency of the seasoning. Always melt the butter at a low temperature to prevent this. - Balance Salt and Sweetness:
If you’re adding sweet elements like honey or brown sugar, balance them carefully with the salt and Worcestershire sauce. You don’t want the sweetness to overpower the savory components.
By following these steps, you’ll create a rich, flavorful seasoning that will coat your Chex Mix perfectly, giving it that mouthwatering taste everyone loves. Whether you stick to the classic seasonings or experiment with extras, your mix will be delicious and addictively crunchy!
Coating the Mix: Evenly Pour the Seasoning Over the Dry Ingredients and Toss
The coating step is critical to ensuring that every piece of Chex Mix is seasoned evenly, with no bland spots or overpowering flavors in one area. By distributing the seasoning carefully, you create a harmonious snack where every bite is flavorful and crunchy. Here’s how to properly coat the mix for the best results:
Step 1: Prepare Your Mixing Space
Before you begin pouring the seasoning over your dry ingredients, ensure that your workspace is ready for the mixing process.
- Use a Large Bowl or Roasting Pan:
- If you haven’t already, transfer all your dry ingredients (cereal, pretzels, and nuts) into a large, deep mixing bowl or roasting pan. A large bowl gives you enough space to toss the mix without spilling, while a roasting pan makes it easier to bake the Chex Mix directly in it later.
- The key is to have enough space so that the ingredients can move around freely when tossed, ensuring an even coating of the seasoning.
- Ensure the Dry Ingredients Are Well-Mixed:
- Before applying the seasoning, ensure that all of your dry ingredients are well mixed. This helps avoid clumping of certain items, like pretzels or nuts, so that each piece gets coated evenly when the seasoning is added.
Step 2: Drizzle the Seasoning Over the Mix
Now it’s time to add the seasoning! You want to pour it evenly over the dry ingredients so that it can be distributed with minimal effort. Here’s how to do it:
- Pour Slowly and Steadily:
- Using a spoon or small ladle, drizzle the seasoned butter mixture over the dry ingredients slowly and evenly. Don’t pour all of it at once—this ensures that the seasoning is absorbed gradually, allowing for even coverage. Aim for a gentle stream rather than dumping the mixture in one go.
- Cover All Areas:
- Try to cover as much of the surface area of the mix as possible as you drizzle. You may need to rotate the bowl slightly to get all parts covered, especially if you’re using a larger batch.
Step 3: Toss Gently But Thoroughly
Now that the seasoning is on the mix, it’s time to toss everything together. This step requires patience, as it’s crucial to coat each ingredient evenly without breaking up the delicate Chex pieces. Here’s how:
- Use a Spatula or Wooden Spoon:
- To avoid crushing the ingredients, use a spatula, wooden spoon, or even your hands (wearing gloves for cleanliness) to gently mix the seasoning into the dry ingredients.
- Start by folding the ingredients from the outside in and gently turning the mixture to ensure the seasoning is evenly spread. Work from the edges to the center, ensuring that all of the pieces get coated.
- Be Patient:
- This part takes time, so don’t rush it! You may need to toss the mix for a few minutes, scraping the sides of the bowl to get the bits of seasoning that have stuck to the edges.
- It helps to rotate the bowl as you toss, lifting the ingredients from the bottom and turning them over to ensure each piece is coated.
- Toss Until Evenly Coated:
- The goal is to ensure that every ingredient in the mix is evenly coated with the seasoning—this means no dry patches or large puddles of butter. The butter should be absorbed, and each piece of cereal, pretzel, and nut should shine with seasoning. You might notice that the mix will have a slight sheen once it’s properly coated, which indicates that the seasoning has been fully absorbed.
Step 4: Add Extra Seasoning (If Needed)
After tossing, if you feel that some ingredients are still under-seasoned or that some areas have too much seasoning, don’t hesitate to adjust the mixture:
- Taste Test:
- Take a small handful of the mix to taste and ensure the seasoning is balanced. If you feel that certain areas are missing flavor, you can drizzle more seasoning over those sections or sprinkle a bit of extra salt or seasoning mix.
- Sprinkle Seasoning Evenly:
- If needed, sprinkle a bit more of your seasoning (like salt, garlic powder, or even a dash of Worcestershire sauce) over the mix and toss again. Make sure the seasoning is evenly distributed.
Step 5: Ensure Proper Coating Before Baking
Once everything is evenly coated, make sure the mix is spread out in a single layer in your pan or bowl before it goes into the oven. This is important for even baking:
- Single Layer Is Key:
- For an even bake, try to spread your Chex Mix in a single layer on the baking sheet or pan. This ensures that each piece of the mix gets equal exposure to the heat, allowing them to bake at the same rate.
- Consider Halfway Stirring:
- If you’re baking a larger batch, it’s a good idea to stir the mix halfway through baking to ensure that the coating stays even and the mix bakes to a golden, crunchy perfection.
Tips for Perfect Coating
- Don’t Over-Toss:
- While it’s important to mix thoroughly, don’t overdo it. Tossing too aggressively can break the Chex pieces or turn the mix mushy. A gentle toss ensures that the mix stays intact while being fully coated.
- Use a Baking Sheet or Roasting Pan:
- If you’re baking, consider spreading the coated mix evenly on a baking sheet lined with parchment paper or in a roasting pan for easy stirring and even baking. Avoid overfilling the pan to ensure each piece bakes properly.
- Check for Clumps:
- Be mindful of clumps that may form during the mixing process. Large clumps of buttered seasoning can lead to uneven flavor, so it’s important to break them up gently when tossing.
By carefully following these steps to evenly coat your ingredients, you’ll ensure that every piece of your Chex Mix is perfectly seasoned and crispy when it comes out of the oven. Whether you stick to the classic flavor or experiment with extra seasonings, the even coating of your ingredients will make a huge difference in the final product!
Baking Instructions: Bake at 250°F for 1 Hour, Stirring Every 15 Minutes for Even Crisping
Baking your Chex Mix at a low temperature for an extended period is key to achieving that perfect, crunchy texture without burning any of the ingredients. The low and slow approach allows the seasoning to penetrate each piece while ensuring the mix becomes evenly crisp. Here’s a detailed breakdown of the baking process:
Step 1: Preheat Your Oven
Before you even begin assembling your Chex Mix, make sure your oven is at the right temperature. Preheating ensures that your Chex Mix bakes evenly as soon as it goes in.
- Set the Temperature:
- Preheat your oven to 250°F (120°C). This low temperature allows the Chex Mix to bake slowly, ensuring that the coating has time to crisp up without overcooking or burning the ingredients.
- Use an Oven Thermometer:
- If you want to be extra precise, consider using an oven thermometer to make sure the oven is at the correct temperature. Oven thermostats can sometimes be inaccurate, and this extra step ensures the baking temperature is just right for perfect results.
Step 2: Spread the Chex Mix in an Even Layer
Once your seasoning is mixed into the dry ingredients, you need to transfer everything to a baking sheet or roasting pan. The way you arrange the mix on the pan will affect how evenly it bakes, so be mindful of this step.
- Use a Large, Shallow Baking Sheet or Roasting Pan:
- For the best results, spread the Chex Mix evenly in a single layer on a large baking sheet. You can also use a roasting pan if you’re making a large batch. The more space the mix has to spread out, the more evenly it will bake.
- Avoid Overcrowding:
- Don’t overcrowd the pan. If necessary, use two pans or rotate the mix during the baking process. Crowding the ingredients makes it harder for the heat to circulate, which could lead to uneven crisping.
- Tip: If you’re using a baking sheet, line it with parchment paper or a silicone baking mat. This will help prevent the mix from sticking and make cleanup easier.
Step 3: Bake at 250°F for 1 Hour
With the Chex Mix in the oven, it’s time to bake! The slow baking process allows the seasoning to set in, the cereals to crisp up, and the pretzels and nuts to toast to perfection.
- Baking Time:
- Set your timer for 1 hour. The low temperature ensures that the Chex Mix bakes slowly and evenly, so don’t rush the process by turning up the heat. Slow baking also prevents the butter from burning, which can happen at higher temperatures.
- Tip: If you’re making a double batch, it may take a little longer, so keep an eye on it and adjust as needed.
Step 4: Stir Every 15 Minutes for Even Crisping
The key to getting an evenly crisped batch of Chex Mix is to stir it every 15 minutes during baking. This ensures that all parts of the mix are exposed to the heat and seasoning, promoting an even texture and flavor throughout.
- Why Stir Every 15 Minutes?
- The purpose of stirring is to make sure that every piece of cereal, pretzel, and nut gets a chance to bake evenly. Without stirring, certain areas may bake faster than others, causing some parts to burn or become soggy while others stay undercooked.
- How to Stir:
- Use a spatula or a wooden spoon to gently stir the mix. Make sure you flip the ingredients from the bottom up so that the pieces at the bottom aren’t neglected. This ensures the mix is evenly exposed to the heat.
- Be Gentle:
- Be careful not to stir too aggressively, as you want to avoid breaking up the Chex pieces, especially the more delicate ones like Rice Chex. Stir just enough to turn over the ingredients without crushing them.
- Tip: If you find that certain areas are baking faster than others, you can rotate the baking sheet halfway through to promote more even heat distribution.
Step 5: Check for Doneness
At the one-hour mark, it’s time to take the Chex Mix out of the oven. While the mix should be golden brown and crispy at this point, it’s important to check its texture to ensure it’s baked to perfection.
- Visual Check:
- The Chex Mix should be golden brown with a glossy appearance from the butter and seasoning. You may also see some of the nuts and pretzels become a darker golden hue, indicating that they’re perfectly toasted.
- Texture Check:
- Take a piece of the Chex Mix from the pan and let it cool for a minute. Then, bite into it to check if it’s crisp. If it’s still a bit soft or chewy, return the mix to the oven for an additional 10-15 minutes, stirring halfway through.
- Tip: Even after removing from the oven, the Chex Mix will continue to crisp up as it cools, so don’t worry if it’s slightly softer immediately out of the oven.
Step 6: Cool and Serve
Once your Chex Mix is baked to perfection, it’s time to let it cool and enjoy!
- Let It Cool Completely:
- Transfer the Chex Mix to a large tray or countertop to cool completely. This helps the seasoning set and the mix become even crisper.
- Break Up Clumps (If Necessary):
- If you notice any clumps forming during baking, gently break them apart as the mix cools. This ensures that every bite stays crunchy and easy to grab.
Tips for Baking Success
- Avoid Raising the Oven Temperature:
- Resist the temptation to increase the oven temperature to speed up the process. High heat can cause the butter to burn and the mix to overcook in some areas, leading to uneven crisping and possible bitterness.
- Check for Burning at the Edges:
- If you notice the edges of the Chex Mix starting to darken more quickly than the center, reduce the oven temperature by 10-20°F and stir more frequently to avoid burning.
- Store Properly:
- Once your Chex Mix has cooled, store it in an airtight container to maintain its freshness and crunch. If you’ve baked it in large batches, consider portioning it into smaller containers to keep it fresh for longer.
By following these baking instructions, you’ll ensure your Chex Mix turns out with a perfect crunchy texture and evenly distributed seasoning. The low and slow bake method ensures that every ingredient gets a chance to crisp up and absorb the flavor, giving you a snack that’s perfectly toasted and irresistible.
5) Pro Tips for the Crunchiest Chex Mix
Spread Evenly on a Baking Sheet: Avoid Overcrowding to Ensure Even Baking
The way you arrange the Chex Mix on the baking sheet can greatly affect how evenly it bakes. Spreading it out properly ensures that all the pieces have room to crisp up and toast to perfection.
- Use a Large Baking Sheet or Roasting Pan:
- For optimal results, use a large baking sheet or a roasting pan. A roasting pan can be especially useful for larger batches because it provides more surface area and depth for tossing the ingredients.
- If you don’t have a large sheet or pan, consider baking the mix in two batches to avoid overcrowding.
- Avoid Overcrowding the Pan:
- When you overcrowd the pan, the ingredients will clump together and not receive even exposure to the heat, leading to uneven crisping. Spread the mix in a single layer as much as possible. If necessary, use a second pan to give each piece space.
- Tip: If your pan is too full, you can rotate the mix during the baking process or use a second pan to ensure even heat distribution.
Stir Frequently: Prevents Burning and Ensures All Pieces Are Coated Evenly
Stirring the Chex Mix during the baking process is essential for evenly crisping every ingredient and preventing parts of the mix from burning. This step helps keep the texture consistent and ensures every piece is coated with seasoning.
- Stir Every 15 Minutes:
- Set a timer to remind yourself to stir the Chex Mix every 15 minutes. This allows the mix to bake evenly on all sides without parts becoming too browned or burnt.
- When stirring, use a spatula or wooden spoon to gently toss the mix, ensuring that all ingredients—Chex, nuts, pretzels—are evenly exposed to the heat.
- Be Gentle When Stirring:
- It’s crucial to stir the mix gently to avoid breaking the more fragile Chex pieces. You want to rotate the mix carefully so that everything gets a chance to crisp up without any of the pieces falling apart.
- Keep an Eye on the Edges:
- The edges of the baking sheet may heat up faster than the center, so be sure to stir the mix thoroughly each time. This will prevent the pieces on the edges from getting overdone while the middle remains undercooked.
Let It Cool Completely: The Mix Becomes Crunchier as It Cools
Cooling your Chex Mix properly is just as important as baking it. Allowing the mix to cool thoroughly ensures that it reaches its final, crispy texture, which is the hallmark of a perfect Chex Mix.
- Why Cooling Is Important:
- As the Chex Mix cools, the butter and seasoning set and harden, locking in that satisfying crunch. If you try to eat it right out of the oven, it might feel a bit soft or greasy, but once cooled, it will be crispy and perfect.
- Cool in a Single Layer:
- Spread the Chex Mix out onto a large tray or surface as it cools. This allows air to circulate around the mix and helps it crisp up evenly. Avoid piling the mix on top of itself, as this could make it less crunchy.
- Tip: If you’re in a hurry, spread the Chex Mix out in a thin layer over a clean kitchen towel or parchment paper to cool faster. Be patient, as rushing this step can lead to a less crispy final result.
Storage Tips: Store in an Airtight Container to Maintain Freshness
Proper storage is key to keeping your Chex Mix crunchy and fresh for days after baking. The right container and storage method can extend its shelf life and prevent it from getting stale.
- Use an Airtight Container:
- Once your Chex Mix is fully cooled, store it in an airtight container to keep moisture out. Moisture is the enemy of crunchiness, so a well-sealed container is essential for maintaining that crispy texture.
- If you don’t have an airtight container, you can use a resealable plastic bag, but make sure to squeeze out any excess air before sealing.
- Glass or Plastic Containers Work Best:
- You can store your Chex Mix in glass jars, plastic containers, or even vacuum-sealed bags. Just make sure that whatever container you use has a secure lid that will keep air out.
- Store at Room Temperature:
- Keep your Chex Mix at room temperature in a cool, dry place like a pantry or kitchen cupboard. Avoid storing it in humid or hot environments, as this can affect the texture and flavor.
- Tip: For extra freshness, you can store Chex Mix in smaller batches so that each serving stays crispy when opened.
Additional Storage Tips:
- Consider Freezing for Longer Storage:
- If you’ve made a big batch and want to store it for longer than a few weeks, consider freezing it. You can place Chex Mix in an airtight container or resealable bag and freeze it for up to 2-3 months. When ready to eat, simply let it thaw at room temperature for a few hours.
- Freezing Tips: Make sure the mix is completely cooled before storing it in the freezer, and try to remove as much air as possible from the container to prevent freezer burn.
- Avoid Refrigeration:
- Avoid storing your Chex Mix in the fridge, as it can introduce excess moisture, which will make the mix soggy and lose its crispiness. Stick to room temperature for the best results.
By following these tips, you’ll be able to enjoy your Chex Mix at its finest. Proper spreading, stirring, cooling, and storage will ensure that every batch stays crispy, flavorful, and fresh for as long as possible. Enjoy it during parties, gatherings, or as a snack anytime!

6) Creative Variations and Serving Ideas
Creative Variations and Serving Ideas
Chex Mix is incredibly versatile, allowing you to easily customize the recipe to suit different tastes and occasions. Whether you’re looking to add a sweet twist, pack in more savory flavors, or make it festive for a special event, these creative variations will make your Chex Mix stand out.
Sweet and Spicy Chex Mix: Add Honey, Cinnamon, or a Pinch of Cayenne
For those who enjoy a little extra kick in their snacks, a sweet and spicy Chex Mix variation is a must-try. By adding a mix of sweet and spicy ingredients, you can create a bold, flavorful snack that’s perfect for those who love a bit of heat with their sweetness.
- Sweet Elements:
- Honey: Add a drizzle of honey to the seasoning mixture for a touch of natural sweetness that complements the savory flavors. The honey will also help the seasoning stick better to the Chex pieces, creating a caramelized coating.
- Cinnamon: For a warm, comforting flavor, sprinkle in some ground cinnamon. Cinnamon pairs beautifully with the sweetness of honey, adding a cozy, holiday-like feel to your Chex Mix.
- Spicy Kick:
- Cayenne Pepper: If you enjoy heat, cayenne pepper adds just the right amount of spice without overpowering the mix. Start with a pinch and adjust to taste, depending on how much heat you prefer.
- Chili Powder or Paprika: For an extra layer of flavor, chili powder or paprika can give the mix a smoky, zesty twist that perfectly balances the sweetness.
- Serving Idea:
- This sweet and spicy version is ideal for game nights or movie marathons, where guests can snack on something with a bit of everything. The mix of sweet and spicy will keep everyone reaching for more.
Cheese-Lover’s Mix: Sprinkle Grated Parmesan or Cheddar Powder Before Baking
Cheese lovers will absolutely adore this variation of Chex Mix, which is packed with rich, cheesy flavors. By incorporating cheese into the mix, you can transform your classic recipe into an irresistible savory treat.
- Cheddar Powder: One of the easiest ways to give your Chex Mix a cheesy twist is by sprinkling cheddar powder over the mix. It adds a strong, tangy flavor that perfectly complements the crunch of the Chex cereals and other mix-ins.
- Grated Parmesan: For a more sophisticated cheesy flavor, add grated Parmesan cheese to your seasoning mixture. Parmesan brings a nutty, salty richness that elevates the overall taste of the mix.
- Sharp Cheddar or Mozzarella Shreds: If you want an extra cheesy bite, try adding some shredded sharp cheddar or mozzarella cheese directly to the mix before baking. Be sure to stir the mix thoroughly to distribute the cheese evenly, ensuring every bite is cheesy and delicious.
- Serving Idea:
- A Cheese-Lover’s Chex Mix is perfect for cheese-themed parties or as a game day snack. Serve it alongside other cheesy appetizers like cheese platters or baked cheese dips to satisfy every cheese craving.
Holiday-Themed Mix: Include Festive Candy (e.g., M&Ms or Colored Sprinkles)
Chex Mix can easily be turned into a holiday-themed snack by incorporating festive ingredients, making it perfect for holiday gatherings, gift-giving, or themed parties. The combination of sweet, salty, and crunchy elements will delight your guests and add a colorful touch to any celebration.
- Festive Candies:
- Add holiday-themed M&Ms, candied pretzels, or even peppermint bark pieces for a sweet addition to your Chex Mix. The vibrant colors of the M&Ms and candy-coated pretzels can add a fun and festive flair to the mix.
- For a Christmas version, you could use red and green M&Ms or sprinkle in some candy canes broken into small pieces. For a Halloween theme, try adding candy corn or other spooky treats.
- Colored Sprinkles or Sugar:
- Colored sprinkles or a sprinkle of edible glitter can give the mix a magical touch, perfect for holidays like Christmas, Easter, or birthdays. You can even make it holiday-specific by choosing colors that match the occasion.
- Tip: Be sure to add the candy or sprinkles after baking, once the mix has completely cooled, to avoid melting or softening during the baking process.
- Serving Idea:
- Holiday-themed Chex Mix is perfect for giving as gifts in mason jars or party favors. You can also serve it in festive bowls or containers during holiday parties and gatherings. It also makes a great addition to your holiday snack table.
Serving Suggestions: Use as a Party Favor, Snack Bar Item, or Game Night Treat
Chex Mix is an incredibly versatile snack that can be served in numerous ways, depending on the occasion. Here are some fun and creative ways to present your homemade Chex Mix:
- Party Favors:
- For an extra special touch, package your Chex Mix in decorative bags or mason jars to give as party favors. Add a little bow or label to personalize the gift, and your guests will leave with a tasty, thoughtful treat.
- Snack Bar Item:
- Set up a Chex Mix snack bar at your next gathering by offering different mix-ins, seasonings, and add-ins. Guests can customize their own Chex Mix, creating unique blends to enjoy during the event. This works particularly well at buffets, birthday parties, or family get-togethers.
- Game Night Treat:
- Chex Mix is the ultimate game night snack—easy to eat, no utensils required, and delicious! Serve it in individual snack bags or large bowls for everyone to grab while playing games. You can even make the mix a game night tradition by creating custom flavor variations for each event.
- Movie Night Snack:
- For a cozy movie night, prepare a big bowl of Chex Mix and serve it alongside other treats like popcorn, chocolate, and candy. The salty-sweet combination of Chex Mix makes it the perfect movie marathon companion.
Bonus Tip: Make It a DIY Experience!
If you’re hosting a gathering or party, consider turning Chex Mix into a DIY station where guests can customize their own mix with various add-ins, seasonings, and flavors. Offer different cereals, snacks, seasonings, and toppings, allowing everyone to create their perfect Chex Mix blend.
These creative variations and serving ideas will make your Chex Mix the star of any gathering, whether you’re preparing it for a special holiday, a themed party, or just as a snack for casual entertaining. Customize your mix to suit your guests’ tastes, and watch as they eagerly reach for seconds!
Conclusion
Conclusion
Oven-baked Chex Mix truly is the ultimate snack for any occasion. Not only does it offer that perfect balance of crunch and flavor, but it’s also incredibly versatile, allowing you to customize it to your taste and the theme of any gathering. The even baking ensures a crispy texture that you simply can’t achieve with stovetop or microwave methods, making it the perfect snack for parties, game nights, holidays, or just a cozy movie night.
With endless possibilities for ingredients and seasoning variations, you can make your Chex Mix as sweet, spicy, cheesy, or festive as you want. Whether you’re sticking with the classic recipe or trying out creative twists like sweet and spicy flavors or a holiday-themed mix, your guests are sure to be impressed. The best part? It’s easy to make, and everyone will appreciate the homemade touch.
So, what are you waiting for? Give this Chex Mix Recipe Oven Edition a try, and don’t be afraid to experiment with your own unique variations. Whether you want to make it extra cheesy, add a spicy kick, or create a seasonal treat, the possibilities are endless!
We’d love to see your Chex Mix creations! Share your variations in the comments below or tag us on social media to show us how you’ve made this delicious snack your own. Happy baking!